Ryobi JM82K English Manual - Page 14
Making Edge-to-edge Joints
 |
View all Ryobi JM82K manuals
Add to My Manuals
Save this manual to your list of manuals |
Page 14 highlights
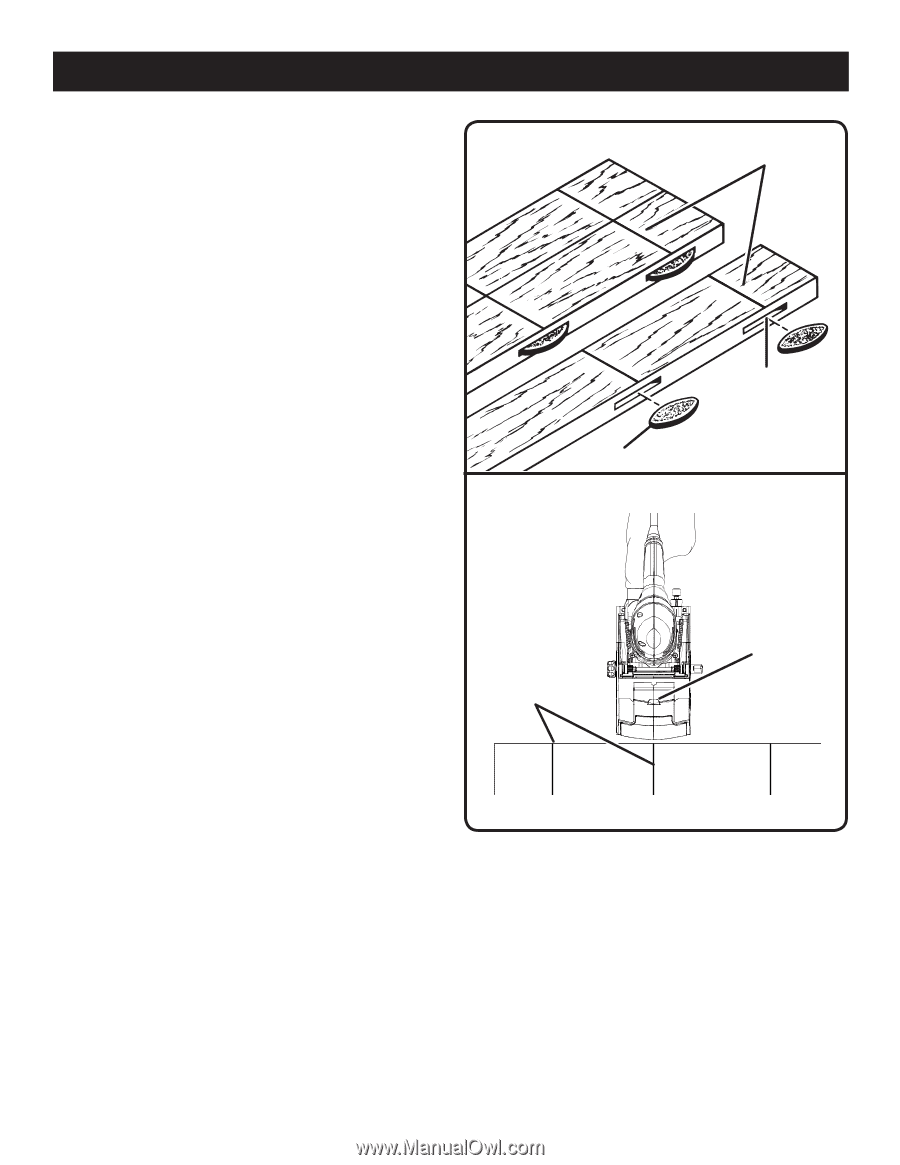
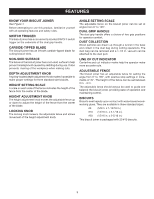
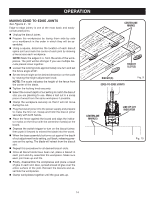
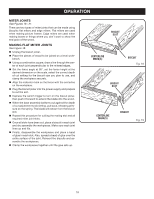
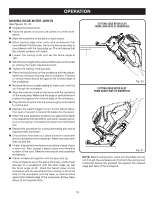
OPERATION MAKING EDGE-TO-EDGE JOINTS See Figures 9 - 10. Edge-to-edge joinery is one of the most basic and easilyconstructed joints. n Unplug the biscuit joiner. n Prepare the workpieces by laying them side by side on a workbench in the order in which they will be assembled. n Using a square, determine the location of each biscuit spline joint and mark the center of each joint by drawing a line across each workpiece. NOTE: Mark the edges 2 in. from the ends of the workpieces. The joint will be stronger if you use multiple biscuits placed close together. n Loosen the locking knob approximately one turn and set the fence angle at 90°. n Set the fence height at the desired dimension on the scale by rotating the height adjustment knob. NOTE: The scale indicates the height of the fence from the center of the blade. n Tighten the locking knob securely. n Select the correct depth of cut setting to match the biscuit size you are planning to use. Make a test cut in a scrap piece of wood from the same workpiece if possible. n Clamp the workpiece securely so that it will not move during the cut. n Plug the biscuit joiner into the power supply and prepare to make the first cut. Grasp and hold the biscuit joiner securely with both hands. n Place the fence against the board and align the indicator marks on the fence with the centerline mark(s) on the board. n Depress the switch trigger to turn on the biscuit joiner, then push it forward to extend the blade into the wood. n When the base assembly bottoms out against the depth of cut adjustment knob setting, pull back, releasing pressure on the spring. The blade will retract from the biscuit slot. n Repeat this procedure for all desired biscuit slots. n Once all biscuit slots have been cut, place a biscuit in each joint and dry-assemble the workpiece. Make sure each joint lines up and fits. n Finally, disassemble the workpieces and place a bead of glue in each slot. Also, spread a bead of glue over the entire surface of the joint. Reinsert the biscuits and assemble the workpieces. n Clamp workpieces together until the glue sets up. CENTERLINE MARKS BISCUIT SLOT(S) BISCUIT(S) EDGE-TO-EDGE JOINTS Fig. 9 CENTERLINE MARK(S) LINE OF CUT INDICATOR Fig. 10 14
-
 1
1 -
2
-
3
-
4
-
5
-
6
-
7
-
8
-
 9
9 -
 10
10 -
 11
11 -
 12
12 -
 13
13 -
 14
14 -
 15
15 -
 16
16 -
 17
17 -
 18
18 -
 19
19 -
20
-
21
-
22
-
23
-
24
-
25
-
26
 |
 |