Ryobi P3260 Operation Manual - Page 9
Maintenance
 |
View all Ryobi P3260 manuals
Add to My Manuals
Save this manual to your list of manuals |
Page 9 highlights
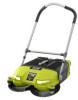
MAINTENANCE WARNING: Before performing any maintenance, make sure the sweeper battery is removed to avoid accidental starting and possible serious personal injury. WARNING: When servicing, use only authorized replacement parts. Use of any other parts can create a hazard or cause product damage. GENERAL MAINTENANCE Avoid using solvents when cleaning plastic parts. Most plastics are susceptible to damage from various types of commercial solvents and can be damaged by their use. Use clean cloths to remove dirt, dust, oil, grease, etc. WARNING: Do not at any time let brake fluids, gasoline, petroleumbased products, penetrating oils, etc., come in contact with plastic parts. Chemicals can damage, weaken or destroy plastic which could result in serious personal injury. Remove any build-up of dirt and debris on the top, sides, and bottom of the tool housing. Wipe the sweeper clean with a dry cloth occasionally. Do not use water. STORING THE CORDLESS SWEEPER See Figures 12 - 14, pages 12 - 13. Turn the motor OFF and remove the battery pack. Push the bristle deflectors all the way down. Push and hold the push-pin button on the handle assembly. Retract the handle assembly until the buttons snap into the holes closest to the handle grips. Tilt the handle assembly completely forward until it is past the front detent and resting on the bristle deflectors. Place the unit in an upright position with the handle facing up. REPLACING THE BRUSHES See Figures 15 - 17, page 13. Over time, the brushes can become worn and need replacement. For even cleaning, it is recommended that the left and right brushes be replaced at the same time. To replace the brushes: Turn the motor OFF and remove the battery pack. Put the unit in the storage position. Remove the screws securing the bracket and remove the bracket. Pull the caster assembly and support away from the sweeper. Remove the worn brush from the shaft. Place a new brush and support on the shaft. NOTE: The left and right brushes are not interchangeable. When installed, the bristles at the top of each brush should point up and away from the center of the tool as shown in figure 17. Replace the caster assembly. Replace the bracket and secure with screws. NOTE: ILLUSTRATIONS START ON PAGE 11 AFTER FRENCH AND SPANISH LANGUAGE SECTIONS. 9 - English
-
 1
1 -
2
-
3
-
 4
4 -
 5
5 -
 6
6 -
 7
7 -
 8
8 -
 9
9 -
 10
10 -
 11
11 -
 12
12 -
 13
13 -
 14
14 -
15
-
16
-
17
-
18
-
19
-
20
-
21
-
22
-
23
-
24
-
25
-
26
-
27
-
28
-
29
-
30
-
31
-
32
 |
 |
