Ryobi P524 Operation Manual - Page 8
Orbital Motion, Straight Cutting, Scroll Cutting, Warning, Plunge Cutting
 |
View all Ryobi P524 manuals
Add to My Manuals
Save this manual to your list of manuals |
Page 8 highlights
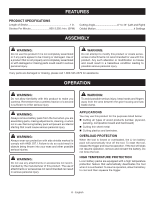
OPERATION Orbital Setting 0 1 2 3 Material Type Counter Top, Laminate Board Thin Sheet Metal Plastics and PVC Scrolling or Curving Cuts in Wood Plywood, Decking and Hardwood General Lumber and Soft Wood Suggested Blade Type Wood Cutting Blade Metal Cutting Blade Wood Cutting Blade Scrolling Wood Blade Wood Cutting Blade Wood Cutting Blade TPI (Teeth per inch) 10-12 (Down Stroke Blade) Speed Setting Max Speed Orbital Action No Orbit 14-24 Slow - Medium Speed No Orbit 10-12 Medium Speed Minimal Orbit 10-12 Max Speed Minimal Orbit 6-12 6-10 Medium - Max Speed Medium Orbit Medium - Max Speed Maximum Orbit ORBITAL MOTION See Figure 6, page 12. The blade of the saw cuts in an orbital motion. This feature is adjustable and provides faster, more efficient cutting. With orbital motion the blade cuts through the work on the upstroke but does not drag across the work on the downstroke. To adjust the orbital motion, rotate the orbital adjustment knob to the desired setting. Refer to the chart to find the right setting for your application. NOTE: Setting the orbital position to a lower setting will result in a smoother finish but slower cut. A higher setting will result in a rougher finish but faster cut. STRAIGHT CUTTING See Figure 7, page 12. A straight cut can be made by clamping a piece of wood or straightedge to the workpiece and guiding the edge of the saw base against it. Make the cut from one direction only. Don't cut halfway and complete the cut from the opposite end. SCROLL CUTTING See Figure 8, page 13. Scroll cuts can be made with the jig saw by guiding the direction of the cut with applied pressure on the handle. NOTE: Tighter tolerance scroll cutting may require the use of a scroll cutting blade (not included). WARNING: Excessive side pressure to the blade could result in broken blades or damage to the material being cut. PLUNGE CUTTING See Figure 9, page 13. Depending on the thickness of the material being cut, you may need to drill a pilot hole before making plunge cuts. WARNING: To avoid loss of control, broken blades, or damage to the material being cut, always use extreme caution when making plunge cuts. We do not recommend plunge cutting on materials other than wood. To make plunge cuts using pilot holes: Mark the line of cut clearly on the workpiece. Drill a pilot hole inside the area marked by the line of cut. The pilot hole should be large enough to slide the blade through the material. Slowly lower the blade through the pilot hole in the workpiece until the base contacts the workpiece. Fully squeeze the switch trigger to start the saw. Do not move the base forward until the blade is entirely through the workpiece and the base is in complete contact with the workpiece. Move the saw forward to complete the opening. To make plunge cuts without using pilot holes: Mark the line of cut clearly on the workpiece. Tilt the jig saw forward so that it rests on the front edge of the base and blade will not come in contact with the workpiece when the tool is turned on. Make sure the blade is aligned with the area to be cut. 8 - English
-
 1
1 -
2
-
 3
3 -
 4
4 -
 5
5 -
 6
6 -
 7
7 -
 8
8 -
 9
9 -
 10
10 -
 11
11 -
 12
12 -
 13
13 -
14
-
15
-
16
-
17
-
18
-
19
-
20
-
21
-
22
-
23
-
24
-
25
-
26
-
27
-
28
-
29
-
30
-
31
-
32
 |
 |
