Ryobi PSP02K Operation Manual - Page 11
Note: Illustrations Start On After, French And Spanish Language S.
 |
View all Ryobi PSP02K manuals
Add to My Manuals
Save this manual to your list of manuals |
Page 11 highlights
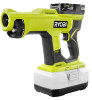
MAINTENANCE CLEANING THE SPRAYER: Fill the tank about one-third full with clean water. NOTE: Never use flammable chemicals or abrasive cleaning agents to clean the tank. Review chemical SDS sheet how best to secure and store your chemical solution when not in use. Replace the tank cap and tighten securely. Reinstall the battery pack. Spray until the tank has been emptied. Make sure to direct the spray toward an area that will not be damaged by the spray solution. Refill and repeat the procedure with clean water. It may be necessary to rinse the tank more than once, then drain again as directed above. Allow all pieces to completely dry, then reinstall the tank cap. Wipe the outside of the sprayer with a clean, dry cloth. NOZZLE MAINTENANCE See Figures 11 - 12, page 14. Irregular mist patterns or leakage may be the result of a clogged or dirty nozzle. To clean nozzles: Remove the battery pack. Rotate mode selector so that the nozzle is in the 6:00 position. Unscrew and remove the nozzle and o-ring from nozzle holder. NOTE: Never point the sprayer at your face. Using a fine needle, free any foreign materials clogging or restricting the nozzle. Using a garden hose, flush debris out of nozzle by back flushing (running the water through the nozzle backwards or from the outside to the inside). NOTE: If blockage persists, use a screwdriver to remove the screw and cone from the nozzle. Soak the nozzle, cone and the screw in warm, soapy water then blow out the nozzle with pressurized air to remove blockage. After the nozzle is clean, reinstall the cone and screw. When reinstalling, ensure the cone is seated at the bottom of the nozzle before screw is installed. NOTE: It may be necessary to soak the nozzle in vinegar overnight. Do not soak the o-ring seal. Reinstall the nozzle and o-ring. NOTE: Make sure the nozzle is securely in place before using. When not properly cleaned, the sprayer nozzle may develop residual chemical build up. This could result in decreased pressure and spray patterns. To reduce the chance of blockage, spray a tank of water through the unit after each use to rinse out any residual chemical build up that may have occurred. NOZZLE REPLACEMENT Use replacement 50 micron nozzles (p/n 316869001), 75 micron nozzles (p/n 316971001) and 100 micron nozzles (316972001) when replacing worn nozzles. Unscrew and remove the old nozzle and o-ring from nozzle holder. Turning clockwise, install new and o-ring into the nozzle holder. NOTE: Each new nozzle includes an o-ring. If an o-ring has been removed, replace it before installing the new nozzle. STORING THE SPRAYER Remove the battery pack from the sprayer before storing. Empty all fluid from the tank as described previously in Cleaning the Unit. Store indoors in a place that is inaccessible to children. Keep away from corrosive agents such as garden chemi- cals and de-icing salts. Store in an upright position. NOTE: ILLUSTRATIONS START ON PAGE 13 AFTER FRENCH AND SPANISH LANGUAGE SECTIONS. 11 - English
-
 1
1 -
2
-
3
-
4
-
5
-
 6
6 -
 7
7 -
 8
8 -
 9
9 -
 10
10 -
 11
11 -
 12
12 -
 13
13 -
 14
14 -
 15
15 -
 16
16 -
17
-
18
-
19
-
20
-
21
-
22
-
23
-
24
-
25
-
26
-
27
-
28
-
29
-
30
-
31
-
32
-
33
-
34
-
35
-
36
 |
 |
