Ryobi TC401 Operation Manual - Page 10
Assembly, Operation
 |
View all Ryobi TC401 manuals
Add to My Manuals
Save this manual to your list of manuals |
Page 10 highlights
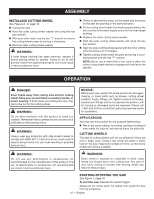
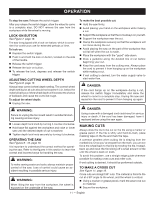
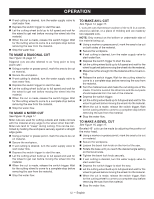
ASSEMBLY INSTALLING CUTTING WHEEL See Figures 5 - 6, page 16. n Unplug the saw. n Hold the outer cutting wheel washer still using the hex box wrench. n With your other hand, use the hex "T" wrench to remove the cutting wheel screw by turning it clockwise. n Remove outer cutting wheel washer. WARNING: If inner flange bushing has been removed, replace it before placing wheel on spindle. Failure to do so will prevent wheel from tightening properly and could result in serious personal injury. n Check to see that the arrow on the wheel and the arrow on the saw are pointing in the same direction. n Fit the cutting wheel inside the wheel guard between the two nozzles of the water supply and onto the inner flange bushing. n Replace the outer cutting wheel washer. n Hold the outer cutting wheel washer still using the hex box wrench. n Align the outer cutting wheel washer with the inner cutting wheel bushing until it engages. n Tighten cutting wheel screw securely by turning it counterclockwise with the hex "T" wrench. NOTE: Never use a wheel that is too thick to allow the outer cutting wheel washer to engage with the flat on the spindle. OPERATION DANGER: Keep hands away from cutting area and the cutting wheel. Keep your second hand on auxiliary handle, or motor housing. If both hands are holding the saw, they cannot be cut by the cutting wheel. WARNING: Do not allow familiarity with this product to make you careless. Remember that a careless fraction of a second is sufficient to inflict serious injury. WARNING: Always wear eye protection with side shield marked to comply with ANSI Z87.1. Failure to do so could result in objects being thrown into your eyes resulting in possible serious injury. NOTICE: Before each use, inspect the entire product for damaged, missing, or loose parts such as screws, cutting wheel washers, hoses, fittings, etc. Tighten securely all screws, washers and fittings and do not operate this product until all missing or damaged parts are replaced. Please call 1-800-525-2579 or contact an authorized service center for assistance. APPLICATIONS You may use this product for the purpose listed below: Wet or dry cross cutting, rip cutting, and bevel cutting of man-made tile, pavers, and natural stone tile products CUTTING WHEELS The best of cutting wheels will not cut efficiently if they are dull or badly worn. Using a dull wheel will place a heavy load on the saw. Keep extra wheels on hand, so that sharp wheels are always available. WARNING: Do not use any attachments or accessories not recommended by the manufacturer of this product. The use of attachments or accessories not recommended can result in serious personal injury. WARNING: Since wheel is exposed on underside of work, keep hands and fingers away from cutting area. Any part of your body coming in contact with moving wheel may result in serious injury. STARTING/STOPPING THE SAW See Figure 7, page 16. To start the saw: Depress the switch trigger. Always let the wheel reach full speed, then guide the saw into the workpiece. 10 - English
-
 1
1 -
2
-
3
-
4
-
 5
5 -
 6
6 -
 7
7 -
 8
8 -
 9
9 -
 10
10 -
 11
11 -
 12
12 -
 13
13 -
 14
14 -
 15
15 -
16
-
17
-
18
-
19
-
20
-
21
-
22
-
23
-
24
-
25
-
26
-
27
-
28
-
29
-
30
-
31
-
32
-
33
-
34
-
35
-
36
-
37
-
38
-
39
-
40
-
41
-
42
-
43
-
44
 |
 |