Ryobi TS1343L Operation Manual - Page 28
Danger, Warning, To Adjust The Laser Guide
 |
View all Ryobi TS1343L manuals
Add to My Manuals
Save this manual to your list of manuals |
Page 28 highlights
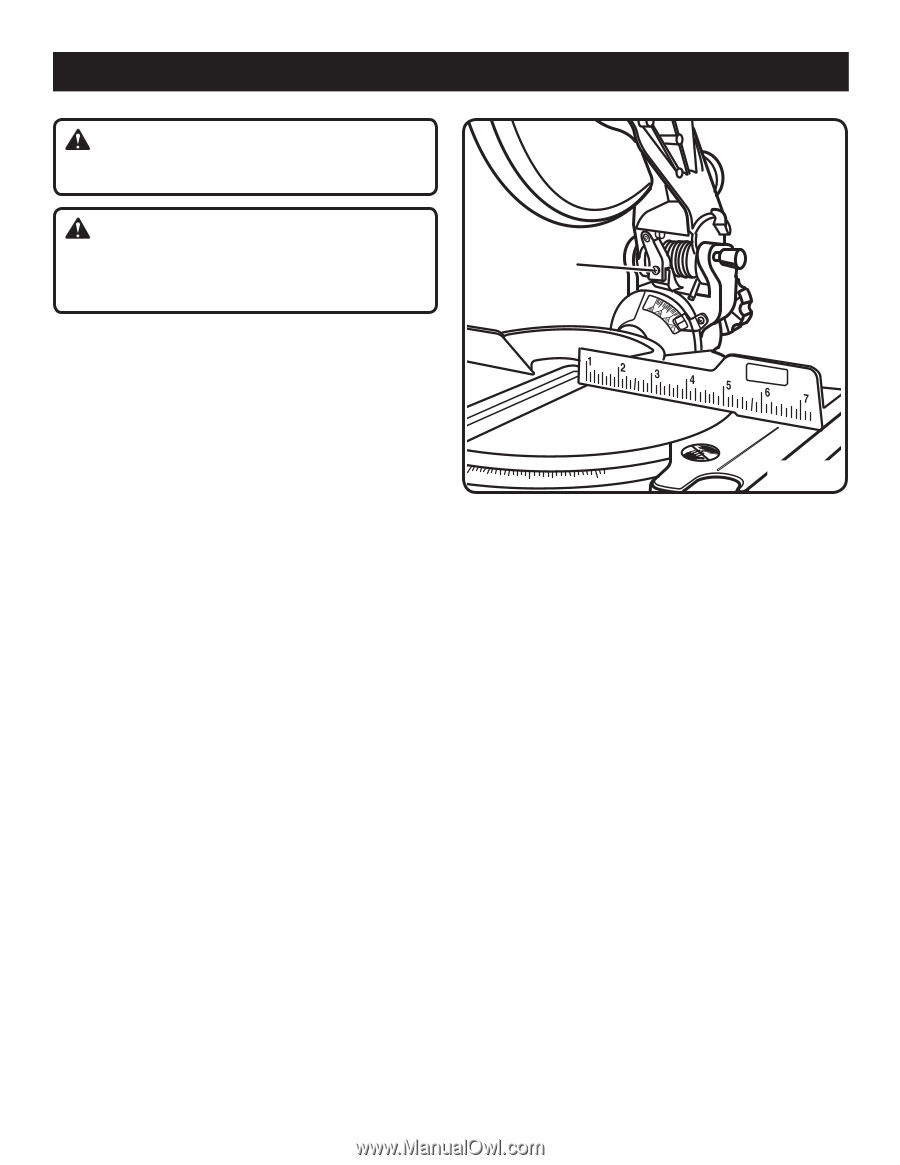
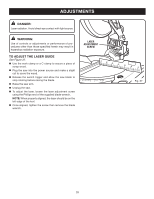
ADJUSTMENTS DANGER: Laser radiation. Avoid direct eye contact with light source. WARNING: Use of controls or adjustments or performance of procedures other than those specified herein may result in hazardous radiation exposure. TO ADJUST THE LASER GUIDE See Figure 37. Use the work clamp or a C-clamp to secure a piece of scrap wood. Plug the saw into the power source and make a slight cut to score the wood. Release the switch trigger and allow the saw blade to stop rotating before raising the blade. Raise the saw arm. Unplug the saw. To adjust the laser, loosen the laser adjustment screw using the Phillips end of the supplied blade wrench. NOTE: When properly aligned, the laser should be on the left edge of the kerf. Once aligned, tighten the screw then remove the blade wrench. LASER ADJUSTMENT SCREW Fig. 37 28
-
 1
1 -
2
-
3
-
4
-
5
-
6
-
7
-
8
-
9
-
10
-
11
-
12
-
13
-
14
-
15
-
16
-
17
-
18
-
19
-
20
-
21
-
22
-
 23
23 -
 24
24 -
 25
25 -
 26
26 -
 27
27 -
 28
28 -
 29
29 -
 30
30
 |
 |