Samsung 400MX Quick Start Guide - Page 5
D.MENU button, PIP button, Power button, Brightness Sensor, Power indicator, Remote Control Sensor - manual
 |
UPC - 729507804552
View all Samsung 400MX manuals
Add to My Manuals
Save this manual to your list of manuals |
Page 5 highlights
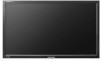
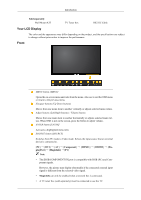
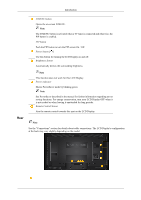
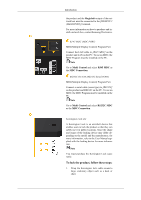
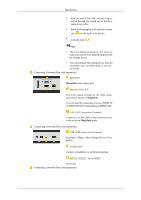
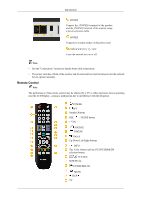
Introduction D.MENU button Opens the on-screen D.MENU. Note The D.MENU button is activated when a TV tuner is connected and otherwise, the PIP button is enabled. PIP button Push the PIP button to turn the PIP screen On / Off. Power button [ ] Use this button for turning the LCD Display on and off. Brightness Sensor Automatically detects the surrounding brightness. Rear Note This function does not work for this LCD Display. Power indicator Shows PowerSaver mode by blinking green Note See PowerSaver described in the manual for further information regarding power saving functions. For energy conservation, turn your LCD Display OFF when it is not needed or when leaving it unattended for long periods. Remote Control Sensor Aim the remote control towards this spot on the LCD Display. Note See the "Connections" section for details about cable connections. The LCD Display's configuration at the back may vary slightly depending on the model.
-
 1
1 -
 2
2 -
 3
3 -
 4
4 -
 5
5 -
 6
6 -
 7
7 -
 8
8 -
 9
9 -
 10
10 -
 11
11 -
12
-
13
-
14
-
15
-
16
-
17
-
18
-
19
-
20
-
21
-
22
-
23
-
24
-
25
-
26
-
27
 |
 |
