Samsung 460DX User Manual - Page 53
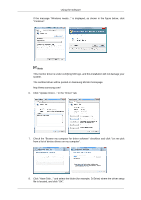
Click Start, Click the Properties button on the Monitor tab and select Driver tab.
 |
UPC - 729507802534
View all Samsung 460DX manuals
Add to My Manuals
Save this manual to your list of manuals |
Page 53 highlights
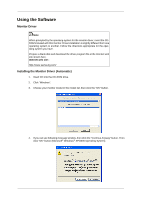
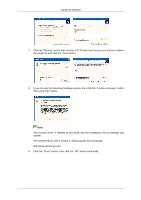
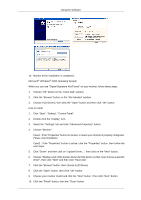
Using the Software 1. Insert CD into the CD-ROM drive. 2. Click "Start" → "Control Panel", then click the "Appearance and Themes" icon. 3. Click "Display" icon and choose the "Settings" tab then click "Advanced...". 4. Click the "Properties" button on the "Monitor" tab and select "Driver" tab. 5. Click "Update Driver..." and select "Install from a list or..." then click "Next" button. 6. Select "Don't search, I will...", then click "Next" and then click "Have disk".
-
 1
1 -
2
-
3
-
4
-
5
-
6
-
7
-
8
-
9
-
10
-
11
-
12
-
13
-
14
-
15
-
16
-
17
-
18
-
19
-
20
-
21
-
22
-
23
-
24
-
25
-
26
-
27
-
28
-
29
-
30
-
31
-
32
-
33
-
34
-
35
-
36
-
37
-
38
-
39
-
40
-
41
-
42
-
43
-
44
-
45
-
46
-
47
-
 48
48 -
 49
49 -
 50
50 -
 51
51 -
 52
52 -
 53
53 -
 54
54 -
 55
55 -
 56
56 -
 57
57 -
 58
58 -
59
-
60
-
61
-
62
-
63
-
64
-
65
-
66
-
67
-
68
-
69
-
70
-
71
-
72
-
73
-
74
-
75
-
76
-
77
-
78
-
79
-
80
-
81
-
82
-
83
-
84
-
85
-
86
-
87
-
88
-
89
-
90
-
91
-
92
-
93
-
94
-
95
-
96
-
97
-
98
-
99
-
100
-
101
-
102
-
103
-
104
-
105
-
106
-
107
-
108
-
109
-
110
-
111
-
112
-
113
-
114
-
115
-
116
-
117
-
118
-
119
-
120
-
121
-
122
-
123
-
124
-
125
-
126
-
127
-
128
-
129
-
130
-
131
-
132
-
133
-
134
-
135
-
136
-
137
-
138
-
139
-
140
-
141
-
142
-
143
-
144
-
145
-
146
-
147
-
148
-
149
-
150
-
151
 |
 |
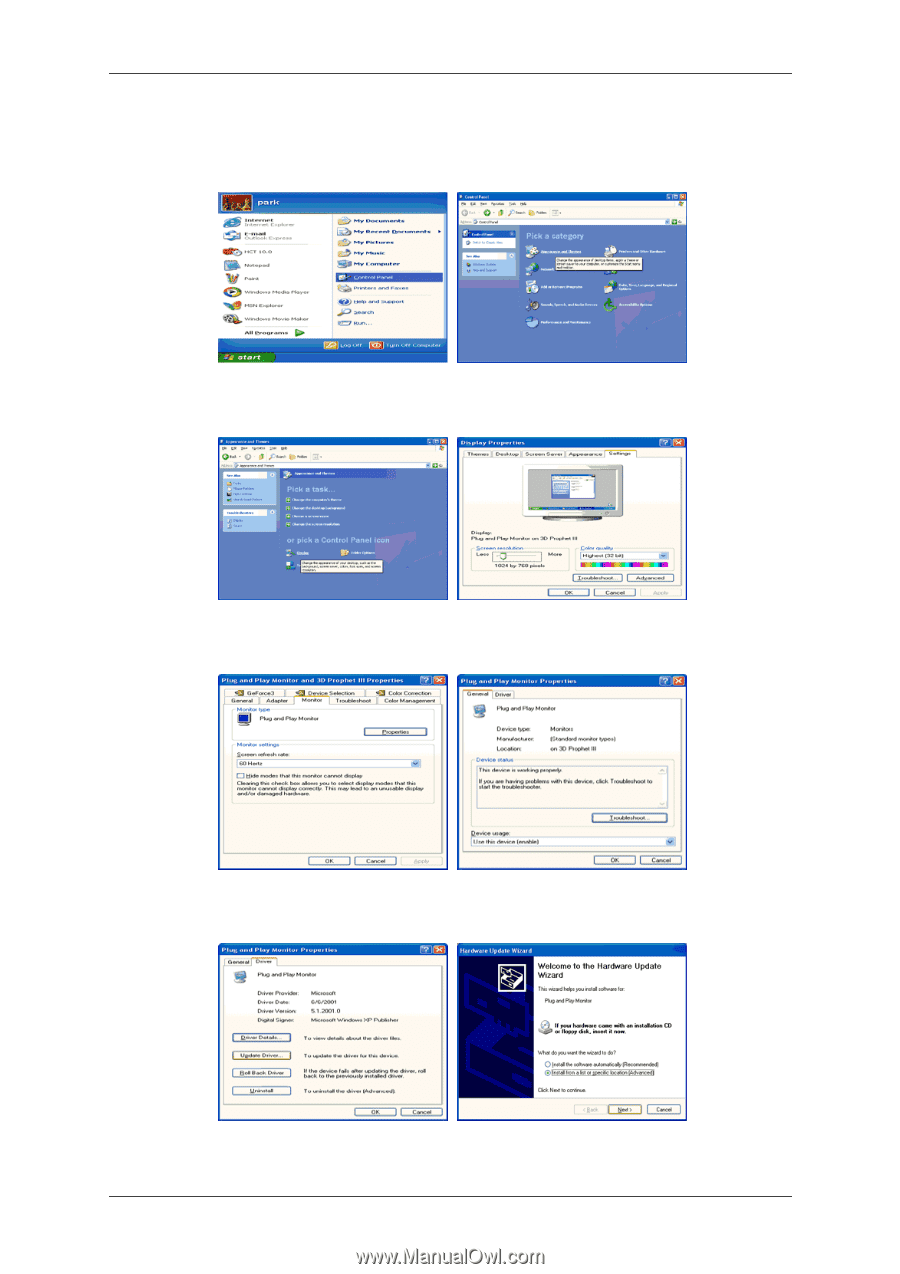
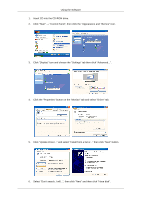
1.
Insert CD into the CD-ROM drive.
2.
Click "Start"
→
"Control Panel", then click the "Appearance and Themes" icon.
3.
Click "Display" icon and choose the "Settings" tab then click "Advanced...".
4.
Click the "Properties" button on the "Monitor" tab and select "Driver" tab.
5.
Click "Update Driver..." and select "Install from a list or..." then click "Next" button.
6.
Select "Don't search, I will...", then click "Next" and then click "Have disk".
Using the Software