Samsung BD-J7500 User Manual - Page 39
Network Services, Creating a Samsung Account - keyboard
 |
View all Samsung BD-J7500 manuals
Add to My Manuals
Save this manual to your list of manuals |
Page 39 highlights
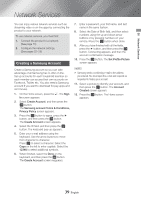
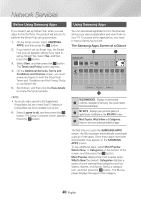
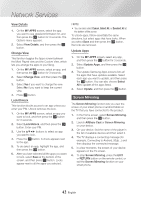
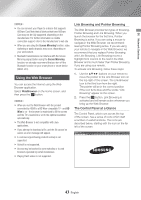
06 Network Services Network Services You can enjoy various network services such as streaming video or on-line apps by connecting the product to your network. To use network services, you must first: 1. Connect the product to a network. (See page 15) 2. Configure the network settings. (See pages 22~25) Creating a Samsung Account Create a Samsung account so you can take advantage of all Samsung has to offer on line. Set up accounts for each household member so each member can access their own accounts on Facebook, Twitter, etc. You also need a Samsung account if you want to download for-pay apps and rent movies. 1. On the Home screen, press the . The Sign In screen appears. 2. Select Create Account, and then press the v button. The Samsung account Terms & Conditions, Privacy Policy screen appears. 3. Press the v button to agree, press the ► button, and then press the v button. The Create Account screen appears. 4. Select the ID field, and then press the v button. The keyboard pop-up appears. 5. Enter your e-mail address using the keyboard. Use the arrow buttons to move from character to character. Press v to select a character. Select the Caps on the left to enter capitals. Select the 123#& to select additional symbols. 6. When finished, select the Done on the keyboard, and then press the v button. The Create Account screen reappears. 7. Enter a password, your first name, and last name in the same fashion. 8. Select the Date of Birth field, and then select numbers using the up and down arrow buttons or by pressing numbers on your remote. Press the v button when done. 9. After you have finished with all the fields, press the ► button, and then press the v button. Connecting appears, and then the account confirmation message. 10. Press the v button. The Set Profile Picture screen appears. ||NOTE | \\ Samsung sends a confirming e-mail to the address you entered. You must open the e-mail and respond as requested to finalize your account. 11. Select a picture to identify your account, and then press the v button. The Account Created screen appears. 12. Press the v button. The Home screen appears. 39 English
-
 1
1 -
2
-
3
-
4
-
5
-
6
-
7
-
8
-
9
-
10
-
11
-
12
-
13
-
14
-
15
-
16
-
17
-
18
-
19
-
20
-
21
-
22
-
23
-
24
-
25
-
26
-
27
-
28
-
29
-
30
-
31
-
32
-
33
-
 34
34 -
 35
35 -
 36
36 -
 37
37 -
 38
38 -
 39
39 -
 40
40 -
 41
41 -
 42
42 -
 43
43 -
 44
44 -
45
-
46
-
47
-
48
-
49
-
50
-
51
-
52
-
53
-
54
-
55
-
56
-
57
-
58
-
59
-
60
-
61
-
62
-
63
-
64
 |
 |