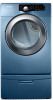
Samsung DV363EWBEUF/A1 Trouble Shooting Guide User Manual Ver.1.0 (English, Fr - Page 3
TEST MODE, Cycle Count Mode, Special Test Mode, Sensor Bar Touch Data Mode, WARNING - electric dryer
 |
View all Samsung DV363EWBEUF/A1 manuals
Add to My Manuals
Save this manual to your list of manuals |
Page 3 highlights
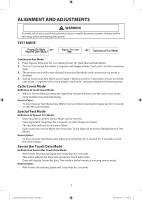
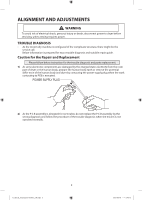
ALIGNMENT AND ADJUSTMENTS WARNING To avoid risk of electrical shock, personal injury or death; disconnect power to dryer before servicing, unless testing requires power. TEST MODE Continuous Run Mode: 1. Press Signal + Dry Level for 3 sec during Power On State (Normal User Mode) . 2. Once in Continuous Run Mode, 7-Segment will toggle display "total cycle" and the remaining time. 3. The previous cycle will restart during Continuous Run Mode until continuous run mode is disabled. 4. During Continuous Run Mode, press Signal + Dryness Level for 3 seconds to return to normal user mode. 7-segment will no long display "total cycle " and only display the remaining time. Cycle Count Mode Definition of Cycle Count Mode: - While in Service Mode pressing the Signal key will put the dryer into the cycle count mode - Cycle number executed will display. How to Enter: - To enter Special Test Mode press While in Service Mode pressing the Signal key for 3 seconds or until the control beep. Special Test Mode Definition of Special Test Mode: - Dryer must be on before Service Mode can be entered. - Press Signal and Temp Keys for 3 seconds, or until 3 beeps are heard. - The machine will now be in Service Mode. - Upon entry into Service Mode, the Sensor Bar Touch Data will be shown (Default Special Test Mode). How to Enter: - To enter Special Test Mode press Signal and Temp Keys for 3 seconds for 3 seconds or until the control beep. Sensor Bar Touch Data Mode Definition of Sensor Bar Touch Data Mode: - With Power On pressing Signal and Temp Keys for 3 seconds - This action will put the dryer into sensor bar touch data mode - Dryer will display Sensor Bar data. This mode is default mode of entering service mode How to Enter: - With Power On pressing Signal and Temp Keys for 3 seconds 3 Technical_information-02365J_EN.indd 3 2012-06-05 �� 5:08:13
-
 1
1 -
 2
2 -
 3
3 -
 4
4 -
 5
5 -
 6
6 -
 7
7 -
 8
8 -
 9
9 -
10
-
11
-
12
-
13
-
14
-
15
-
16
-
17
-
18
-
19
-
20
-
21
-
22
-
23
-
24
-
25
-
26
-
27
-
28
-
29
-
30
-
31
-
32
-
33
-
34
-
35
-
36
 |
 |
