Samsung HP-S4253 User Manual (ENGLISH) - Page 12
Installing the Batteries in Your Remote Control, Remote Control Operation Range - no power
 |
UPC - 036725242531
View all Samsung HP-S4253 manuals
Add to My Manuals
Save this manual to your list of manuals |
Page 12 highlights
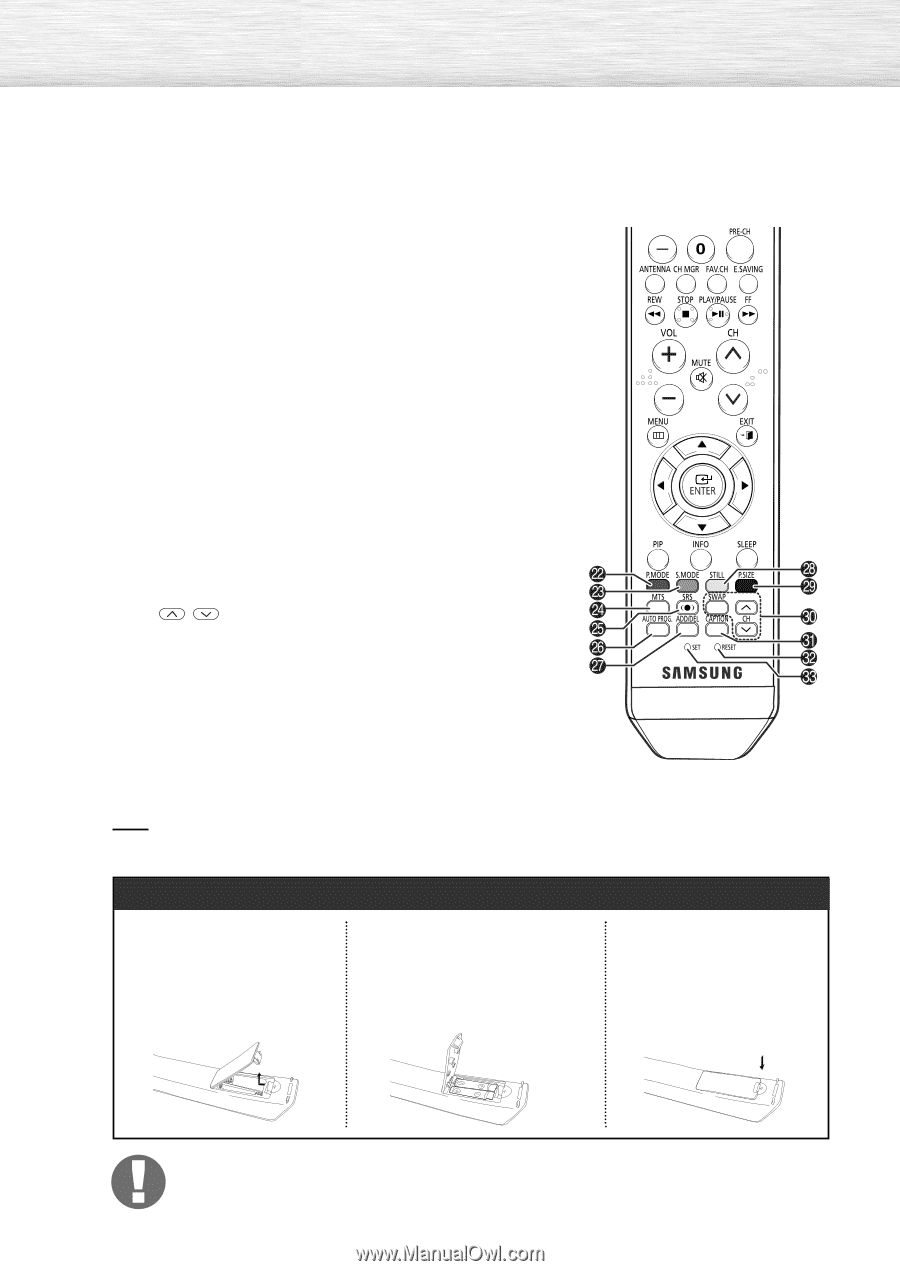
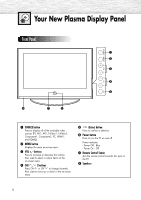
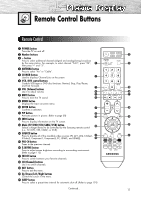
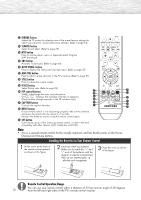
˛ P.MODE button Adjust the TV picture by selecting one of the preset factory settings (or select your personal, customized picture settings). (Refer to page 53) ◊ S.MODE button Select Sound effect. (Refer to page 67) ± MTS button Press to choose stereo, mono or Separate Audio Program (SAP broadcast). ≠ SRS button Activates TruSurround. (Refer to page 68) - AUTO PROG. button Press to display the memorized channels menu. (Refer to page 37) - ADD/DEL button Press to add or erase channels in the TV's memory. (Refer to page 81) ÷ STILL button Press to pause the current screen. ® P.SIZE button Select Picture size. (Refer to page 56) ∑ PIP control buttons SWAP: Interchange the main and sub picture. CH , : Displays the available channels in sequence. (These buttons change channels in the PIP window only.) µ CAPTION button Controls the caption decoder. ¥ RESET button If your remote control is not functioning properly, take out the batteries and press the reset button for about 2~3 seconds. Re-insert the batteries and try using the remote control again. ≥ SET button Used during set up of this Samsung remote control, so that it will work compatibly with other devices (VCR, Cable Box and DVD). Note • This is a special remote control for the visually impaired, and has Braille points on the Power, Channel and Volume buttons. Installing the Batteries in Your Remote Control 1 Lift the cover at the back of the remote control upward as shown in the figure. 2 Install two AAA size batteries. Make sure to match the "+" and "-" ends of the batteries with the diagram inside the compartment. •Do not mix battery types, i.e. alkaline and manganese. 3 Close the cover as shown in the figure. Remote Control Operation Range You can use your remote control within a distance of 23 feet and an angle of 30 degrees 12 from the left and right sides of the TV's remote control receiver.
-
 1
1 -
2
-
3
-
4
-
5
-
6
-
 7
7 -
 8
8 -
 9
9 -
 10
10 -
 11
11 -
 12
12 -
 13
13 -
 14
14 -
 15
15 -
 16
16 -
 17
17 -
18
-
19
-
20
-
21
-
22
-
23
-
24
-
25
-
26
-
27
-
28
-
29
-
30
-
31
-
32
-
33
-
34
-
35
-
36
-
37
-
38
-
39
-
40
-
41
-
42
-
43
-
44
-
45
-
46
-
47
-
48
-
49
-
50
-
51
-
52
-
53
-
54
-
55
-
56
-
57
-
58
-
59
-
60
-
61
-
62
-
63
-
64
-
65
-
66
-
67
-
68
-
69
-
70
-
71
-
72
-
73
-
74
-
75
-
76
-
77
-
78
-
79
-
80
-
81
-
82
-
83
-
84
-
85
-
86
-
87
-
88
-
89
-
90
-
91
-
92
-
93
-
94
-
95
-
96
-
97
-
98
-
99
-
100
-
101
-
102
-
103
-
104
-
105
-
106
-
107
-
108
-
109
-
110
-
111
-
112
-
113
-
114
-
115
-
116
-
117
-
118
-
119
-
120
-
121
-
122
-
123
-
124
-
125
-
126
-
127
-
128
-
129
-
130
-
131
-
132
-
133
-
134
-
135
-
136
-
137
-
138
-
139
-
140
-
141
-
142
-
143
-
144
 |
 |