Samsung NA30R5310FS/AA Installation Guide - Page 20
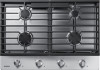
Step 9. Install the grates, Orient the center grate as noted direction.
 |
View all Samsung NA30R5310FS/AA manuals
Add to My Manuals
Save this manual to your list of manuals |
Page 20 highlights
Installation instructions Step 9. Install the grates 36" Model : NA36R5310F* NOTE Install the grates as instructed below for longest life. When installed properly, the openings in the grates are centered over the burners. The three cooktop grates are designed to fit in specific positions on the cooktop. For maximum stability, these grates should only be used in their proper positions. • Place the left and right grates so that the thicker side of the right grate lines up with the right side of the cooktop and the thicker side of the left grate lines up with the left side of the cooktop. • The center grate must be installed with the filled-in section, marked with the word 'BACK', oriented towards the back of the cooktop. The center grate has two overhangs to help you locate the side grates correctly. It hits the side grates when you locate wrong direction. See the illustration below. To replace the grates correctly, follow these steps: 1. Orient the center grate as noted direction. 2. Gently lower the legs of the center grate so that leg dimples can match embosses on cooktop. 3. Locate thicker side of remaining two grates to face outside of cooktop 4. Gently lower the legs of two remaining grates into the corresponding embosses without interfering with center grate overhang. Thicker side must be on the left Thicker side must be on the right Installation instructions 20 English Install_NA30R5310FG_AA_DG68-01133A-00_EN.indd 20 2019-04-12 12:13:37
-
 1
1 -
2
-
3
-
4
-
5
-
6
-
7
-
8
-
9
-
10
-
11
-
12
-
13
-
14
-
 15
15 -
 16
16 -
 17
17 -
 18
18 -
 19
19 -
 20
20 -
 21
21 -
 22
22 -
 23
23 -
 24
24 -
 25
25 -
26
-
27
-
28
-
29
-
30
-
31
-
32
-
33
-
34
-
35
-
36
-
37
-
38
-
39
-
40
-
41
-
42
-
43
-
44
-
45
-
46
-
47
-
48
-
49
-
50
-
51
-
52
-
53
-
54
-
55
-
56
-
57
-
58
-
59
-
60
-
61
-
62
-
63
-
64
-
65
-
66
-
67
-
68
-
69
-
70
-
71
-
72
-
73
-
74
-
75
-
76
-
77
-
78
-
79
-
80
-
81
-
82
-
83
-
84
 |
 |
