Samsung SCX-5315F User Guide
Samsung SCX-5315F Manual
 |
View all Samsung SCX-5315F manuals
Add to My Manuals
Save this manual to your list of manuals |
Samsung SCX-5315F manual content summary:
- Samsung SCX-5315F | User Guide - Page 1
SCX-5315F/5115 Digital Laser MFP SCX-5315F SCX-5115 User's Guide Visit us at: Home www.samsungprinter.com JC68-01054ARev. 1.00 - Samsung SCX-5315F | User Guide - Page 2
any changes, direct or indirect, arising from or related to use of this manual. © 2003 Samsung Electronics Co., Ltd. All rights reserved. • SCX-5315F, SCX-5115 and Samsung logo are trademarks of Samsung Electronics Co., Ltd. • Centronics is a trademark of Centronics Data Computer Corporation. • IBM - Samsung SCX-5315F | User Guide - Page 3
the Drum and Toner Cartridges 1.14 Turning the Machine On 1.17 Loading Paper 1.17 Setting the Paper Size 1.20 Changing the Display Language 1.20 Using Save Modes 1.21 Toner Save 1.21 Paper Save 1.21 Power Save 1.22 Chapter 2: INSTALLING SOFTWARE About Samsung Software 2.2 MFP Driver - Samsung SCX-5315F | User Guide - Page 4
4.9 Clone Copying 4.10 Duplex Copying 4.11 Collation Copying 4.12 Chapter 5: PRINTING Printing a Document 5.2 Printer Settings 5.3 Accessing Printer Settings 5.3 Printer Properties Tabs 5.4 Printer Properties Buttons & Icons 5.12 Setting Up the Locally Shared Printer 5.12 In Windows 9x/Me - Samsung SCX-5315F | User Guide - Page 5
6: SCANNING Scanning using the Samsung SmarThru 6.2 Scanning Process with TWAIN-enabled Software ...... 6.4 Chapter 7: MAINTENANCE Cleaning the Scan Unit 7.2 Expected Cartridge Life 7.3 Replacing the Toner Cartridge 7.3 Setting to Notify Toner Low 7.7 Cleaning the Drum 7.8 Replacing the Drum - Samsung SCX-5315F | User Guide - Page 6
A.6 Supported Operating Systems A.7 Printing a Network Configuration Page A.7 Configuring TCP/IP A.8 Configuring Netware A.10 Restoring the Network Configuration A.11 Resetting the Network Interface Card A.11 Configuring the Samsung Network Printer Port ....... A.12 Installing Samsung Network - Samsung SCX-5315F | User Guide - Page 7
instruction. If you cannot resolve the conflict, contact your sales or service unit is subsequently used. 14. Unplug the product from the telephone jack, PC and AC wall outlet, and refer servicing to qualified service personnel under the following conditions: • When any part of the power - Samsung SCX-5315F | User Guide - Page 8
service technician to restore the product to normal operation. 16. Avoid using this product during a lightning storm. There may be a remote risk of electric shock from lightning. If possible, unplug the AC power and telephone cord for the duration of the lightning storm. 17. SAVE THESES INSTRUCTIONS - Samsung SCX-5315F | User Guide - Page 9
so there is never any human access to laser radiation above a Class I level during normal operation, user maintenance, or prescribed service condition. WARNING Never operate or service the printer with the protective cover removed from Laser/ Scanner assembly. The reflected beam, although invisible - Samsung SCX-5315F | User Guide - Page 10
in a well ventilated area. If you need additional information about ozone, please request your nearest Samsung dealer. Power Saver This product contains advanced energy conservation technology that reduces power consumption when it is not in active use. When the product does not receive data for - Samsung SCX-5315F | User Guide - Page 11
with the limits for a Class A digital device, pursuant to Part 15 of the FCC Rules. These limits and used in accordance with the instruction manual, may cause harmful interference to radio or individual. Refer to the Facsimile User's Guide for instructions on how to enter this information service. x - Samsung SCX-5315F | User Guide - Page 12
will give you further instructions on how to actually test the emergency number. • This product may not be used on coin service or party lines. • This product provides magnetic coupling to hearing aids. • You may safely connect this equipment to the telephone network by means of a standard - Samsung SCX-5315F | User Guide - Page 13
the analogue public switched telephone network (PSTN) in accordance with Directive 1999/5/EC. The product has been designed to work with the national PSTNs and compatible PBXs of the European countries: In the event of problems, you should contact the Euro QA Lab of Samsung Electronics Co., Ltd. in - Samsung SCX-5315F | User Guide - Page 14
Replacing the Fitted Plug (for UK Only) IMPORTANT The mains lead for this machine is fitted with a standard (BS 1363) 13 amp plug and has a 13 amp fuse. When you change or examine the fuse, you must re-fit the correct 13 amp fuse. You then need to replace the fuse cover. If you have lost the fuse - Samsung SCX-5315F | User Guide - Page 15
NOTE: Any queries, problems or requests for accessories/Information as well as service should be directed at the address shown in your warranty paperwork. xiv - Samsung SCX-5315F | User Guide - Page 16
, scanning, and faxing (SCX-5315F only) functions! This chapter provides step-by-step instructions on setting up the machine, and installing the software. This chapter includes: • Unpacking • Component Location • Control Panel Functions • Making Connections • Installing the Drum and Toner Cartridges - Samsung SCX-5315F | User Guide - Page 17
from the unit. The scan unlock switch automatically moves to the unlock position ( ). Scanner module NOTE: To scan or copy a document, the switch must be on that position. When you are moving the machine or do not intend to use it for a long time, push the switch to the lock position ( ). 3 Pull - Samsung SCX-5315F | User Guide - Page 18
SCX-5315F UK only) This User's Guide, Facsimile User's Guide (SCX-5315F only), Quick install Guide CD-ROM† Starter Toner Cartridge Drum Cartridge *. The appearance of the power cord and the telephone line cord vary according to countries. †. The CD-ROM contains the MFP driver, SmarThru software - Samsung SCX-5315F | User Guide - Page 19
of your machine. Front View Automatic Document Document Feeder Guides Control Panel (See page 1.6 for SCX-5315F. See page 1.9 for SCX-5115.) Document Input Tray Document Output Tray Paper Guides Bypass Tray Scanner Module Paper Cassette Release lever Front Cover Side Cover 1.4 GETTING - Samsung SCX-5315F | User Guide - Page 20
Rear View ADF (Automatic Document Feeder) Connector Telephone Connections (available in SCX-5315F only) Document Cover 1 Document Glass AC Power Cord Connector Parallel Connector Power Switch USB Connector Paper Exit Extension Paper Cassette GETTING STARTED 1.5 - Samsung SCX-5315F | User Guide - Page 21
Control Panel Functions SCX-5315F 1 2 3 4 5 6 7 13 8 9 10 11 12 1 01 02 21 22 System Data System ID 03 23 Date & Time 04 05 24 25 System Setup Memory Clear 06 26 Delay TX 07 27 Memory TX 08 28 Priority TX 09 29 Polling 10 30 Add/Cancel 11 31 Group Dial 12 13 32 - Samsung SCX-5315F | User Guide - Page 22
. To clear the jam, see page 8.4. Turns on when the toner or drum has almost run out. To replace the toner or drum cartridge, see page 7.3 and page 7.8. (Error indicators) Turns on when of the paper when printed. 6 Used to dial a number or enter alphanumeric characters. GETTING STARTED 1.7 - Samsung SCX-5315F | User Guide - Page 23
toner by using less toner to 7 print a document. S A Allows you to save power by reducing power consumption when not printing. V E Allows you to save paper by printing to change the zoom rate and to change the number of copies. 10 Selects the mode to activate: FAX or COPY. Also, confirms the - Samsung SCX-5315F | User Guide - Page 24
SCX-5115 1 2 3 4 5 1 10 6 7 8 9 When an error occurs, the light on the a paper jam occurs. To clear the jam, see page 8.4. Turns on when the toner or drum almost runs out. To replace the toner or drum cartridge, see page 7.3 and page 7.8. Turns on when the input tray you are using is - Samsung SCX-5315F | User Guide - Page 25
job will use both sides of the paper when printed. Used to enter numbers. Allows you to save toner by using less toner to print a document. Allows you to save power by reducing power consumption when not printing. Allows you to save paper by printing 2 pages on a single sheet of paper (available in - Samsung SCX-5315F | User Guide - Page 26
fasten the side screws. NOTE: Without connecting the cord to the port, you cannot use the ADF. 2 If you have SCX-5115: Skip this step and proceed to step 3. If you have SCX-5315F: Connect the supplied telephone line to the LINE jack and the other end to the wall jack. GETTING STARTED 1.11 - Samsung SCX-5315F | User Guide - Page 27
the cord of your extension phone or answering machine into the EXT jack. UK users should plug the cord of the extension phone into the supplied TAM lead and plug the cord of the TAM lead into the EXT jack on the back of your machine. TAM lead (For UK users - Samsung SCX-5315F | User Guide - Page 28
with your machine. 1 If you want to use a parallel printer cable, only use a IEEE1284 compliant cable and connect it to of the above cables. • If you are using a USB cable, you must be running Windows 98/ Me/2000/XP. • When using the a USB connection, your machine provides two USB modes; Fast and - Samsung SCX-5315F | User Guide - Page 29
Installing the Drum and Toner Cartridges 1 Pull the release lever to open the side cover. CAUTION: Ensure that the side cover is always open before opening the front cover. 2 Open the front cover. 3 If the cartridge locking lever is on the lower position, turn the lever upward until it locks into - Samsung SCX-5315F | User Guide - Page 30
the drum cartridge from its bag and slide it into the machine firmly until it locks into place completely. 1 5 Remove the starter toner cartridge from its bag. Gently shake the cartridge to loosen the toner. Thoroughly shaking the cartridge will assure maximum copies per cartridge. 6 Slide the toner - Samsung SCX-5315F | User Guide - Page 31
it locks into place. 8 Close the front cover 1 and then side cover 2 . 2 1 NOTE: When the drum or toner cartridge need to be replaced, the display indicates the corresponding message with the error indicator. Refer to the list of error messages on page 8.11. To replace the drum and toner cartridges - Samsung SCX-5315F | User Guide - Page 32
Turning the Machine On 1 Plug one end of the supplied three-wire electrical grounding 1 type cord into the AC socket on the machine and the other end into a properly grounded AC outlet. 2 Turn on the power switch. "WARMING UP PLEASE WAIT" appears on the display indicating that the machine now - Samsung SCX-5315F | User Guide - Page 33
on the pressure plate until it locks in position. 3 Adjust the rear paper guide to the desired paper length. It is preset to Letter or A4 size depending on the country. To load another size, lift and insert the rear guide into the corresponding position. Rear guide LGL FOLIO A4 LTR 4 Fan the - Samsung SCX-5315F | User Guide - Page 34
the paper corners are under the corner snubbers. 1 Corner snubber Do not fill above the max fill line. Max Fill Line 6 While pinching the side guide as shown, move it toward the stack of paper until it lightly touches the side of the stack. If it is too tight it will - Samsung SCX-5315F | User Guide - Page 35
buttons. These settings will apply to the Copy mode only. In the PC printing mode, you have to select the paper size in the application program you Press Menu/Exit and then System Setup from the one- touch dial keypad. SCX-5115 users should press Menu and then Enter. 2 Press or until "SELECT - Samsung SCX-5315F | User Guide - Page 36
Toner Save 1 The Toner Save feature allows the printer to use less toner on each page. Activating this mode extends the life of the toner cartridges up to twice as long as in normal mode, but reduces the print quality. To turn the Toner 3 Press Mode/Enter (Enter for SCX-5115) to save the selection. - Samsung SCX-5315F | User Guide - Page 37
for SCX-5115) to save the selection. You can further select the length of time the machine waits after a job is printed before it switches to a reduced power state. options are 5, 10, 15, 30, and 45 (minutes). Press or until the desired time blinks. 4 Press Mode/Enter (Enter for SCX-5115) to save - Samsung SCX-5315F | User Guide - Page 38
information about installing the supplied Samsung software. You must install the Samsung software to use your machine as a printer and scanner. The topics included in this chapter are: • About Samsung Software • System Requirements • Installing Samsung Software • Uninstalling Samsung Software - Samsung SCX-5315F | User Guide - Page 39
the following: • MFP Driver • SmarThru Software • OCR Software (AnyPage Lite) MFP Driver To use your machine as a printer and scanner, you must install the MFP driver. SmarThru Software SmarThru is the accompanying software for your multifunctional product. SmarThru contains a powerful image editor - Samsung SCX-5315F | User Guide - Page 40
SE/Windows Me/ 2 Windows NT 4 Workstation or Server with Service Pack 3/ Windows 2000 Professional or Advanced Server/Windows XP Home edition or Professional. Minimal Requirements • Disk space: 120 MB for installation • Memory: 64 MB • CPU: Pentium II 233 or higher • Required software: Internet - Samsung SCX-5315F | User Guide - Page 41
Installing Samsung Software NOTES: • For Windows 95/98/Me/NT 4.0/2000/XP users, cancel the "New Hardware Found" screen when the computer boots up. • Make sure that your machine is plugged in and connected to your computer's parallel port or USB port before installing software from the CD. Windows 95 - Samsung SCX-5315F | User Guide - Page 42
you select the Custom installation, you may choose the options you want to install. • SmarThru Software: to scan and edit images and to work with electronic documents. • OCR Software: AnyPage Lite software to enable OCR. • MFP Driver: to print and scan. 6 Selecting the type, Click Next. INSTALLING - Samsung SCX-5315F | User Guide - Page 43
as Remote Fax or Remote Scan service. If you selected SmarThru networking, you can select to install it as a Server, a Client, or both. The Server option allows you to share a local fax modem and/or a scanner over a LAN. You can control sharing by managing a remote service user. The Client option - Samsung SCX-5315F | User Guide - Page 44
does not shut down and restart automatically, you must shut it down manually and restart it before the changes will be saved. NOTE: When you install the software, the Digital Signature Not Found window appears in Windows 2000 and Windows XP. Click OK in Windows 2000 and click Continue Anyway in - Samsung SCX-5315F | User Guide - Page 45
. If you want to uninstall the scan driver, select TWAIN Driver Uninstaller. If you want to uninstall the printer driver, select Samsung SCX-5x15 Series Driver Uninstall. If you want to uninstall the Remote Control Panel, select Uninstall SCX-5x15 Series Remote Control Panel. 2.8 INSTALLING SOFTWARE - Samsung SCX-5315F | User Guide - Page 46
When the uninstallation is done, click OK. 5 The message box recommends you restart your computer. Click OK, then restart Windows. NOTE: If you want to install the printer driver or the scan driver using the SmarThru CD-ROM, make sure that you select the Setup Type to Compact. Or select Custom then - Samsung SCX-5315F | User Guide - Page 47
for example, you decide to install the Stand Alone configuration over the SmarThru Networking. In this case, uninstall Samsung SmarThru having the Leave intact option set and install the SmarThru Stand Alone configuration. 4 After selecting the uninstall option, click Next. 2.10 INSTALLING SOFTWARE - Samsung SCX-5315F | User Guide - Page 48
5 Follow the on-screen instructions to complete the un- installation. The SmarThru software and all components will be removed. 2 6 When the uninstallation is done, click OK. The message box recommends restarting your computer. 7 Click OK. Shut down and - Samsung SCX-5315F | User Guide - Page 49
can uninstall both the MFP driver and the SmarThru software with the CD-ROM you have used to install the software. 1 Insert the SmarThru CD-ROM into your CD-ROM drive. The SmarThru CD-ROM should automatically run and the installation window appear. If the installation window does not appear, select - Samsung SCX-5315F | User Guide - Page 50
3 PAPER HANDLING This chapter introduces you to the basics of selecting print media and loading print media into your machine. This chapter includes: • Selecting Print Media • Paper Guidelines • Loading Paper in the Cassette • Using the Bypass Tray • Setting the Paper Size for Copying - Samsung SCX-5315F | User Guide - Page 51
is not recommended may cause paper jams or print quality problems. Media Size Input Sources and Capacities Media Size Input Source/Capacitya Paper Cassette Bypass Tray Plain paper Letter (8.5 x 11 in.) Folio (8.5 x 13 in.) Legal (8.5 x 14 in.) Executive (7.25 x 10.5 in.) A4 (210 x 297 mm) B5 (182 - Samsung SCX-5315F | User Guide - Page 52
print on damp, curled, wrinkled, or torn paper can cause paper jams and poor print quality. • Use only high quality copier with windows, laser printers. • To prevent special media such as transparencies and label sheets from sticking together, remove them from the exit tray as they are printed - Samsung SCX-5315F | User Guide - Page 53
10 sheets of special media into the Bypass Tray at a time. • Verify that your labels' adhesive material can tolerate fusing temperature of 200oC (392oF) for 0.1 second. • Make sure that there is no exposed adhesive material between labels. Exposed areas can cause labels to peel off during printing - Samsung SCX-5315F | User Guide - Page 54
your PC using the paper cassette, make sure that you select the Paper source and the correct paper size from your software application before starting your print job. • If you experience problem with the paper feed, place the paper in the Bypass Tray. • You can load up to 300 sheets of previously - Samsung SCX-5315F | User Guide - Page 55
Label 30 sheets or 9mm (max)a Cardstock 10 sheets or 9mm (max)a a. The height is measured with the stack of sheets untouched laid on a flat surface. Notes: • Always load only use print media specified in Specifications to avoid paper jams and print quality problems. • Do not hit the Bypass Tray - Samsung SCX-5315F | User Guide - Page 56
print media in the Bypass Tray: 1 Lower the Bypass Tray, located on the right side of the machine. Unfold the paper support extension as shown. 3 Paper support and avoid touching the print side. Oils from your fingers that are deposited on the transparency can cause print quality problems. If you are - Samsung SCX-5315F | User Guide - Page 57
is too deep or if you push it in too far. Max. fill line NOTES: When printing on previously used paper via the Bypass Tray, the printed side should be facing up with the uncurled edge at the left side. If you experience problems with paper feed, turn the paper around. 3.8 PAPER HANDLING - Samsung SCX-5315F | User Guide - Page 58
need to set the correct paper size using the control panel buttons. These settings will apply to the Copy mode, and the Fax mode (SCX-5315F only). In PC printing mode, you have to select the paper size in the application program you use. To set the paper size for cassette, take the - Samsung SCX-5315F | User Guide - Page 59
NOTE 3.10 PAPER HANDLING - Samsung SCX-5315F | User Guide - Page 60
4 COPYING This chapter provides step-by-step instructions for copying documents. This chapter includes: • Loading Paper for Copy Output • Selecting a Paper Tray • Making Copies from the Automatic Document Feeder • Making Copies using the - Samsung SCX-5315F | User Guide - Page 61
card (3.9 by 5.8 inch) or as large as a sheet of legal-sized (8.5 by 14 inch) paper. The instructions for loading the print media are the same whether you are printing the print media for use when copying, you have to select the paper tray you will use for both copy and fax jobs (SCX-5315F only). - Samsung SCX-5315F | User Guide - Page 62
the document size. Make sure that the bottom of the document stack matches the paper size marked on the ADF. 4 Document guides 2 SCX-5315F users should verify that the machine is in the Copy mode. If necessary, press Mode/Enter to change the mode to Copy mode. In Copy - Samsung SCX-5315F | User Guide - Page 63
characteristics, use the document glass to load documents. 1 Lift the document cover. 2 Place the document face down on the glass and align it with document guides on the left top corner of the document glass. 4.4 COPYING - Samsung SCX-5315F | User Guide - Page 64
the scan glass. 3 Close the scanner cover. NOTES: • Leaving the cover open while copying will affect the copy quality and toner consumption. • If you are copying a page from a book or magazine, close the cover flat. The slanted cover may cause heavy exposure of the light when scanning. 4 SCX-5315F - Samsung SCX-5315F | User Guide - Page 65
documents containing mostly text. MIXED: Used for documents with mixed text and graphics. PHOTO: Used when the originals are photographs. 3 Press Mode/Enter (Enter on SCX-5115) to save the selection. 4.6 COPYING - Samsung SCX-5315F | User Guide - Page 66
steps: 1 Press Contrast. 2 Press Contrast or the navigation buttons to select an option and press Mode/Enter (Enter on SCX-5115). MANUAL: You can adjust the contrast manually. Continue to the next step. AUTO SUPPRESS: Use this setting for copying an original from a newspaper or magazine to remove - Samsung SCX-5315F | User Guide - Page 67
copied image by 25% to 400% when you copy the original from the document scanner glass, and by 25% to 100% using the ADF. Note that the zoom buttons, the number increases or decreases rapidly. 3 Press Mode/Enter (Enter on SCX-5115) to save the selection. NOTES: • If you press the Stop/Clear button - Samsung SCX-5315F | User Guide - Page 68
using document scanner glass. If a document is detected in the ADF, the auto-fit will not work. 1 Load the document to be copied on the document glass, and close the cover. 2 Make sure that you have selected the required paper tray. See page 4.2. 3 To enter the special copy mode, SCX-5315F users - Samsung SCX-5315F | User Guide - Page 69
the document scanner glass. If a document is detected on the ADF, the Clone option will not work. 1 Load the document to be copied on the document glass, and close the cover. 2 Make sure that you have selected the required paper tray. See page 4.2. 3 To enter the special copy mode, SCX-5315F users - Samsung SCX-5315F | User Guide - Page 70
Copying Duplex copying allows you to print on both sides of the paper. Before printing in the duplex mode, decide on If you select "OFF", you cannot use duplex copying. 5 Press Mode/Enter (Enter on SCX-5115) to save the selection. 6 If necessary, customise the copy settings including the number - Samsung SCX-5315F | User Guide - Page 71
will print followed by the second complete 3 page document. 1 Load the documents to be copied in the ADF. Or, place a sheet of the documents on the document glass face down. 2 Make sure that you have selected the required paper tray. See page 4.2. 3 To enter collation copy mode, SCX-5315F users - Samsung SCX-5315F | User Guide - Page 72
4 Press Mode/Enter (Enter on SCX-5115) to save the selection. 5 If necessary, customise the fed from the document glass, the display shows "SCAN ANOTHER?" on the top line after the page is scanned into the memory. To scan another page, remove the scanned page and load the next page on the glass. - Samsung SCX-5315F | User Guide - Page 73
MEMO 4.14 COPYING - Samsung SCX-5315F | User Guide - Page 74
5 PRINTING Read this chapter to learn how to select and load print media and how to use the print settings. This topics included in this chapter are: • Printing a Document • Printer Settings • Setting Up the Locally Shared Printer - Samsung SCX-5315F | User Guide - Page 75
following steps describe the typical process to print from Windows: 1 Ensure that your machine is properly connected to the computer, the machine is powered on, and there is paper in the paper tray. 2 Verify that you have installed the Samsung software for your computer. For details, see "Installing - Samsung SCX-5315F | User Guide - Page 76
click OK to start the print job. Printer Settings You can use the machine with all your Windows 95/98/Me/2000/ XP or Windows NT 4.0 applications. Be sure to set Samsung SCX-5x15 Series PCL 6 as the default printer for all of your Windows operations. Most Windows software applications allow you to - Samsung SCX-5315F | User Guide - Page 77
the right mouse button, then select Properties and Printing Preferences from the drop-down list. Windows XP • Select the File > Print > Preferences command from within any Windows application. • Select Samsung SCX-5x15 Series PCL 6 printer from the Printers and Faxes folder, click the right mouse - Samsung SCX-5315F | User Guide - Page 78
Paper Tab Use the Paper tab to select the size of paper you have in your printer, the orientation, the number of copies to print, etc. 1 2 3 4 Click on the box to put a check mark to use the different paper size of paper you are using. 3 Select the type of paper you are using. 4 PRINTING 5.5 - Samsung SCX-5315F | User Guide - Page 79
. When it is not checked, colored text is printed in shades of gray. Toner Save Mode allows the printer to use less toner on each page. Using this mode will extend the life of your 4 toner cartridge and reduce your cost per page, but will reduce print quality. Click to put a check mark and enable - Samsung SCX-5315F | User Guide - Page 80
Tab The Output tab provides options for you to adjust how the document will appear on the printed page. The Output Mode Type options includes Multiple Pages per Side, Booklet Printing, Fit to Page, Poster and Duplex printing. Multiple Pages per Side Choose the Multiple Pages per Side option to - Samsung SCX-5315F | User Guide - Page 81
a document out as a booklet. 7 Once your document prints, fold the pages in half and staple the pages. Booklet printing is available only when you select Plain Paper for Paper Type in the Paper tab. Fit to Page Choose this option to scale your print job to any selected paper size regardless of the - Samsung SCX-5315F | User Guide - Page 82
Poster Choose the Poster option to enlarge the printed document. 1 To determine the scaling factor, select the style. You can choose from: 2x2, 3x3, or 4x4. 1 For example, if you select 2x2, the output will be automatically stretched to cover 4 physical pages. 5 PRINTING 5.9 - Samsung SCX-5315F | User Guide - Page 83
the Duplex option from the Output tab to print the document on both sides of the paper. 1 Choosing Long Edge lets you you have the binding orientation along the short edge of the paper as in a calendar. Duplex printing is available only when you select Plain Paper for Paper Type in the Paper tab - Samsung SCX-5315F | User Guide - Page 84
Watermark Tab The Watermark tab allows you to create a background image of text to print on each page of your document. Watermarks are useful for printing identifying information on a document, information such as "DRAFT" or "CONFIDENTIAL", or perhaps the name of your company or department. By - Samsung SCX-5315F | User Guide - Page 85
by other users on the network through a Windows 9x, Me, 2000, XP or NT 4.0 network printer connection. In Windows 9x/Me Setting Up the Host Computer 1 Start Windows. 2 From the Start menu, select Control Panel and double- click on the Network icon. 3 Check the File and Print Sharing box and click OK - Samsung SCX-5315F | User Guide - Page 86
, from the Start menu, select Settings and then Printers. For Windows XP, from the Start menu, select Printers and Faxes. 3 Double-click your printer icon. 4 From the Printer menu, select Sharing. 5 For Windows NT 4.0, check the Shared box. For Windows 2000, check the Shared As box. PRINTING 5.13 - Samsung SCX-5315F | User Guide - Page 87
Explorer. 2 Open your network folder in the left column. 3 Click the shared name. 4 For Windows NT 4.0/2000, from the Start menu, select Settings and Printers. For Windows XP, from the Start menu, select Printers and Faxes. 5 Double-click your printer icon. 6 From the Printer menu, select Properties - Samsung SCX-5315F | User Guide - Page 88
digital files on your computer. Then you can fax or e-mail the files, display them on your web site, or use them to create projects that you can print out using Samsung SmarThru software which came with your machine. This chapter includes: • Scanning using the Samsung SmarThru • Scanning Process - Samsung SCX-5315F | User Guide - Page 89
using SmarThru: 1 Feed the document(s) to be scanned face up into the ADF. Or Place a single document on the document glass face down then close the cover. 2 Once you have installed the Samsung software, you will see the SmarThru icon on the desktop window. Double-click the SmarThru 3 icon. Double - Samsung SCX-5315F | User Guide - Page 90
window. Scan Wizard icon. The Scan Wizard lets you use the following services: •Scan Lets you scan the original documents and save them in the Image Manager of the Samsung a scanned image into text that you can edit in a word processing program. After you scan your document, the software processes - Samsung SCX-5315F | User Guide - Page 91
page on the document glass. • Open an application, such as PhotoDeluxe or Photoshop. • Open the TWAIN window and setting the scan options. • Scan and save your scanned image. You need to follow the programme's instructions for acquiring an image. Please refer to the user's guide for the application. - Samsung SCX-5315F | User Guide - Page 92
for maintaining the cartridge and your machine. This chapter includes: • Cleaning the Scan Unit • Expected Cartridge Life • Replacing the Toner Cartridge • Setting to Notify Toner Low (Available in SCX-5315F only) • Cleaning the Drum • Replacing the Drum Cartridge • Consumables and Replacement Parts - Samsung SCX-5315F | User Guide - Page 93
clean helps ensure the best possible copies. We suggests that you clean the scan unit at the start of each day and during the day as needed. CAUTIONS: Cleaning the cabinet of the printer with surfactants containing large amounts of alcohol, solvent or other strong substances can discolor or crack - Samsung SCX-5315F | User Guide - Page 94
approximately 6,000 pages. The actual number may vary according to the print density of the page you print. If you print a lot of graphics, you may need to change the cartridge more often. Replacing the Toner Cartridge When the toner cartridge is near the end of its life, white streaks or light copy - Samsung SCX-5315F | User Guide - Page 95
2 Open the front cover. 3 Turn the cartridge locking lever upwards to release the toner cartridge. 4 Pull the toner cartridge out and gently shake the cartridge to distribute the toner evenly inside the cartridge. NOTE: If the toner gets on your clothing, wipe it off with a dry cloth and wash - Samsung SCX-5315F | User Guide - Page 96
cartridge locking lever downwards. 6 Close the front cover, then the side cover. The display shows "NEW TONER? 1.YES 2.NO." 7 Select "NO" by pressing 2. The machine returns to Standby mode. This is typically successful only one time. When the toner eventually runs out, only blank pages will print - Samsung SCX-5315F | User Guide - Page 97
used toner cartridge. Refer to the recycling brochure packed with the toner cartridge for details. 4 Shake the new toner cartridge horizontally four or five times. Save the box and the cover for shipping. 5 Slide the new toner cartridge in until it locks in place. 6 Turn the cartridge locking lever - Samsung SCX-5315F | User Guide - Page 98
Setting to Notify Toner Low (Available in SCX-5315F only) If you have set this NOTIFY TONER LOW menu option to "ON," your machine automatically sends a fax to your service company or the dealer to notify them that your machine requires a new toner cartridge when the toner cartridge needs to be - Samsung SCX-5315F | User Guide - Page 99
there are streaks or spots on your print, the drum cartridge may require cleaning. 1 Before setting the cleaning procedure, make sure that paper is loaded in the machine. 2 SCX-5315F users should press Menu/Exit then Maintenance from the one-touch dial keypad. SCX-5115 users should press Menu then - Samsung SCX-5315F | User Guide - Page 100
locking lever upwards to unlock the toner cartridge, then pull the toner cartridge out. NOTE: The toner cartridge must be removed to replace the drum cartridge. 3 Pull the used drum cartridge out. NOTE: Help the environment by recycling your used drum cartridge. Refer to the recycling brochure - Samsung SCX-5315F | User Guide - Page 101
and slide it into place, making sure not to touch the surface of the drum. 5 Reinstall the toner cartridge, and then lock the lever. NOTE: If your machine automatically recognises the replaced cartridge, you can skip steps 6 and 7. 6 Close the front cover and the side cover. The LCD displays - Samsung SCX-5315F | User Guide - Page 102
time is up. Consumables and Replacement Parts From time to time, you will need to replace the toner and drum cartridges, roller, and fuser unit to maintain top performance and to avoid print quality problems and paper feed problems resulting from worn parts. The following items should be replaced - Samsung SCX-5315F | User Guide - Page 103
MEMO 7.12 MAINTENANCE - Samsung SCX-5315F | User Guide - Page 104
8 TROUBLESHOOTING This chapter gives helpful information for what to do if you encounter an error. This chapter includes: • Document Jams • Paper Jams • LCD Error Messages • Solving Problems - Samsung SCX-5315F | User Guide - Page 105
out of the ADF. 3 Close the ADF top cover. Then place the documents back into the ADF. NOTE: To prevent document jams, use the document scanner glass for thick, thin or mixed documents. 8.2 TROUBLESHOOTING - Samsung SCX-5315F | User Guide - Page 106
ADF or the feed area by carefully pulling it rightwards using both hands. 8 3 Close the document cover. Then place the documents back into the ADF. TROUBLESHOOTING 8.3 - Samsung SCX-5315F | User Guide - Page 107
jammed in the feed area, "PAPER JAM0" appears in the display. 1 Pull the paper cassette open. After you pull it out completely, lift the front part of the cassette slightly up to release the cassette from the machine. 2 Remove the jammed paper by gently pulling it straight out. Once you remove - Samsung SCX-5315F | User Guide - Page 108
release lever to open the side cover. NOTE: Do not touch the shiny drum cartridge surface. Scratches or smudges will result in poor copy quality. 4 Carefully rear part of the cassette to align the rear edge to the corresponding slot of the machine, then insert it completely. 8 TROUBLESHOOTING 8.5 - Samsung SCX-5315F | User Guide - Page 109
open the side cover. 2 Pull down on the fuser lever as shown below. This will release pressure on the paper. If paper is not seen in this area, skip to the Exit Area. NOTE: Do not pull paper up through the fusing unit. Unfused toner may adhere in the area, resulting in smudged - Samsung SCX-5315F | User Guide - Page 110
4 Push the fuser lever up, and then close the side cover. Paper Exit Area If the paper jammed in the exit area, "PAPER JAM 2" appears on the display. 1 Press the release lever to open the side cover. 2 Open the front cover. 8 TROUBLESHOOTING 8.7 - Samsung SCX-5315F | User Guide - Page 111
3 Pull down on the fuser lever. This will release pressure on the paper. 4 Turn the Jam Remove Lever in the direction of the arrow to move the paper to the exit area, then gently pull the paper out through the exit area. 5 Push the fuser lever up. 8.8 TROUBLESHOOTING - Samsung SCX-5315F | User Guide - Page 112
duplexer, "DUPLEX JAM" appears on the display. 1 Press the release lever to open the side cover. 2 Remove the jammed paper. Then close the side cover. 8 TROUBLESHOOTING 8.9 - Samsung SCX-5315F | User Guide - Page 113
try to print using the Bypass Tray and the machine does not detect paper due to no paper or improper paper loading. "BYPASS JAM" also may occur when the paper is not properly fed into the machine through the Bypass Tray. In that case, pull the paper out of the machine. 8.10 TROUBLESHOOTING - Samsung SCX-5315F | User Guide - Page 114
is a problem in the fuser unit. You have used an unauthorised cartridge. Replace the drum cartridge. See page 7.8. Unplug the power cord and plug it back in. If the problem still persists, please call for service. You must use a Samsungapproved cartridge. LINE ERROR (for SCX-5315F only) Your - Samsung SCX-5315F | User Guide - Page 115
Display MEMORY FULL (for SCX-5315F only) NO ANSWER (for SCX-5315F only) POLLING ERROR (for SCX-5315F only) NO DEVELOPER CARTRIDGE NO PAPER RX TRAY FULL PAPER JAM 0 PAPER JAM 1 PAPER JAM 2 RETRY REDIAL? (for SCX-5315F only) SCANNER LOCKED Meaning Solution The memory is full. Either delete - Samsung SCX-5315F | User Guide - Page 116
is corrected. If the problem persists, please contact a service engineer. Copier Problem Solution Chart Condition Suggested solutions The LCD does not turn on. Check that the machine is plugged into an electrical supply. Ensure that there is power to the socket where the unit is plugged in to - Samsung SCX-5315F | User Guide - Page 117
Toner yield is lower than expected and TONER LOW message appears on the LCD. Fewer copies from the toner cartridge than expected. The following message appears on your computer screen: Scanner is busy receiving or printing cassette with a fresh supply. Check/adjust the paper guides, if necessary. - Samsung SCX-5315F | User Guide - Page 118
. Check the printer settings in the Windows Control Panel to make sure that the print job is being sent to the correct port. (For Example: LPT1.) Check that the toner and drum cartridges are installed properly. Reinstall the software. Use the IEEE-1284 parallel port cable supplied with the machine - Samsung SCX-5315F | User Guide - Page 119
Menu/Exit then System Setup from the onetouch dial keypad. SCX-5115 users should press Menu then Enter. 2. Use or High Speed Printer Communications section and your computer's user guide. If using Windows 95, the print job is large. Reduce resolution from 600 dpi to 300 dpi. 8.16 TROUBLESHOOTING - Samsung SCX-5315F | User Guide - Page 120
dirty be dirty. Print a few blank pages to clean the transfer roller. Faded graphics Toner may be low. Remove the toner cartridge and shake it gently to evenly distribute the toner. Then reinstall the toner cartridge. 8 Ensure that you have a spare toner cartridge. TROUBLESHOOTING 8.17 - Samsung SCX-5315F | User Guide - Page 121
Problem Solution Chart (Available in SCX-5315F only) Condition The machine is not working, there is no display and the buttons are not working. Suggested solutions Unplug the power in the memory correctly. Print a Phone Book list referring to the Facsimile User's Guide. The document does not - Samsung SCX-5315F | User Guide - Page 122
the document. Blank areas appear at the bottom of each page or on other pages, with only a small strip of text printed at the top. You may have chosen the wrong paper settings in the user option setting. Refer to the Facsimile User's Guide to choose the proper paper size. 8 TROUBLESHOOTING 8.19 - Samsung SCX-5315F | User Guide - Page 123
NOTE 8.20 TROUBLESHOOTING - Samsung SCX-5315F | User Guide - Page 124
A INSTALLING A NETWORK OPTION You can connect your machine to your network by installing an optional network interface card. This chapter includes: • Installing a Network Interface Card • Configuring Network Parameters • Configuring the Samsung Network Printer Port - Samsung SCX-5315F | User Guide - Page 125
, discharge any static electricity once again. 1 Unpack the network interface card. Make sure that there is no missing or damaged part. œ¤Network Interface Card œ¤SyncThru CD-ROM and User's Guide 2 Turn your machine off and unplug the power cord and all of cables from the machine. 3 Remove - Samsung SCX-5315F | User Guide - Page 126
4 Pull the control board cover slightly towards you and slide it to the left. Remove the cover from the machine. 5 Remove the one screw from the port cover. A 6 Remove the port cover by using your finger or a screw driver from the machine. INSTALLING A NETWORK OPTION A.3 - Samsung SCX-5315F | User Guide - Page 127
into the slots on the port panel and replace the cover, as shown. Fasten the screw removed in Step 5 to secure the cover. 9 Insert the network interface card, ensuring that the network cable connector and LEDs on the card align with the port and LED slots. A.4 INSTALLING - Samsung SCX-5315F | User Guide - Page 128
10 Align the connector of the network interface card with the network card port on the control board and press the card until it is securely seated on the board. 11 Insert the teeth at the bottom with those on the machine. Fasten the six screws to secure the cover. INSTALLING A NETWORK OPTION A.5 - Samsung SCX-5315F | User Guide - Page 129
To use your machine as a network printer, you need to set up the desired network protocols on the machine. Setting protocols can be accomplished by using the supplied network programme. Please refer to SyncThru User's Guide. You can configure the basic network parameters through the control panel of - Samsung SCX-5315F | User Guide - Page 130
Network Interface Network Operating System Network Protocols Dynamic Addressing Server Requirements 10/100 Base-TX • Novell NetWare 3.x, 4.x, 5.x • Windows 95/98/Me/XP, Protocol Printing a Network Configuration Page The Network Configuration page shows you how the network card installed in - Samsung SCX-5315F | User Guide - Page 131
networks. There are two ways that your printer can be assigned a TCP/IP address, depending on your network: • Static Addressing: TCP/IP address is assigned manually for SCX-5115) to access the menu. 6 Press or until "IP ADDRESS" displays on the bottom line. 7 Press Mode/Enter (Enter for SCX-5115) - Samsung SCX-5315F | User Guide - Page 132
10 Enter a number between 0 and 255 for each byte and press Mode/Enter (Enter for SCX-5115). You can move between each . 2 Press or to display "NETWORK SETUP" on the top line. 3 Press or to display "CONFIG NETWORK" on the bottom line. 4 Press Mode/Enter (Enter for SCX-5115) to access the menu. - Samsung SCX-5315F | User Guide - Page 133
Configuring Netware On IPX/SPX protocol networks (for example, Novell NetWare), the format of network communication frames must be specified on the printer. In most cases, you can keep the default setting on "AUTO." However, you can manually set the frame type format if required. • AUTO (default): - Samsung SCX-5315F | User Guide - Page 134
return to Standby mode, press Stop/Clear. Resetting the Network Interface Card When your network interface card does not work properly, you need to reboot the card. A 1 Press Menu/Exit and then System Setup on the one- touch dial keypad. SCX-5115 users should press Menu and then Enter. 2 Press - Samsung SCX-5315F | User Guide - Page 135
the Samsung Network Printer port, you need to install the MFP driver on your system if it is not already installed. See page page 2.4. Installing Samsung Network Printer Port 1 Insert the installation CD supplied with your network interface card into the CD-ROM drive. 2 The language selection window - Samsung SCX-5315F | User Guide - Page 136
Network Printer Port To print to the Samsung Network Printer port, you need to select it in the printer driver. 1 From the Windows Start menu, selecting Settings and then Printer to open the Printer folder. In Windows XP, select Start and then Printers and Faxes. 2 Right-click on the Samsung SCX - Samsung SCX-5315F | User Guide - Page 137
MEMO A.14 INSTALLING A NETWORK OPTION - Samsung SCX-5315F | User Guide - Page 138
B SPECIFICATIONS This chapter includes: • General Specifications • Scanner and Copy Specifications • Printer Specifications • Facsimile Specifications (SCX-5315F only) - Samsung SCX-5315F | User Guide - Page 139
Printing method Laser scanning unit Scanning method Sheet-fed and Flat-bed CCD(charge coupled device) module Effective scanning 2-piece Toner/Drum cartridge system Compatibility Win 95, 98, 2000, NT 4.0, Win Me, Win XP PC Interface IEEE 1284 Parallel, USB, Optional Network Power requirements - Samsung SCX-5315F | User Guide - Page 140
Item Description LCD 16 Characters x 2 lines Toner cartridge life 6,000 pages @ IDC 5% coverage Drum cartridge life 15,000 pages @ IDC 5% coverage SET Dimension (WxDxH) 22.0 x 17.0 x 18.1 inches (560 x 433 x 459 mm) Weight Net: 22.5 Kg (including consumables) Gross: 26.5 - Samsung SCX-5315F | User Guide - Page 141
/A4 1200 dpi class PCL 6 Facsimile Specifications (SCX-5315F only) Item Printing method Compatibility Applicable line Data coding Modem speed Transmission speed Scanning speed Resolution Description Laser Scanning Unit ITU-T Group 3, ECM Public Switched Telephone Network(PSTN) or behind PABX MH - Samsung SCX-5315F | User Guide - Page 142
Item User Memory Halftone Auto dialer Description 4 MB (320 pages) 256 levels One-touch dialling (registration for 40 numbers) Speed dialling (registration for 80 numbers) B SPECIFICATIONS B.5 - Samsung SCX-5315F | User Guide - Page 143
7.2 load 4.4 drum clean 7.8 install 1.14 replace 7.8 E error 8.11 extension phone, connect 1.12 F fit to page print in copy mode 4.9 in print mode 5.8 J jam, clear document 8.2 paper 8.4 M MFP driver install 2.4 uninstall 2.8 N network interface card configure A.6 install A.2 network printer, setup - Samsung SCX-5315F | User Guide - Page 144
print 5.9 power save 1.22 printer driver install 2.4 uninstall 2.8 printer driver window 5.3 R resolution, print 5.6 S scan driver install 2.4 uninstall 2.8 scanner lock 1.2 SmarThru install 2.4 uninstall 2.10 software install 2.4 uninstall 2.12 T tel line, connect 1.11 toner cartridge install - Samsung SCX-5315F | User Guide - Page 145
SCX-5315F Digital Laser Facsimile SCX-5315F User's Guide Visit us at: Home www.samsungprinter.com JC68-01055ARev. 1.00 - Samsung SCX-5315F | User Guide - Page 146
options. Laser MFP User's Guide provides information you will need to set this machine and install the supplied software. And this guide provides all of the detailed instructions to use this machine as a printer, scanner and copier. You will also find information to maintain and troubleshoot your - Samsung SCX-5315F | User Guide - Page 147
2.2 How to Send a Fax 2.2 Adjusting Document Settings 2.4 Resolution 2.5 Contrast 2.6 Sending a Fax Automatically 2.6 Sending a Fax Manually 2.7 Confirming Transmission 2.8 Chapter 3: RECEIVING A FAX About Receive Mode 3.2 Loading Paper for Receiving Faxes 3.3 Receiving Automatically in FAX - Samsung SCX-5315F | User Guide - Page 148
Group Dialling (Multi-Address Transmission 4.9 Searching for a Number in the Memory 4.10 Searching Sequentially through the Memory ...... 4.10 Searching with a Particular First Letter 4.10 Chapter 5: OTHER WAYS TO FAX Redialling 5.2 Delayed Transmission 5.2 Memory Transmission 5.4 Priority - Samsung SCX-5315F | User Guide - Page 149
the Secure Receiving Mode 6.2 Printing Reports 6.3 Printing List 6.5 System Data Settings 6.5 Setting System Data Option 6.5 System Data Options 6.6 Using Remote Control Panel 6.8 Settings Tab 6.9 Advanced Tab 6.9 Phonebook Tab 6.10 Information Tab 6.10 Firmware Update 6.11 Clearing - Samsung SCX-5315F | User Guide - Page 150
1 GETTING STARTED The following topics are included: • Control Panel Functions • Setting the System ID • Setting the Date and Time • System Setup • Adjusting the Ringer Volume • Adjusting the Speaker Volume - Samsung SCX-5315F | User Guide - Page 151
26 Delay TX 07 27 Memory TX 08 28 Priority TX 09 29 Polling 10 30 Add/Cancel 11 31 Group Dial 12 13 32 33 Maintenance 14 34 Also 2 used to delete digits in the editing mode. F A X Used to store frequently dialled fax numbers and dial them using a 2-digit speed number. Also used to - Samsung SCX-5315F | User Guide - Page 152
jam, refer to the machine user's guide. Turns on when the toner or drum requires replacing. To replace the toner or drum cartridge, refer to the machine user's guide. (Error indicators) Turns on when Collation. The current copy job is printed using both sides of the paper. GETTING STARTED 1.3 - Samsung SCX-5315F | User Guide - Page 153
toner by using less toner to 7 print a document. Allows you to save power by reducing power S consumption when not printing. A V E Allows you to save paper by printing the zoom rate and to change the number of copies. 10 Selects either the fax or copy modes. Also confirms the selection - Samsung SCX-5315F | User Guide - Page 154
ID, containing your 1 telephone number and name (or company name), will be printed at the top of each page sent from your machine. 1 Press Menu/Exit at the end of the entries to delete the last digit or press Search/ Delete to delete all digits you entered. To correct errors at the beginning or - Samsung SCX-5315F | User Guide - Page 155
succession (e.g. SS, AA, 777), enter one digit, move the cursor by pressing the button, and enter the next digit. If you want to insert a space in 1.7. 2 To enter additional letters, repeat Step 1. If the next letter is printed on the same button, move the cursor by pressing and then press the button - Samsung SCX-5315F | User Guide - Page 156
Names If you make a mistake while entering a number or name, press at the end of the entries to delete the last digit or press Search/Delete to delete all digits you have entered. Then enter the correct numbers or characters. To correct errors at the beginning or in the middle of an - Samsung SCX-5315F | User Guide - Page 157
). The time and date are printed on all faxes you send. Note: If power to the machine is cut off for over 30 minutes, when power is restored, the machine prompts mode) = 00 ~ 59 You can also use or to move the cursor under the digit you want to correct, and enter a new number. 3 To select AM or PM - Samsung SCX-5315F | User Guide - Page 158
, you can change the following: Option PREFIX DIAL NO. Secure Receive RINGER VOLUME ALARM SOUND Description You can set the prefix dial number up to 5 digits. This dial number is to dial first before any autodial number is started. It is useful to access PABX exchange. You can keep your received - Samsung SCX-5315F | User Guide - Page 159
desired print quality. The scan lamp under the document glass automatically turns off when it is not in actual use to reduce power network printer by installing an optional network interface card. This menu allows you to configure the network parameters. For further details, see the MFP user's guide - Samsung SCX-5315F | User Guide - Page 160
see "RINGER VOLUME" on the upper line of the display. 3 Press or until you see the desired loudness on the lower line of the display. 10 levels are available. You'll hear the selected volume and the display will show the level. Setting to the left end turns the ringer off - Samsung SCX-5315F | User Guide - Page 161
Adjusting the Speaker Volume 1 Make sure that the display shows date and time (Fax Standby mode). If not, press Mode/Enter to switch to the Fax mode. 2 Press On Hook Dial. You'll hear dial tone. 3 Press or repeatedly until you find the desired loudness. The display shows the current volume level. 4 - Samsung SCX-5315F | User Guide - Page 162
2 SENDING A FAX The following topics are included: • Preparing Documents for Faxing • How to Send a Fax • Adjusting Document Settings • Sending a Fax Automatically • Sending a Fax Manually • Confirming Transmission - Samsung SCX-5315F | User Guide - Page 163
document glass only. How to Send a Fax To fax a document using the Automatic Document Feeder (ADF): 1 Adjust the document guide on the ADF to match the width of the document. Document guides Place the document face up. 2 Slide the document face up into the ADF. You can insert up to 30 sheets - Samsung SCX-5315F | User Guide - Page 164
3 Make sure that the machine is in the Fax mode. If necessary, press Mode/Enter to change the mode into the Fax mode. In the Fax mode, the display shows: 4 You can adjust the following document settings to suit your fax needs (see page 2.4): •Resolution - to select resolution. •Contrast - to - Samsung SCX-5315F | User Guide - Page 165
. •Contrast - to adjust contrast. 5 Use the number keypad to dial the number of the remote fax machine. 6 Press Copy/Start or Mode/Enter. The document scans into the memory. The display asks if you want to send another page. Change the page and press "1.YES" else select "2.NO". If "1.YES" is - Samsung SCX-5315F | User Guide - Page 166
containing small characters or thin lines, or for sending documents printed using a dot-matrix printer. SUPER FINE Documents containing extremely fine detail. Super Fine mode is enabled only if the remote machine also supports Super Fine resolution. (See the Note below.) PHOTO Documents - Samsung SCX-5315F | User Guide - Page 167
keys, you can choose from 5 contrast levels. Set to darker mode when the document contains faint pencil markings or light print. Set to lighter mode for dark print. 3 When the desired level is displayed, press Mode/Enter to save the selection. Sending a Fax Automatically 1 Feed the document(s) face - Samsung SCX-5315F | User Guide - Page 168
on the top line after the document is scanned into the memory. If you have the next page, remove the scanned page and load the next page on the Stop/Clear at any time during the transmission. Sending a Fax Manually Manual sending allows you to talk to the other party before sending the document. - Samsung SCX-5315F | User Guide - Page 169
manually, their meanings, see page Chapter 8 "Troubleshooting" in the user's guide supplied with the machine. If you receive an error message, press Stop/Clear to clear the message and try to send the document again. You can set your machine to print - Samsung SCX-5315F | User Guide - Page 170
: • About Receive Mode • Loading Paper for Receiving Faxes • Receiving Automatically in FAX Mode • Receiving in TEL/FAX Mode • Receiving Automatically in ANS/FAX Mode • Receiving Manually in TEL Mode • Receiving Manually Using an Extension Telephone • Receiving Fax in the Memory - Samsung SCX-5315F | User Guide - Page 171
About Receive Mode Your machine has four reception modes: • In FAX mode, the machine answers an incoming call and immediately goes into fax receive mode. • In TEL mode, when your machine sounds a incoming call, you can receive a fax by picking up the handset of the extension phone and then pressing - Samsung SCX-5315F | User Guide - Page 172
the paper input tray are the same whether you are printing, faxing, or copying, except that faxes can only be printed on letter-, A4-, or legal-sized paper. For details on loading paper, refer to the Multifunctional Product User's Guide supplied with the machine. NOTE: After loading paper, you must - Samsung SCX-5315F | User Guide - Page 173
Receiving Automatically in FAX Mode Your machine is preset to FAX mode at the factory. If you have changed the fax mode, take the following steps to receive faxes automatically: 1 Press Receive Mode repeatedly until you see "FAX" on the lower line of the display. You can also use the navigation keys - Samsung SCX-5315F | User Guide - Page 174
to your machine, you must switch off the answering machine, or the outgoing message from the answering machine will interrupt your phone conversation. Receiving Manually in TEL Mode 1 Press Receive Mode repeatedly until you see 'TEL' on the lower line of the display. You can also use the navigation - Samsung SCX-5315F | User Guide - Page 175
and returns to Standby mode when the reception is complete. Receiving Manually Using an Extension Telephone This features works best when you are using faxes while you are making copies or printing. If you receive a fax while you are copying or printing, your machine stores the incoming fax in - Samsung SCX-5315F | User Guide - Page 176
4 AUTOMATIC DIALLING The following topics are included: • One-Touch Dialling • Speed Dialling • Group Dialling • Searching for a Number in the Memory - Samsung SCX-5315F | User Guide - Page 177
One-Touch Dialling The 20 one-touch buttons on the control panel lets you store frequently used fax numbers and automatically dial a number with one touch of a button. Using the Shift button, you can store up to 40 fax numbers on the one-touch buttons. Storing a Number for One-Touch Dialling 1 Press - Samsung SCX-5315F | User Guide - Page 178
your fax needs if necessary. For details, see "Adjusting Document Settings" on page 2.4. 4 Press the one-touch button where you stored a number. 5 The document scans into the memory. If the document is loaded on the document glass, the display asks if you want to send another page. Select "1.YES" to - Samsung SCX-5315F | User Guide - Page 179
Using the One-Touch Sheet A one-touch sheet is included with your machine. Once you store numbers in one-touch dial buttons, make a note of the numbers on the sheet to remind you which number is stored in each button. 1 Remove the clear cover and label. 2 Write information on the sheet and replace - Samsung SCX-5315F | User Guide - Page 180
Dialling You can store up to 80 numbers in one or 2-digit Speed Dial locations (1-80). Storing a Number for Speed Dialling numbers, press at the end of the entries to delete the last digit or press Search/ Delete to delete all digits you entered. To correct errors at the beginning or in the middle - Samsung SCX-5315F | User Guide - Page 181
4 Press Speed/Status on the control panel. 5 Enter the speed dial number. 6 When the desired number appears on the display, press Mode/Enter. 7 The document scans into the memory. If the document is loaded on the document glass, the display asks if you want to send another page. Select "1.YES" to - Samsung SCX-5315F | User Guide - Page 182
can create a group of these destinations and set them under a 2-digit group dial location. This enables you to use a single speed dialling a different number. 4 The LCD display asks you to enter a one-touch or 2-digit speed dial number. Press the one-touch button or speed dial number you want to - Samsung SCX-5315F | User Guide - Page 183
9 If you want to assign another group, repeat from step 3. Or To return to Standby mode, press Menu/Exit or Stop/Clear. NOTE: You cannot include one group dial number in another group dial number. Editing Group Dial Numbers You can delete a specific one-touch or speed dial number from a selected - Samsung SCX-5315F | User Guide - Page 184
dial number. You can use only one group number for one operation. Then continue the procedure to complete the desired operation. Your machine automatically scans the document loaded in the document tray into the memory, and the machine will dial each of the numbers included in the Group. 4 AUTOMATIC - Samsung SCX-5315F | User Guide - Page 185
Number in the Memory There are two ways to search for a number in the memory. You can either scan from A to Z sequentially. Or you can search using the first letter of the name associated with the you want appears on the LCD display, press Copy/Start or Mode/Enter to dial. 4.10 AUTOMATIC DIALLING - Samsung SCX-5315F | User Guide - Page 186
5 OTHER WAYS TO FAX The following topics are included: • Redialling • Delayed Transmission • Memory Transmission • Priority Transmission • Polling • Adding Documents To a Scheduled Operation • Cancelling a Scheduled Operation • Monitoring a Dual Job Status • Sending a Flash/Recall/R - Samsung SCX-5315F | User Guide - Page 187
for about 2 seconds. The Redial memory in your machine retains the last 10 numbers called. If you have dialled the same number multiple times, the machine begins to send. NOTE: For documents scanned from the document glass, the display asks if you want to scan another page. Select "1.YES" to add - Samsung SCX-5315F | User Guide - Page 188
2 Adjust the document settings if necessary. For details, see "Adjusting Document Settings" on page 2.4. 3 Press Menu/Exit and then Delay TX on the one-touch dial keypad. 4 Enter the number of the remote machine using the number keypad. To enter the number, you can also press a one-touch button, or - Samsung SCX-5315F | User Guide - Page 189
10 Enter the time by using the number keypad. To select AM or PM the following day. 11 Press Mode/Enter when the start time displays correctly. 12 The document will be scanned into the memory before transmission. The display shows the remaining memory capacity and the number of pages being stored - Samsung SCX-5315F | User Guide - Page 190
for another fax number. 7 To send to one location or when you complete the last fax 5 number setting, select "2.NO". 8 The document will be scanned into the memory before transmission. The display shows the remaining memory capacity and the number of pages being stored in the memory. NOTE: For - Samsung SCX-5315F | User Guide - Page 191
to enter a name using the number keypad, see "Entering Characters Using the Number Keypad" on page 1.6. 7 Press Mode/Enter. The document will be scanned into the memory before transmission. The display shows the remaining memory capacity and the number of pages being stored in the memory. 5.6 OTHER - Samsung SCX-5315F | User Guide - Page 192
from the document glass, the display asks if you want to scan another page. Select "1.YES" to add another page, otherwise select "2.NO". 8 The machine shows the number being dialled, and begins sending the document. Polling What - Samsung SCX-5315F | User Guide - Page 193
poll code. 5 If you want to use a poll code, enter the desired 4-digit code (except for 0000), and press Mode/Enter. Or If you do not want to the memory capacity remaining. NOTE: For documents scanned from the document glass, the display asks if you want to scan another page. Select "1.YES" to add - Samsung SCX-5315F | User Guide - Page 194
Delay RX Poll You can set your machine to automatically receive documents from an unattended remote fax machine now, or at a later time. This feature permits unattended polling in the evening hours when telephone rates are lower. NOTE: The remote machine must be ready for polling. 1 Make sure that - Samsung SCX-5315F | User Guide - Page 195
day. Or To call the remote fax machine(s) immediately, skip over this step. 10 Press Mode/Enter when the time appears correctly in the display or without entering the time. The display asks you to enter a 4-digit code. Poll code "0000" represents no code. 11 If the remote machine is secured - Samsung SCX-5315F | User Guide - Page 196
the memory, and the display shows the remaining memory capacity and the number of pages. NOTE: For documents scanned from the document glass, the display asks if you want to scan another page. Select "1.YES" to add another page, otherwise select "2.NO". 6 After storing, the product shows the total - Samsung SCX-5315F | User Guide - Page 197
than one function simultaneously. For example, you can: • Receive a fax into the memory while making a copy. • Store a fax document for later transmission while printing an incoming fax. While the machine performs dual tasks, press Speed/Status to see the current status on the display of the other - Samsung SCX-5315F | User Guide - Page 198
Sending a Flash/Recall/R Some special phone services require a switch-hook signal for proper operation. For Flash/Recall/R again to talk to the first caller again. NOTE: If you do not have a special service that uses the switchhook signal, do not press Flash/Recall/R during a call. If you do, you - Samsung SCX-5315F | User Guide - Page 199
MEMO 5.14 OTHER WAYS TO FAX - Samsung SCX-5315F | User Guide - Page 200
6 ADDITIONAL FEATURES The following topics are included: • Using the Secure Receiving Mode • Printing Reports • System Data Settings • Using Remote Control Panel • Clearing Memory - Samsung SCX-5315F | User Guide - Page 201
to let you know that there is a fax stored. To print received documents: 1 Access the "SECURE RECEIVE" menu by following the steps 1 and 2 above. 2 Press or to display "PRINT" on the bottom line and press Mode/Enter. 3 Enter the four-digit passcode and pressMode/Enter. The faxes stored in the memory - Samsung SCX-5315F | User Guide - Page 202
Mode/Enter. 3 Enter the four-digit passcode and press Mode/Enter. The mode is deactivated and the faxes stored in the memory are printed all together. 4 To return to during transmission (ERR). • No report printed at all (OFF). You can print this report manually at any time you want. Schedule Job - Samsung SCX-5315F | User Guide - Page 203
quick reference guide. NOTE: The list you have set to print out automatically will not print out when printed automatically after sending documents or receiving documents from more than one location. Power Failure Report This report is printed out automatically when power is restored after a power - Samsung SCX-5315F | User Guide - Page 204
: Reception Journal • Help List: Help List 2 The selected list prints out. System Data Settings Your machine has various user-selectable system data them. To find out how the options are currently set, print the System Data list. For details on printing the list, see "System Data List" on page 6.4. - Samsung SCX-5315F | User Guide - Page 205
display prompts you to choose the length of time the machine waits after a job is printed before it switches to a reduced power state. Select OFF to turn this feature off. It keeps the machine ready to print with minimum warm-up time. Error Correction Mode compensates for poor line quality. Options - Samsung SCX-5315F | User Guide - Page 206
reduce the document to fit onto one page, the document is divided and printed in actual size on two or more pages. DISCARD SIZE When receiving a SEND FROM MEMORY When enabled, all fax transmission documents are automatically scanned into the memory. It will not be necessary to wait until - Samsung SCX-5315F | User Guide - Page 207
Panel utility is automatically installed. For information on installing the Samsung software, please refer to the Samsung SCX-5x15 Series User's Guide. To open the Remote Control Panel, take the following steps: 1 Start your Windows. 2 Click the Start button on your desktop computer. 3 From Programs - Samsung SCX-5315F | User Guide - Page 208
fax system data settings. Reads the current settings in your machine then refreshes the Remote Control Panel with the machine's current setting. Downloads the settings made in Remote Control Panel to your machine. For details on the system data setting options, see page 6.6. Advanced Tab - Samsung SCX-5315F | User Guide - Page 209
entries from the machine to the Remote Control Panel. Allows you to download the Phonebook entries from the Remote Control Panel to the machine. tab to view the software version information and various counters which allows you to check how manypages have been scanned or printed as well as how - Samsung SCX-5315F | User Guide - Page 210
Firmware Update Click the Firmware Update tab to update the firmware of your machine. This feature should only be used by an authorised technician. Please consult with the point of purchase or a locally authorised dealer. 6 ADDITIONAL FEATURES 6.11 - Samsung SCX-5315F | User Guide - Page 211
Clearing Memory You can selectively clear information stored in your machine's memory. 1 Press Menu/Exit then Memory Clear on the one-touch dial keypad. 2 Press or until you see the item you want to clear. • SYSTEM ID: your fax number and name are cleared from the machine's memory. • SYSTEM DATA: - Samsung SCX-5315F | User Guide - Page 212
3.4 in memory 3.6 in secure receiving mode 6.2 in TEL mode 3.5 in TEL/FAX mode 3.4 using extension phone 3.6 receive modes 3.2 redial, last number 5.2 remote control panel 6.8 reports, print 6.2 INDEX I - Samsung SCX-5315F | User Guide - Page 213
resolution, set 2.5 S search, a number 4.10 secure receiving mode, use 6.2 send a fax automatically 2.6 manually 2.7 speed dial dialling 4.6 storing 4.5 system data change 6.5 options 6.6 system ID, set 1.5 system setup change 1.11 options 1.9 V volume, adjust ringer 1.11 speaker 1.12 II INDEX - Samsung SCX-5315F | User Guide - Page 214
#1934. Q;ECK B:@@ "66="3 5& 4:$6@"7.R " S3=$$ MenuA 8
-
 1
1 -
 2
2 -
 3
3 -
 4
4 -
 5
5 -
 6
6 -
 7
7 -
8
-
9
-
10
-
11
-
12
-
13
-
14
-
15
-
16
-
17
-
18
-
19
-
20
-
21
-
22
-
23
-
24
-
25
-
26
-
27
-
28
-
29
-
30
-
31
-
32
-
33
-
34
-
35
-
36
-
37
-
38
-
39
-
40
-
41
-
42
-
43
-
44
-
45
-
46
-
47
-
48
-
49
-
50
-
51
-
52
-
53
-
54
-
55
-
56
-
57
-
58
-
59
-
60
-
61
-
62
-
63
-
64
-
65
-
66
-
67
-
68
-
69
-
70
-
71
-
72
-
73
-
74
-
75
-
76
-
77
-
78
-
79
-
80
-
81
-
82
-
83
-
84
-
85
-
86
-
87
-
88
-
89
-
90
-
91
-
92
-
93
-
94
-
95
-
96
-
97
-
98
-
99
-
100
-
101
-
102
-
103
-
104
-
105
-
106
-
107
-
108
-
109
-
110
-
111
-
112
-
113
-
114
-
115
-
116
-
117
-
118
-
119
-
120
-
121
-
122
-
123
-
124
-
125
-
126
-
127
-
128
-
129
-
130
-
131
-
132
-
133
-
134
-
135
-
136
-
137
-
138
-
139
-
140
-
141
-
142
-
143
-
144
-
145
-
146
-
147
-
148
-
149
-
150
-
151
-
152
-
153
-
154
-
155
-
156
-
157
-
158
-
159
-
160
-
161
-
162
-
163
-
164
-
165
-
166
-
167
-
168
-
169
-
170
-
171
-
172
-
173
-
174
-
175
-
176
-
177
-
178
-
179
-
180
-
181
-
182
-
183
-
184
-
185
-
186
-
187
-
188
-
189
-
190
-
191
-
192
-
193
-
194
-
195
-
196
-
197
-
198
-
199
-
200
-
201
-
202
-
203
-
204
-
205
-
206
-
207
-
208
-
209
-
210
-
211
-
212
-
213
-
214
 |
 |
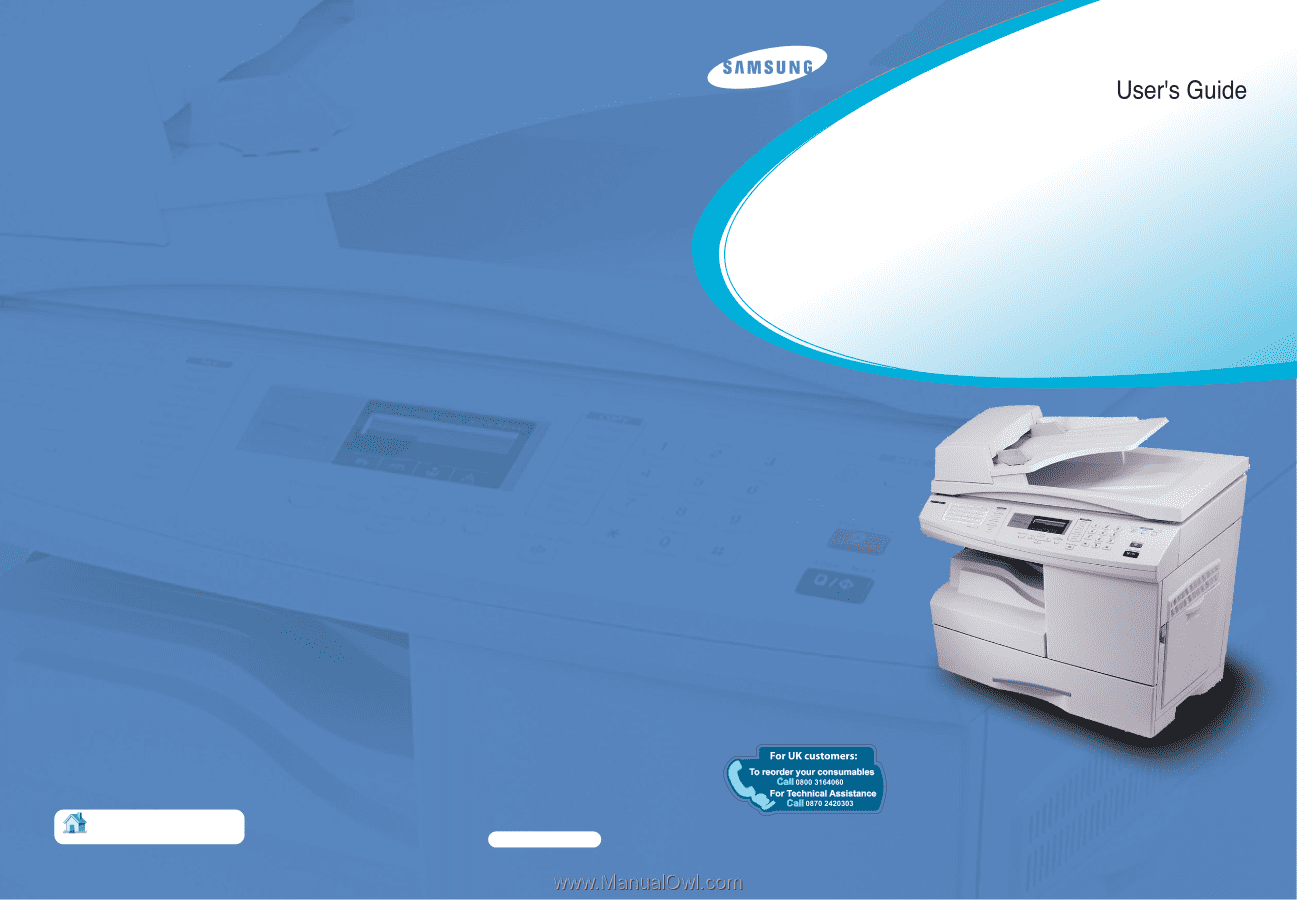
Digital Laser MFP
SCX-5315F
SCX-5115
SCX-5315F/5115 User’s Guide
Home
Visit us at:
www.samsungprinter.com
JC68-01054ARev. 1.00