Samsung SGH-X105 User Manual (user Manual) (ver.1.0) (English) - Page 42
Draft, Write New
 |
View all Samsung SGH-X105 manuals
Add to My Manuals
Save this manual to your list of manuals |
Page 42 highlights
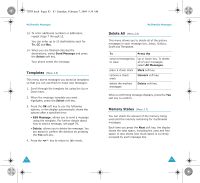
X105.book Pages 78 - 79 Saturday, February 7, 2004 9:34 AM Multimedia Messages Draft (Menu 2.3) After creating a picture message, you can store it in this message box for later sending. Or, if you are interrupted while making a message by an incoming call or message, your message is automatically saved in this box. For further details about viewing a message, see "Outbox" on page 77. Write New (Menu 2.4) This menu option allows you to create a new picture message and then send it to multiple destinations. Creating and Sending a Picture Message 1. Enter the subject of your message and press the OK soft key. For further details about entering characters, see page 42. 2. When Add Here highlights, press the Options soft key and add the message contents using one of the following options: • Add Text: Enter the message text and press the OK soft key. • Add Picture: allows you to add a picture stored in the Images (Menu 8.4). Choose a picture and press the Select soft key. You may Multimedia Messages not be able to add some downloaded images if they are not in the correct format. • Add Sound: allows you to add a sound. You can record a new voice memo or use a sound stored in the Sounds menu (Menu 8.3). You may not be able to add some downloaded images if they are not in the correct format. • Send: allows you to send the message. Use this option when you finish creating the message. This option is activated after you add a content to the message. • Save: saves the message in the Draft (Menu 2.3) or Templates (Menu 2.5) box for later use. This option is activated after you add a content to the message. • Settings: allows you to change the message settings. For further details about each setting option, see page 83. After changing, you need to press the soft key or the key to go to back to the options screen. • Add Destination: allows you to enter destination addresses. See steps 7 to 10. After. adding, you need to press the soft key or the key to go to back to the options screen. • Preview: shows your message as it will display on the recipient's phone. Note: You can use the adding options only one time for one page. 3. The added content displays. 4. Repeat steps 2 and 3 until you finish creating your message. 78 79
-
 1
1 -
2
-
3
-
4
-
5
-
6
-
7
-
8
-
9
-
10
-
11
-
12
-
13
-
14
-
15
-
16
-
17
-
18
-
19
-
20
-
21
-
22
-
23
-
24
-
25
-
26
-
27
-
28
-
29
-
30
-
31
-
32
-
33
-
34
-
35
-
36
-
 37
37 -
 38
38 -
 39
39 -
 40
40 -
 41
41 -
 42
42 -
 43
43 -
 44
44 -
 45
45 -
 46
46 -
 47
47 -
48
-
49
-
50
-
51
-
52
-
53
-
54
-
55
-
56
-
57
-
58
-
59
-
60
-
61
-
62
-
63
-
64
-
65
-
66
-
67
-
68
-
69
-
70
-
71
-
72
-
73
-
74
-
75
-
76
-
77
-
78
-
79
-
80
-
81
-
82
 |
 |
