Samsung SP-F10M User Manual - Page 56
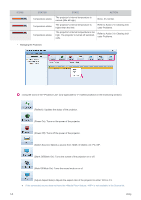
New Schedule, Press the <New> button. The New Schedule screen appears.
 |
View all Samsung SP-F10M manuals
Add to My Manuals
Save this manual to your list of manuals |
Page 56 highlights
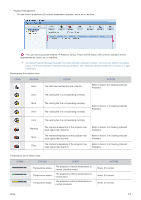
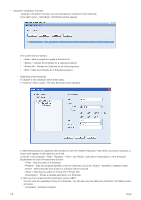
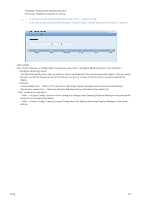
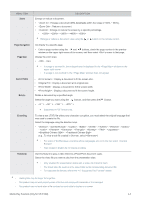
• Using the Function Using the function, you can manage your projectors more efficiently. If you select →, the following window appears. The screen has four buttons: • : Adds a projector to make a Schedule for. • : Deletes the Schedule for a selected projector. • : Deletes the Schedule for all of the projectors. • : Edits the Schedule for a Schedule projector. • Registering a New Schedule To register a new schedule, follow these steps: 1. Press the button. The New Schedule screen appears. 2. Select the projectors to apply the new schedule to from the field. When you select a projector, a check mark appears in the check box to its left. 3. Set the , , , and , and enter a of the Schedule. Explanations for each of these terms is below. - : Sets the name of a Schedule. - : Sets the schedule repetition (- Executes only once, - Specifies a repetition date). - : Determines the time at which a schedule will be executed. -: Sets Source switch or / - : Shows a detailed description of a Schedule. 4. After you have entered all the information, press . You can view the registration history of a Schedule. You can also view the status of a Schedule. The Status codes are below: -: Schedule complete. 3-6 Using
-
 1
1 -
2
-
3
-
4
-
5
-
6
-
7
-
8
-
9
-
10
-
11
-
12
-
13
-
14
-
15
-
16
-
17
-
18
-
19
-
20
-
21
-
22
-
23
-
24
-
25
-
26
-
27
-
28
-
29
-
30
-
31
-
32
-
33
-
34
-
35
-
36
-
37
-
38
-
39
-
40
-
41
-
42
-
43
-
44
-
45
-
46
-
47
-
48
-
49
-
50
-
 51
51 -
 52
52 -
 53
53 -
 54
54 -
 55
55 -
 56
56 -
 57
57 -
 58
58 -
 59
59 -
 60
60 -
 61
61 -
62
-
63
-
64
-
65
-
66
-
67
-
68
-
69
-
70
-
71
-
72
-
73
-
74
-
75
-
76
-
77
-
78
-
79
-
80
-
81
-
82
-
83
-
84
-
85
-
86
-
87
-
88
-
89
-
90
-
91
-
92
 |
 |
