Samsung YP-700H User Manual (user Manual) (ver.1.0) (English) - Page 22
Manual Installation of USB Driver - drivers
 |
View all Samsung YP-700H manuals
Add to My Manuals
Save this manual to your list of manuals |
Page 22 highlights
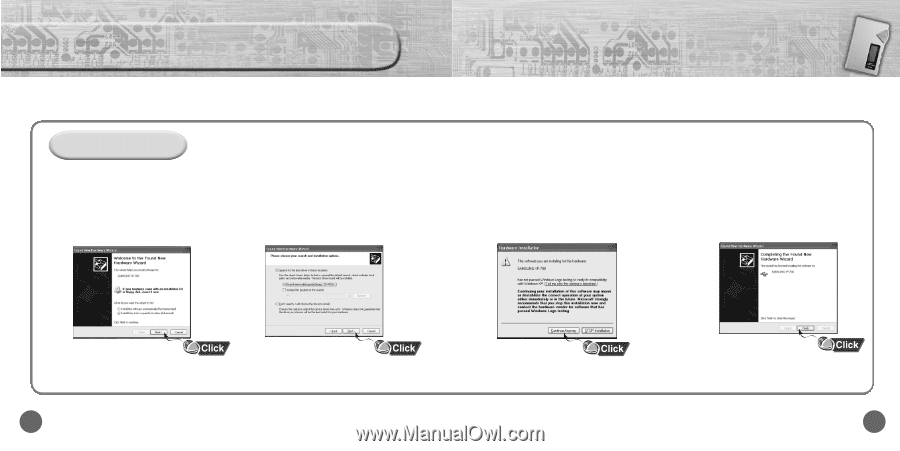
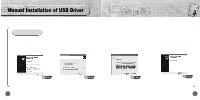
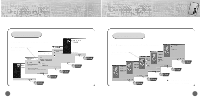
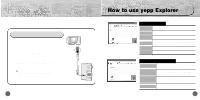
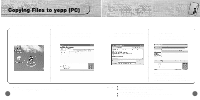
Manual Installation of USB Driver If yepp does not communicate with PC (USB driver can't be installed automatically), turn on the power of yepp and connect yepp to PC, install USB driver manually (How to check USB driver : refer to page 41) In Windows XP 1 Connect yepp to PC. The window shown below appears. Select [Install from a list or specific location (Advanced)] and click [Next]. 2 Insert Installation CD into CD-ROM drive. Select [Search removable media (floppy, CD-ROM...)] and click [Next]. ➡ Continued... 3 Sometimes a POP-UP window including the attention shown below appears. This software does not impair or destabilize the correct operation of your system. Click [Continue Anyway] 4 When Installation is completed, click [Finish]. q If a message asking for the location of the source driver pops up, select the location and execute continuously. 42 43
-
 1
1 -
2
-
3
-
4
-
5
-
6
-
7
-
8
-
9
-
10
-
11
-
12
-
13
-
14
-
15
-
16
-
 17
17 -
 18
18 -
 19
19 -
 20
20 -
 21
21 -
 22
22 -
 23
23 -
 24
24 -
 25
25 -
 26
26 -
 27
27 -
28
-
29
-
30
-
31
-
32
-
33
-
34
-
35
-
36
-
37
 |
 |