Sanyo ICR-B50 Owners Manual - Page 10
Recording - memory full
 |
View all Sanyo ICR-B50 manuals
Add to My Manuals
Save this manual to your list of manuals |
Page 10 highlights
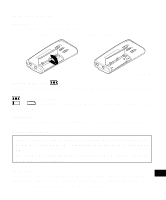
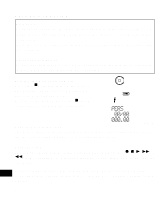
RECORDING 1. Press the n button to turn the power on. 2. Set the REC MODE switch (back of the unit) to select the desired recording mode. DIC (Dictating): " " appears. CONF (Conference): " " appears. LECT (Lecture): " " appears. Note: If an external microphone (not supplied) is connected, the recording mode cannot be changed. " " appears. 3. Select the desired folder name, VAS and recording time modes. (See "SELECTING THE MENU MODE".) 4. Press the m button (red). Recording starts with new file number. Example: The display appears as shown below. (Red) Fig. 9 Folder name Current file number Total file number Elapsed recording time Fig. 10 5. Press the n button to stop the recording at any time. Note: • The unit can record up to file number 99 for each folder (except ALARM folder). • When the recording time is full, "MEMORY FULL" appears briefly. In this case, erase the unnecessary file. 9
-
 1
1 -
2
-
3
-
4
-
 5
5 -
 6
6 -
 7
7 -
 8
8 -
 9
9 -
 10
10 -
 11
11 -
 12
12 -
 13
13 -
 14
14 -
 15
15 -
16
-
17
-
18
-
19
-
20
-
21
-
22
-
23
-
24
-
25
-
26
-
27
-
28
-
29
-
30
-
31
-
32
-
33
-
34
 |
 |
