Sanyo PLC-XR70N Installation - Page 4
Joint top and Bottom Cabinets
 |
View all Sanyo PLC-XR70N manuals
Add to My Manuals
Save this manual to your list of manuals |
Page 4 highlights
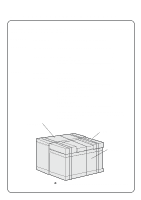
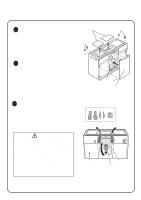
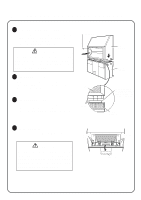
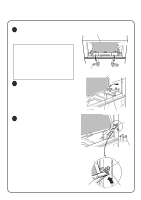
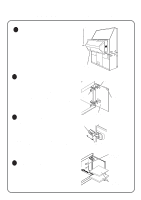
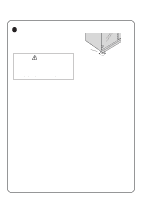
3 J0INT TOP AND BOTTOM CABINETS 1 Joint Top and Bottom Cabinets Lift the Top Cabinet and put it on the Bottom Cabinet. When setting the Top Cabinet, be sure the frame of the Bottom Cabinet is fitted into the frame of the Top Cabinet completely. CAUTION THE TOP CABINET OF THIS PROJECTOR HAS ITS GRAVITY AT THE SCREEN SIDE. WHEN LIFTING THE TOP CABINET, BE CAREFUL NOT TO DROP. 2 Remove Back Cover Remove the 14 Screws and the Back Cover. Keep the screws and Back Cover. All the installations are finished, all those parts should be replaced. 3 Remove Cover Plate Remove the Cover Plate on the lower part of the Top Cabinet. Keep the Cover Plate for later use. Replace this plate when the appliance need to be transported. Screws (14 pcs) Top Cabinet Bottom Cabinet Top Cabinet Be sure the frame of the Bottom Cabinet is fitted into the frame of the Top Cabinet completely. Frame Bottom Cabinet 4 Fix the Cabinets Joint the Top and the Bottom Cabinets with the 4 Joint Bolts securely. CAUTION BE SURE TO FIX THE CABINETS WITH JOINT BOLTS. IF THE TOP AND THE BOTTOM CABINETS ARE NOT FIXED PROPERLY, THE TOP CABINET MAY BE DROPPED OR FALL DOWN. Joint Bolts (4 pcs) Joint Bolts (4 pcs) Cover Plate
-
 1
1 -
 2
2 -
 3
3 -
 4
4 -
 5
5 -
 6
6 -
 7
7 -
 8
8
 |
 |
