Sanyo PLC-XR70N Installation - Page 6
Adjust Projection Mirror
 |
View all Sanyo PLC-XR70N manuals
Add to My Manuals
Save this manual to your list of manuals |
Page 6 highlights
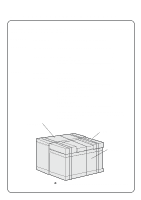
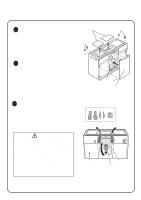
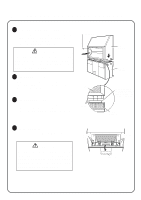
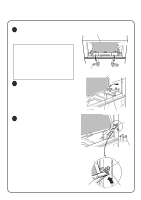
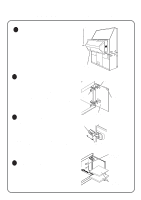
5 ADJUST PROJECTION MIRROR When the figure of the projection image does not match the Projection Screen, adjust the Projection Mirror. If the figure fits the Projection Screen precisely, skip the steps 2, 3 and 4 and replace the Back Cover. 1 Check Projection Image Connect the projector to the AC outlet, and turn the projector on. Connect the video output equipment to the projector. Project the image of cross-hatch or circles to check whether the picutre is displayed fully on the Projection Screen and is not distorted. (Refer to the Owner's Manual for operation.) If the figure is distorted, adjust the Projection Mirror following the steps 2 to 4 below. If the picture is displayed properly, adjustment of the Mirror is not required. Skip the steps below and replace the back cover. Mirror Holder Screw(B) 2 Adjust Projection Mirror Adjust the Projection Mirror by turning the Adjusting Nuts. Move the Projection Mirror up or down by turning the Adjusting Nuts on the both sides of the Projection Mirror. Adjust Screw(B) if it required. Refer to the figure on the right for the image movement with the Adjusting Nut. 3 Fix Projection Mirror Fix the Projection Mirror where the picture is displayed properly. Fix the Screw(B) securely. When fixing the Screw(B) the figure may be distorted again. When it should happen, readjust the Mirror following the steps 2 to 4. Lower the Mirror Holder. Lift the Mirror Holder. Mirror Arm Adjusting Nut Turn Adjusting Nuts to adjust the screen image. When turning the Adjusting Nuts on both sides to the right, the lower part of the image becomes narrow. 4 Turn the projector off Turn off the projector and disconnect it from the AC outlet. CAUTION DO NOT STARE DIRECTLY INTO THE LENS. EYE DAMAGE COULD RESULT. WHEN ADJUSTING THE MIRROR, NEVER TOUCH THE PARTS EXCEPT THE MIRROR. IT MAY RESULT IN ELECTRICAL SHOCK. When turning the Adjusting Nuts on both sides to the left, the lower part of the image is stretched. When turning the Adjusting Nuts on one side to the left or the right, one side of the lower part of the figure is shortened or stretched.
-
 1
1 -
 2
2 -
 3
3 -
 4
4 -
 5
5 -
 6
6 -
 7
7 -
 8
8
 |
 |
