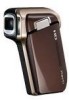
Sanyo VPC HD700 Instruction Manual, VPC-HD700EX - Page 9
Copy data from your camera to the computer
 |
UPC - 086483069307
View all Sanyo VPC HD700 manuals
Add to My Manuals
Save this manual to your list of manuals |
Page 9 highlights
3 In the installation window, click on [Finish]. h The installation window closes. h Remove the DVD-ROM from your computer's DVD drive. h When the installation window closes, a dialog box to connect to the website introducing Kodak's online service appears. Check the [No thanks !] option button, and then click on the [OK] button. Copy data from your camera to the computer Connect your camera to a computer, and copy the desired data to the computer. 1 Turn on the computer, and use the supplied dedicated USB interface cable to connect your camera to the computer. h Connect the cable between the camera's USB/AV terminal and the computer's USB connector. 2 Turn on the camera (page 39). h The USB Connection Screen appears on the camera's monitor. USB CONNECTION COMPUTER PRINTER CANCEL CANCEL OK To power outlet To USB terminal on the docking station To USB connector on the computer Supplied dedicated USB interface cable i Insert the plug with the [n] mark facing up. English viii
-
 1
1 -
2
-
3
-
 4
4 -
 5
5 -
 6
6 -
 7
7 -
 8
8 -
 9
9 -
 10
10 -
 11
11 -
 12
12 -
 13
13 -
 14
14 -
15
-
16
-
17
-
18
-
19
-
20
-
21
-
22
-
23
-
24
-
25
-
26
-
27
-
28
-
29
-
30
-
31
-
32
-
33
-
34
-
35
-
36
-
37
-
38
-
39
-
40
-
41
-
42
-
43
-
44
-
45
-
46
-
47
-
48
-
49
-
50
-
51
-
52
-
53
-
54
-
55
-
56
-
57
-
58
-
59
-
60
-
61
-
62
-
63
-
64
-
65
-
66
-
67
-
68
-
69
-
70
-
71
-
72
-
73
-
74
-
75
-
76
-
77
-
78
-
79
-
80
-
81
-
82
-
83
-
84
-
85
-
86
-
87
-
88
-
89
-
90
-
91
-
92
-
93
-
94
-
95
-
96
-
97
-
98
-
99
-
100
-
101
-
102
-
103
-
104
-
105
-
106
-
107
-
108
-
109
-
110
-
111
-
112
-
113
-
114
-
115
-
116
-
117
-
118
-
119
-
120
-
121
-
122
-
123
-
124
-
125
-
126
-
127
-
128
-
129
-
130
-
131
-
132
-
133
-
134
-
135
-
136
-
137
-
138
-
139
-
140
-
141
-
142
-
143
-
144
-
145
-
146
-
147
-
148
-
149
-
150
-
151
-
152
-
153
-
154
-
155
-
156
-
157
-
158
-
159
-
160
-
161
-
162
-
163
-
164
-
165
-
166
-
167
-
168
-
169
-
170
-
171
-
172
-
173
-
174
-
175
-
176
-
177
-
178
-
179
-
180
-
181
-
182
-
183
-
184
-
185
-
186
-
187
-
188
-
189
-
190
-
191
-
192
-
193
-
194
-
195
-
196
-
197
-
198
-
199
-
200
-
201
-
202
-
203
-
204
-
205
-
206
-
207
-
208
-
209
-
210
-
211
-
212
-
213
-
214
-
215
-
216
-
217
-
218
-
219
-
220
-
221
-
222
-
223
-
224
-
225
-
226
-
227
-
228
-
229
-
230
-
231
-
232
-
233
-
234
-
235
-
236
-
237
-
238
-
239
-
240
-
241
 |
 |
