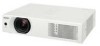
Sanyo XU105 Instruction Manual, PLC-XU105
Sanyo XU105 - PLC XGA LCD Projector Manual
 |
UPC - 086483071386
View all Sanyo XU105 manuals
Add to My Manuals
Save this manual to your list of manuals |
Sanyo XU105 manual content summary:
- Sanyo XU105 | Instruction Manual, PLC-XU105 - Page 1
Multimedia Projector MODEL PLC-XU105 Owner's Manual - Sanyo XU105 | Instruction Manual, PLC-XU105 - Page 2
remote control (p.50). PIN code lock function prevents unauthorized use of the projector (pp.19, 50-51). ◆ Helpful Maintenance Functions Lamp and filter The Power management function reduces power consumption and maintains the lamp life (p.48). ◆ Lamp Control Useful Interface; ● 2 Inputs for RGB (D- - Sanyo XU105 | Instruction Manual, PLC-XU105 - Page 3
the Filter Counter 55 Attaching the Lens Cap 56 Cleaning the Projection Lens 56 Cleaning the Projector Cabinet 56 Lamp Replacement 57 Resetting the Lamp Counter 58 Appendix 59 Troubleshooting 59 Menu Tree 63 Indicators and Projector Condition 65 Compatible Computer Specifications - Sanyo XU105 | Instruction Manual, PLC-XU105 - Page 4
operate improperly, read this manual again, check operations and cable connections and try the solutions in the "Troubleshooting" section in the back of this booklet. If the problem still persists, contact the dealer where you purchased the projector or the service center. CAUTION RISK OF ELECTRIC - Sanyo XU105 | Instruction Manual, PLC-XU105 - Page 5
a damp cloth for cleaning. Follow all warnings and instructions marked on the projector. For added protection to the projector during a lightning storm, or when it persons. Upon completion of any service or repairs to this projector, ask the service technician to perform routine safety checks to - Sanyo XU105 | Instruction Manual, PLC-XU105 - Page 6
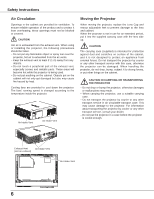
Safety Instructions Air Circulation Openings in the cabinet are provided for from external forces. Do not transport the projector by courier or any other transport service with this case, otherwise the projector can be damaged. When handling the projector, do not drop, bump, subject it to - Sanyo XU105 | Instruction Manual, PLC-XU105 - Page 7
Safety Instructions Installing the Projector in Proper Directions Use the projector properly in specified positions. Improper positioning may reduce the lamp life and result in severe accident or fire hazard. This projector can project the picture upward, downward, or backward, perpendicular to the - Sanyo XU105 | Instruction Manual, PLC-XU105 - Page 8
instructions. If such changes or modifications should be made, you could be required to stop operation of the equipment. Model Number : PLC-XU105 Trade Name : Sanyo Responsible party : SANYO from the Parts Department indicated in your User Instructions. If the plug supplied is not suitable - Sanyo XU105 | Instruction Manual, PLC-XU105 - Page 9
Remote Receiver ② Focus Ring ③ Projection Lens ④ Zoom Lever ⑤ Lens Cap CAUTION Do not turn on a projector with lens cap attached. High temperature from light ⑬ Lamp Cover ⑭ Filters ⑮ Adjustable Feet Kensington Security Slot This slot is for a Kensington lock used to deter theft of the projector. - Sanyo XU105 | Instruction Manual, PLC-XU105 - Page 10
Part Names and Functions Rear Terminal ① ② ③ ④ ⑤ ⑥ ⑦ ⑧ ⑨ ① SERVICE PORT This jack is used to service the projector. ② COMPUTER IN 2/COMPONENT IN Connect the computer or component video (or RGB Scart) output signal to this terminal. Use the supplied VGA cable or a Component- - Sanyo XU105 | Instruction Manual, PLC-XU105 - Page 11
Top Control ⑥ Part Names and Functions ① LAMP REPLACE indicator ⑦ WARNING indicator Lights yellow when the projection lamp reaches its end of life (pp.57, 65). ② ON/STAND-BY button -Lights red when the projector detects an abnormal condition. -Blinks red when the internal temperature of - Sanyo XU105 | Instruction Manual, PLC-XU105 - Page 12
on the screen. (p26) ⑬ ⑩ LAMP CONTROL button Select the lamp mode. (pp.25, 49) ⑫ setting. (pp.25, 29) ⑮ K EYSTONE button Correct the keystone distortion. (pp.23, 43) To ensure safe operation, please observe the following precautions : - Do not bend, drop the remote control or expose the remote - Sanyo XU105 | Instruction Manual, PLC-XU105 - Page 13
AA or LR6 type alkaline batteries. ● Always replace batteries in sets. ● Do not use a new battery with a used instructions. Remote Control Operating Range Point the remote control toward the projector (Infrared Remote Receiver) when pressing the buttons. Maximum operating range for the remote - Sanyo XU105 | Instruction Manual, PLC-XU105 - Page 14
Installation Positioning the Projector For projector positioning, see the figures below. The projector should be set perpendicularly to the plane of the screen. Notes: • The brightness in the room has a great influence on picture quality. It is recommended to limit ambient lighting in order to - Sanyo XU105 | Instruction Manual, PLC-XU105 - Page 15
. If you are not sure of the type of power being supplied, consult your authorized dealer or service station. Connect the projector with all peripheral equipment before turning the projector on. Installation CAUTION The AC outlet must be near this equipment and must be easily accessible. Notes - Sanyo XU105 | Instruction Manual, PLC-XU105 - Page 16
used for connection • VGA Cable (Mini D-sub 15 pin)* • Audio Cables (*One cable is supplied; other cables are not supplied with the projector.) Audio Output Monitor Output Monitor Input External Audio Equipment Audio cable (stereo) VGA cable VGA cable VGA cable COMPUTER IN 2/ COMPUTER IN - Sanyo XU105 | Instruction Manual, PLC-XU105 - Page 17
cable External Audio Equipment Audio Input VIDEO AUDIO IN S-VIDEO Audio cable (stereo) Notes: • When the AUDIO OUT is plugged-in, the projector's built-in speaker is not available. • The S-VIDEO jack connection overrides the VIDEO jack connection when selecting AUTO in the Input Menu (p.36 - Sanyo XU105 | Instruction Manual, PLC-XU105 - Page 18
COMPONENT IN COMPUTER /COMPONENT AUDIO IN External Audio Equipment Audio Input Audio cable (stereo) Notes: • When the AUDIO OUT is plugged-in, the projector's built-in speaker is not available. • See page 69 for ordering optional cables. 18 AUDIO OUT (stereo) Unplug the power cords of both the - Sanyo XU105 | Instruction Manual, PLC-XU105 - Page 19
49 for Lamp control status.) Note: • The Filter warning and Lamp replacement icons may appear on the screen depending on the usage state of the projector. PIN Code Input Dialog Box After the OK icon disappears, you can operate the projector. Notes: • When the Logo select function is set to "Off - Sanyo XU105 | Instruction Manual, PLC-XU105 - Page 20
changed according to the temperature inside the projector. • Do not put the projector in a case before the projector is cooled enough. • If the WARNING indicator blinks or lights red, see "Warning Indicator" on page 54. • While the POWER indicator is blinking, the lamp is being cooled down and the - Sanyo XU105 | Instruction Manual, PLC-XU105 - Page 21
How to Operate the On-Screen Menu The projector can be adjusted or set via the On-Screen Menu. For each adjustment and setting procedure, refer to the respective sections in this manual. 1 Press the MENU button on the top control or the remote control to display the On-Screen Menu. 2 Use the Point - Sanyo XU105 | Instruction Manual, PLC-XU105 - Page 22
see "Menu Tree" on pages 63-64. For computer source Guide Window Show the selected Menu of the On-Screen Menu. PC and Image 1 ~ 4. (p.32) Screen Menu Setting Menu Used to adjust size of Used to set the image. [Normal / True projector's operating / Wide / Full / Custom configurations. - Sanyo XU105 | Instruction Manual, PLC-XU105 - Page 23
is provided to automatically correct Keystone distortion according to the projector's tilt and adjust the computer display parameters (Fine sync, button, adjust manually by pressing the KEYSTONE button on the top control or on the remote control or selecting Keystone in the Setting menu (p.44). - Sanyo XU105 | Instruction Manual, PLC-XU105 - Page 24
Mute function is also effective for the AUDIO OUT jack. Top Control Remote Control VOLUME+/buttons VOL-(◄) button Point ▲ button VOL+(►) button Point ▼ press the VOLbutton to turn down the volume. Press the MUTE button to set the Mute function On or Off. The dialog box disappears after 4 seconds. - Sanyo XU105 | Instruction Manual, PLC-XU105 - Page 25
▲▼ buttons IMAGE button LAMP CONTROL button LAMP CONTROL button Press the LAMP CONTROL button on the remote control to select the lamp mode for changing the ....... Normal brightness Eco Lower brightness reduces the lamp power consumption and extends the lamp life. Note: • See the next page for - Sanyo XU105 | Instruction Manual, PLC-XU105 - Page 26
Basic Operation NO SHOW button Press the NO SHOW button on the remote control to black out the image. To restore to normal, press the NO SHOW button again or press any other button. When a projected image is captured and set as "User" in the Logo selection (p.45), the screen changes each time you - Sanyo XU105 | Instruction Manual, PLC-XU105 - Page 27
the INPUT button on the top control or press the COMPUTER button on the remote control. Before using these buttons, correct input source should be selected through Menu RGB signal. • When the Input Search function is set to "On1" or "On2", the input signal will be searched automatically (p.47). 27 - Sanyo XU105 | Instruction Manual, PLC-XU105 - Page 28
(pp.30-31). ----- There is no signal input from the computer. Check the connection between your computer and the projector. (See "Troubleshooting" on page 59.) Mode 1 The preset system is manually adjusted in the PC Adjust Menu. The adjusted data can be stored in Mode 1-5 (pp.30-31). SVGA 1 PC - Sanyo XU105 | Instruction Manual, PLC-XU105 - Page 29
directly by pressing the AUTO PC button on the remote control. Remote Control AUTO PC button Menu Operation Auto PC Adj. Auto PC Adjustment can be stored in the projector. Once the parameters are stored, the setting can be done just by selecting a manual adjustments are required (pp.34-35). 29 - Sanyo XU105 | Instruction Manual, PLC-XU105 - Page 30
enables you to precisely adjust several parameters to match those signal formats. The projector has five independent memory areas to store those parameters manually adjusted. It allows you to recall the setting for a specific computer. 1 Press the MENU button to display the On-Screen Menu. Use the - Sanyo XU105 | Instruction Manual, PLC-XU105 - Page 31
Input Display area H Use the Point ◄► buttons to adjust the horizontal area displayed by this projector. Display area V Use the Point ◄► buttons to adjust the vertical area displayed by this projector. Reset To reset the adjusted data, select Reset and press the SELECT button. A confirmation box - Sanyo XU105 | Instruction Manual, PLC-XU105 - Page 32
IMAGE button on the remote control. Dynamic For viewing pictures in a bright room. Standard Normal picture mode preset on the projector. Real Picture mode not truly effective on a black colored board. Image 1-4 For viewing with the user preset image mode in the Image Adjust Menu (pp. 33-34). This - Sanyo XU105 | Instruction Manual, PLC-XU105 - Page 33
pointer to the desired item and then press the SELECT button to display the adjustment dialog box. Use the Point ◄► buttons to adjust the setting value. Contrast Press the Point ◄ button to decrease the contrast; press the Point ► button to increase the contrast (from 0 to 63). Brightness Press the - Sanyo XU105 | Instruction Manual, PLC-XU105 - Page 34
Store icon Image Mode Menu Move the red frame pointer to an image item to be set and then press the SELECT button. A confirmation box appears and then select [Yes] Screen Size Adjustment This projector has the picture screen resize function, which enables you to customize the image size. 1 Press - Sanyo XU105 | Instruction Manual, PLC-XU105 - Page 35
manually with this function. Press the SELECT button at Custom and the "Custom" is displayed on the screen for a few seconds and then the Aspect dialog box appears. Scale H/V........... Adjust the Horizontal/Vertical screen scale. H&V When set ZOOM + button on the remote control. Digital zoom - - Sanyo XU105 | Instruction Manual, PLC-XU105 - Page 36
Control INPUT button Computer 1 Computer 2 VIDEO REMOTE CONTROL VIDEO button Menu Operation 1 Press the MENU projector automatically detects incoming video signal, and adjusts itself to optimize its performance. The projector set to "On1" or "On2", the input signal will be searched - Sanyo XU105 | Instruction Manual, PLC-XU105 - Page 37
the INPUT button on the top control or press the COMPUTER button on the remote control. Before using these buttons, correct input source should be selected through Menu Note: • When the Input Search function is set to "On1" or "On2", the input signal will be searched automatically (p.47). 37 - Sanyo XU105 | Instruction Manual, PLC-XU105 - Page 38
itself to optimize its performance. When Video System is PAL-M or PAL-N, select the system manually. PAL/SECAM/NTSC/NTSC4.43/PAL-M/PAL-N If the projector cannot reproduce proper video image, select a specific broadcast signal format from among PAL, SECAM, NTSC, NTSC 4.43, PAL-M, and PAL-N. AV - Sanyo XU105 | Instruction Manual, PLC-XU105 - Page 39
button on the remote control. Dynamic For viewing pictures in a bright room. Standard Normal picture mode preset on the projector. Cinema Picture mode a blackboard. See above for further description. Image1-4 For viewing with the user preset image mode in the Image Adjust Menu (pp. 40-41). Image - Sanyo XU105 | Instruction Manual, PLC-XU105 - Page 40
pointer to the desired item and then press the SELECT button to display the adjustment dialog box. Use the Point ◄► buttons to adjust the setting value. Contrast Press the Point ◄ button to decrease the contrast; press the Point ► button to increase the contrast (from 0 to 63). Brightness Press the - Sanyo XU105 | Instruction Manual, PLC-XU105 - Page 41
For a still picture. Film........ For watching a film. With this function, the projector reproduces pictures faithful to the original film quality. Reset To reset the adjusted data to an image item to be set and then press the SELECT button. A confirmation box appears and then select [Yes]. 41 - Sanyo XU105 | Instruction Manual, PLC-XU105 - Page 42
This projector has the wide screen ratio. Custom Adjust the screen scale and position manually with this function. Press the SELECT button at Custom and the appears. Scale H/V........... Adjust the Horizontal/Vertical screen scale. H&V When set to "On", the aspect ratio is fixed. The "Scale - Sanyo XU105 | Instruction Manual, PLC-XU105 - Page 43
. . . Always works and corrects keystone distortion according to the projector's tilt. Manual . . . Works only when pressing the AUTO SETUP button on SETUP, adjust manually by pressing the KEYSTONE button on the top control or on the remote control or selecting Keystone in the Setting menu (pp. - Sanyo XU105 | Instruction Manual, PLC-XU105 - Page 44
. Use this function when you want to project images after the lamp becomes bright enough. The factory default setting is in this option. Countdown Off......... Show the input image instead of the countdown when turning on the projector. Use this function when you want to project the image as - Sanyo XU105 | Instruction Manual, PLC-XU105 - Page 45
to capture the projected image. After capturing the projected image, go to the Logo select function and set it to "User". Then the captured image will be displayed the next time you turn on the projector or when you press the NO SHOW button (p.26). To cancel the Capture function, select [No]. Notes - Sanyo XU105 | Instruction Manual, PLC-XU105 - Page 46
. Repeat this step to complete entering a four-digit number. After entering the four-digit number, move the pointer to "Set." Press the SELECT button so that you can start to operate the projector. If you entered an incorrect Logo PIN code, "Logo PIN code" and the number will turn red for a moment - Sanyo XU105 | Instruction Manual, PLC-XU105 - Page 47
image from a ceiling-mounted projector. Ceiling Rear When this function is set to "On," the picture will Lamp are displayed every time the signal is switched. • Only the last selected input source can be detected. • If the INPUT button on the top control or COMPUTER or VIDEO buttons on the remote - Sanyo XU105 | Instruction Manual, PLC-XU105 - Page 48
Setting Power management For reducing power consumption as well as maintaining the lamp life, the Power management function turns off the projection lamp when the projector is not operated for a certain period. If the input signal is interrupted and no button is pressed for more than 30 seconds, - Sanyo XU105 | Instruction Manual, PLC-XU105 - Page 49
than the Normal mode. Normal....... Normal brightness Eco Lower brightness reduces the lamp power consumption and extends the lamp life. Remote control This projector provides two different remote control codes; the factory-set, initial code (Code 1) and the secondary code (Code 2). This switching - Sanyo XU105 | Instruction Manual, PLC-XU105 - Page 50
function to set the security for the projector operation. Key lock Key lock This function locks the top control and remote control buttons have the remote control nearby or there is something wrong with your remote control, contact the dealer where you purchased the projector or the service center. - Sanyo XU105 | Instruction Manual, PLC-XU105 - Page 51
. Repeat this step to complete entering a four-digit number. After entering the four-digit number, move the pointer to "Set." Press the SELECT button so that you can start to operate the projector. If you entered an incorrect PIN code, "PIN code" and the number will turn red for a moment. Enter the - Sanyo XU105 | Instruction Manual, PLC-XU105 - Page 52
effect. On 3....Be sure to set the Lamp control in High and the Fan control in On 3 when using the projector inclined at between +40 degrees to warning log records will be deleted. Lamp counter This function is used to reset the lamp counter. When the lamp life is left less than 100 hours, the Lamp - Sanyo XU105 | Instruction Manual, PLC-XU105 - Page 53
Fig.3 Filter warning icon Filter warning icon appears on the screen at a set time. Note: • This icon also appears at turning on. Fig.4 Filter warning icon Factory default This function returns all setting values except for the user logo, PIN code lock, Logo PIN code lock, lamp counter, and filter - Sanyo XU105 | Instruction Manual, PLC-XU105 - Page 54
/ Heating Duct or Vent? Move the installation of the projector away from the duct or vent. - Is the filter clean? Clean the filter periodically. The projector is shut down and the WARNING indicator lights red. When the projector detects an abnormal condition, it is automatically shut down to - Sanyo XU105 | Instruction Manual, PLC-XU105 - Page 55
and may result in internal heat buildup and adversely affect the life of the projector. If a "Filter warning" icon appears on the screen, clean the filters immediately. Clean the filter by following the steps below. 1 Turn off the projector, and unplug the AC power cord from the AC outlet. 2 Turn - Sanyo XU105 | Instruction Manual, PLC-XU105 - Page 56
an excessive amount of cleaner. Abrasive cleaners, solvents, or other harsh chemicals might scratch the surface of the cabinet. When the projector is not in use, put the projector in an appropriate carrying case to protect it from dust and scratches. Lens Cap Hole String for the lens cap Secure - Sanyo XU105 | Instruction Manual, PLC-XU105 - Page 57
Handle Screw Screw Lamp ORDER REPLACEMENT LAMP Replacement lamp can be ordered through your dealer. When ordering a projection lamp, give the following information to the dealer. ● Model No. of your projector ● Replacement Lamp Type No. : PLC-XU105 : POA-LMP111 (Service Parts No. 610 - Sanyo XU105 | Instruction Manual, PLC-XU105 - Page 58
a new one IMMEDIATELY after the projector has cooled down. (Follow carefully the instructions in the Lamp Replacement section of this manual.) Continuous use of the lamp with the LAMP REPLACE indicator lighted may increase the risk of lamp explosion. ● A Lamp may explode as a result of vibration - Sanyo XU105 | Instruction Manual, PLC-XU105 - Page 59
) When the projector is on and you press the input button, an icon other than the Lamp mode icon appears. - That is the Filter warning icon. Refer lamp control function.(see page 25) - Check the LAMP REPLACE indicator. If it lights, the end of lamp life is approaching. Replace the lamp - Sanyo XU105 | Instruction Manual, PLC-XU105 - Page 60
to change the setting for monitor output when connecting to a projector. See your computer's instruction manual for the setting. - It cannot be displayed. Press the NO SHOW button or any other button on the remote control. No sound - Check the audio cable connection from audio input source. - Sanyo XU105 | Instruction Manual, PLC-XU105 - Page 61
top control is locked at "Key lock" under "Security" of SETTING section. Please check "SETTING" section on page 50. Unable to unlock the Logo PIN - Contact the dealer where you purchased the projector or the service code lock, Security key lock center. or Security PIN code lock - Sanyo XU105 | Instruction Manual, PLC-XU105 - Page 62
WARNING : High voltages are used to operate this projector. Do not attempt to open the cabinet. If problems still persist after following all operating instructions, contact the dealer where you purchased the projector or the service center. Specify the model number and explain about the problem - Sanyo XU105 | Instruction Manual, PLC-XU105 - Page 63
Menu Tree Computer Input/Video Input Input Computer 1 Computer 2 Video Sound Sound Computer Input Volume Mute Quit System (1) SVGA 1 Mode 1 Mode 2 - - - - * Systems displayed in the System depending on an input signal. Menu vary PC Adjust Auto PC Adj. Fine sync Total dots Horizontal - Sanyo XU105 | Instruction Manual, PLC-XU105 - Page 64
Timer (1-30 Min.) Quit On start Lamp control On/Off Auto/High/Normal/Eco Remote control Security Code 1 or Code 2 Key lock Off Projector Remote control Quit PIN code lock Off/On1/On2 PIN code change Quit Quit Fan Fan control Warning log Lamp counter Filter counter Factory default Quit L1/L2 - Sanyo XU105 | Instruction Manual, PLC-XU105 - Page 65
or the service center for service and checkup. Do not leave the projector on. It may cause an electric shock or a fire hazard. • • • green. • • • red • • • off • • • blinks green. • • • blinks red. When the projection lamp reaches its end of life, the LAMP REPLACE indicator lights yellow - Sanyo XU105 | Instruction Manual, PLC-XU105 - Page 66
Appendix Compatible Computer Specifications Basically this projector can accept the SVGA 6 SVGA 7 SVGA 8 SVGA 9 SVGA 10 SVGA 11 MAC 16 MAC 19 XGA 1 XGA 2 XGA 3 XGA 4 XGA 5 XGA 6 XGA 7 XGA 8 XGA 9 XGA 10 XGA 11 XGA 12 XGA 13 XGA 14 XGA 15 RESOLUTION 640 x 480 720 x 400 640 x 400 640 x 480 640 x - Sanyo XU105 | Instruction Manual, PLC-XU105 - Page 67
Appendix Technical Specifications Mechanical Information Projector Type Multi-media Projector Dimensions (W x H x D) 334 mm x 78 mm x 257.5mm (Not including protrusion) Net Weight 3.5 kg Feet Adjustment 0˚ to 8.9˚ Panel Resolution LCD Panel System 0.8" TFT Active Matrix - Sanyo XU105 | Instruction Manual, PLC-XU105 - Page 68
Appendix Accessories Owner's Manual (CD-ROM) Quick Reference Guide AC Power Cord Remote Control and Batteries VGA Cable Serial Control Cable Lens Cap with String PIN Code Label Soft Carrying Case ● The specifications are subject to change without notice. ● LCD panels are - Sanyo XU105 | Instruction Manual, PLC-XU105 - Page 69
(Vert.sync.) 11 Ground 12 DDX Data / --13 Horiz. sync. Input (Composite H/V sync.) 14 Vert. sync. 15 DDC Clock / --- SERVICE PORT CONNECTOR Terminal : Mini DIN 8-PIN 876 5 43 21 1 R X D 5 ----2 ----- 6 T X D 3 ----- 7 ----4 GND 8 ----- 2.0(51.3) Dimensions 13.15(334) 3.17(80.5) 3.1(78) 3.6(91 - Sanyo XU105 | Instruction Manual, PLC-XU105 - Page 70
in the column below and keep it with this manual securely. If you forgot or lost the number and unable to operate the projector, contact the service station. PIN Code Lock No. Factory default set No: 1 2 3 4* Logo PIN Code Lock No. Factory default set No: 4 3 2 1* *Should the four-digit number be - Sanyo XU105 | Instruction Manual, PLC-XU105 - Page 71
KG3AC SANYO Electric Co., Ltd.
-
 1
1 -
 2
2 -
 3
3 -
 4
4 -
 5
5 -
 6
6 -
 7
7 -
8
-
9
-
10
-
11
-
12
-
13
-
14
-
15
-
16
-
17
-
18
-
19
-
20
-
21
-
22
-
23
-
24
-
25
-
26
-
27
-
28
-
29
-
30
-
31
-
32
-
33
-
34
-
35
-
36
-
37
-
38
-
39
-
40
-
41
-
42
-
43
-
44
-
45
-
46
-
47
-
48
-
49
-
50
-
51
-
52
-
53
-
54
-
55
-
56
-
57
-
58
-
59
-
60
-
61
-
62
-
63
-
64
-
65
-
66
-
67
-
68
-
69
-
70
-
71
 |
 |

Multimedia Projector
MODEL
PLC-XU105
Owner’s Manual