Schwinn IC3 Indoor Cycling Bike Assembly and Owners Manual
Schwinn IC3 Indoor Cycling Bike Manual
 |
View all Schwinn IC3 Indoor Cycling Bike manuals
Add to My Manuals
Save this manual to your list of manuals |
Schwinn IC3 Indoor Cycling Bike manual content summary:
- Schwinn IC3 Indoor Cycling Bike | Assembly and Owners Manual - Page 1
TM ASSEMBLY MANUAL / OWNER'S MANUAL - Schwinn IC3 Indoor Cycling Bike | Assembly and Owners Manual - Page 2
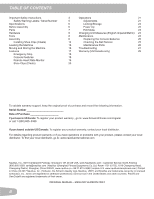
Safety Instructions 3 Safety Warning Labels / Serial Number 5 Specifications 6 Before Assembly 6 Parts 7 Hardware 8 Tools 8 Assembly 8 Tension 25 Maintenance Parts 26 Troubleshooting 27 Warranty (US/Canada only) 29 To validate warranty support, keep the original proof - Schwinn IC3 Indoor Cycling Bike | Assembly and Owners Manual - Page 3
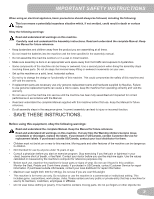
. • Read and understand the complete Manual supplied with this machine before first use. Keep the Manual for future reference. • Do all assembly steps in the sequence given. Incorrect assembly can lead to injury or incorrect function. • SAVE THESE INSTRUCTIONS. Before using this equipment, obey the - Schwinn IC3 Indoor Cycling Bike | Assembly and Owners Manual - Page 4
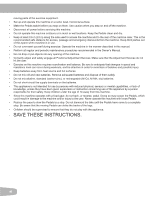
on them. Use caution when you step on and off the machine. • Disconnect all power before servicing this machine have been given supervision or instruction concerning use of the appliance by a person slow the Pedals to a stop. Do not dismount the bike until the Pedals have come to a complete stop. Be - Schwinn IC3 Indoor Cycling Bike | Assembly and Owners Manual - Page 5
Manual for additional warnings and safety information. • The heart rate displayed is an approximation and should be used for reference only. • Not intended for use (Label is only available on the IC3 in English and French Canadian.) Product installed and used in accordance with the instructions, may - Schwinn IC3 Indoor Cycling Bike | Assembly and Owners Manual - Page 6
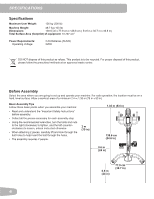
x 1.35 m (79 in x 53 in). Basic Assembly Tips Follow these basic points when you assemble your machine: • Read and understand the "Important Safety Instructions" before assembly. • Collect all the pieces necessary for each assembly step. • Using the recommended wrenches, turn the bolts and nuts to - Schwinn IC3 Indoor Cycling Bike | Assembly and Owners Manual - Page 7
10 6 9 11 5 4 1 12 8 2 7 3 PARTS Item Qty Description 1 1 Main Assembly 2 1 Stabilizer, Front 3 1 Stabilizer, Rear 4 1 Seat Post 5 1 Seat 6 1 Handlebar Item 7 8 9 10 11 12 Qty Description 1 Pedal, Right 1 Pedal, Left 1 Water Bottle Holder 1 Console 2 AA-size Batteries 2 - Schwinn IC3 Indoor Cycling Bike | Assembly and Owners Manual - Page 8
HARDWARE / TOOLS / ASSEMBLY Item Qty Description A 2 Adjustment Handle, Handlebar / Seat B 2 Flat Washer, M10 Wide C 1 Adjustment Handle, Handlebar Post A B C Tools Included #2 6 mm 15 mm 17 mm 1. Attach Stabilizers to - Schwinn IC3 Indoor Cycling Bike | Assembly and Owners Manual - Page 9
2. Attach Seat to Seat Post and Frame NOTICE: Make sure the adjustment knob (4a) engages the holes in the Seat Post. 5 4 B 4a A 9 - Schwinn IC3 Indoor Cycling Bike | Assembly and Owners Manual - Page 10
3. Install Handlebar Assembly on Frame NOTICE: Make sure the Adjustment Handle (C) engages the holes in the Handlebar Post. 6 B A C 10 - Schwinn IC3 Indoor Cycling Bike | Assembly and Owners Manual - Page 11
4. Attach Pedals to Frame Assembly If the threads strip due to improper installation, then the Pedals can disengage from the bike and/or break while under usage, which can result in serious injury to the user. Note: The Left Pedal is reverse-threaded. Be sure to - Schwinn IC3 Indoor Cycling Bike | Assembly and Owners Manual - Page 12
Bottle Holder to Handlebar Note: The hardware (*) is pre-installed and not in the Hardware Bag. 9 X3 * 6. Install Batteries in Console Note: The console uses AA size batteries (SUM3). Make sure that the batteries point in the direction of the +/- indicators in the battery bay. ! Do not mix old - Schwinn IC3 Indoor Cycling Bike | Assembly and Owners Manual - Page 13
that all hardware is tight and components are properly assembled. Be sure to record the serial number in the field provided at the front of this manual. Do not use or put the machine into service until the machine has been fully assembled and inspected for correct performance in accordance with the - Schwinn IC3 Indoor Cycling Bike | Assembly and Owners Manual - Page 14
Installing Shoe Clips (Cleats) on Cycling Shoes (optional accessory) Shoe Clips (Cleats) - later version Note: The shoe cleats fit both the right and , one shoe at a time. Readjust to determine the best cleat position. 4. Using a 4mm hex key, fully tighten the cleat mounting bolts (5 - 6 N·m). 14 - Schwinn IC3 Indoor Cycling Bike | Assembly and Owners Manual - Page 15
pliers, pull off the rubber cover to expose the cleat mounting holes on the bottom of the cycling shoe. Note: This step may not be necessary, depending on the type of shoe. 2. Remove to determine the best cleat position. 5. Using a 4mm hex key, fully tighten the cleat mounting bolts (5 - 6 N·m). 15 - Schwinn IC3 Indoor Cycling Bike | Assembly and Owners Manual - Page 16
the machine is level and stable before you exercise. Moving and Storing the Machine To move the bike, carefully pull the Handlebars toward you while pushing the front of the bike downward. Push the bike to the desired location. NOTICE: Be careful when you move the machine. Abrupt motions can affect - Schwinn IC3 Indoor Cycling Bike | Assembly and Owners Manual - Page 17
J Rear Stabilizer K Leveler L Pedal w/Foot Restraint M Flywheel N Brake Assembly O Cover, Drive Belt P Front Stabilizer Q Transport Wheel R Battery Bay Receiver T Water Bottle Holder U Shoe Clips (Cleats) WARNING! Use the values calculated or measured by the machine's computer for reference - Schwinn IC3 Indoor Cycling Bike | Assembly and Owners Manual - Page 18
a time goal for the workout, push MODE until the TIME field blinks. Use the arrow keys to adjust the time goal (minutes). During the workout, the calories goal for the workout, push MODE until the CALORIES field blinks. Use the arrow keys to adjust the calories. During the workout, the display - Schwinn IC3 Indoor Cycling Bike | Assembly and Owners Manual - Page 19
display field shows the distance from start to finish of workout. To set a distance goal for the workout, push MODE until the DISTANCE field blinks. Use the arrow keys to adjust the distance in increments of 0.50 km (or miles). During the workout, the display shows the remaining distance. When it - Schwinn IC3 Indoor Cycling Bike | Assembly and Owners Manual - Page 20
optimum fat-burning) Shoe Clips (Cleats) Foot pedals that are equipped for cycling shoes with cleats provide secure footing on the exercise bike. The shoe cleats provided fit both the right and left Pedals. Prior to use, make sure you understand the operation of the engagement / release mechanism - Schwinn IC3 Indoor Cycling Bike | Assembly and Owners Manual - Page 21
or feel faint. Contact your doctor before you use the machine again. Use the values calculated or measured by the machine's computer Position / Pedal Strap Adjustment Foot pedals with straps provide secure footing to the exercise bike. 1. Put the ball of each foot in the Foot Restraint on the Pedals - Schwinn IC3 Indoor Cycling Bike | Assembly and Owners Manual - Page 22
the Shoe Clips (Cleats) Foot pedals that are equipped for cycling shoes with cleats provide secure footing on the exercise bike. Be sure to turn the Pedals so that the Foot Restraint is under the Pedal. Prior to use, make sure you understand the operation of the engagement / release mechanism for - Schwinn IC3 Indoor Cycling Bike | Assembly and Owners Manual - Page 23
Mode To set a TIME, CALORIES or DISTANCE goal for your workout, push the MODE button to move to the desired field. The field will blink. Use the Up and Down arrow keys to adjust the value. Note: To reset the value to zero (0), push RESET. Push MODE to move to the - Schwinn IC3 Indoor Cycling Bike | Assembly and Owners Manual - Page 24
MAINTENANCE Read all maintenance instructions fully before you start any repair work. In some purchased outside US/Canada, contact your local distributor for them. Disconnect all power to the machine before you service it. Daily: Weekly: Monthly or after 20 hours: Before each use, examine the - Schwinn IC3 Indoor Cycling Bike | Assembly and Owners Manual - Page 25
batteries point in the +/- direction shown in the battery bay. Note: The console uses AA size alkaline batteries (SUM3) ! Do not mix old and new batteries. the Drive Belt Tension To check the Drive Belt tension, the bike needs to be operated. Set the resistance at a medium to the Service Manual. 25 - Schwinn IC3 Indoor Cycling Bike | Assembly and Owners Manual - Page 26
Parts B A L K C E M VC D V R F S G H I P W W I J Q UTQ J N O A Console B Handlebar C Adjustment Handle D Adjustment Handle, Handlebar Post E Brake/Resistance Knob F Brake Assembly G Cover, Drive Belt H Cover, Drive Belt Inside I Crank Arm J Pedal w/Foot Restraint K Seat L Seat Post - Schwinn IC3 Indoor Cycling Bike | Assembly and Owners Manual - Page 27
TROUBLESHOOTING Condition/Problem mode) while in use Replace Console Check data the problem, contact Customer Service (if inside US/Canada) or your local distributor (if outside US/Canada). should be in place on Flywheel. Speed Sensor Assembly should be aligned with magnet and connected to data - Schwinn IC3 Indoor Cycling Bike | Assembly and Owners Manual - Page 28
to the sensor or the connecting wire. Contact Customer Service (if inside US/Canada) or your local distributor (if outside US/Canada). Lubricate the brake pad with silicone lubricant. Refer to the brake lubrication procedure in the service manual. Levelers may be turned to level machine. Adjustment - Schwinn IC3 Indoor Cycling Bike | Assembly and Owners Manual - Page 29
2 years • Labor 1 year (Labor support does not include the installation of replacement parts involved in the initial product assembly and preventative maintenance services.) For warranty & service of products purchased outside US/Canada, please contact your local distributor. To - Schwinn IC3 Indoor Cycling Bike | Assembly and Owners Manual - Page 30
™™ ™ ™ ™ ™ 8015880.100122.H EN ™
-
 1
1 -
 2
2 -
 3
3 -
 4
4 -
 5
5 -
 6
6 -
 7
7 -
8
-
9
-
10
-
11
-
12
-
13
-
14
-
15
-
16
-
17
-
18
-
19
-
20
-
21
-
22
-
23
-
24
-
25
-
26
-
27
-
28
-
29
-
30
 |
 |

ASSEMBLY MANUAL / OWNER’S MANUAL
ASSEMBLY MANUAL / OWNER’S MANUAL
TM