Seiko 6A32 Technical Guide - Page 13
Cal. 6a32a, Caution
 |
View all Seiko 6A32 manuals
Add to My Manuals
Save this manual to your list of manuals |
Page 13 highlights
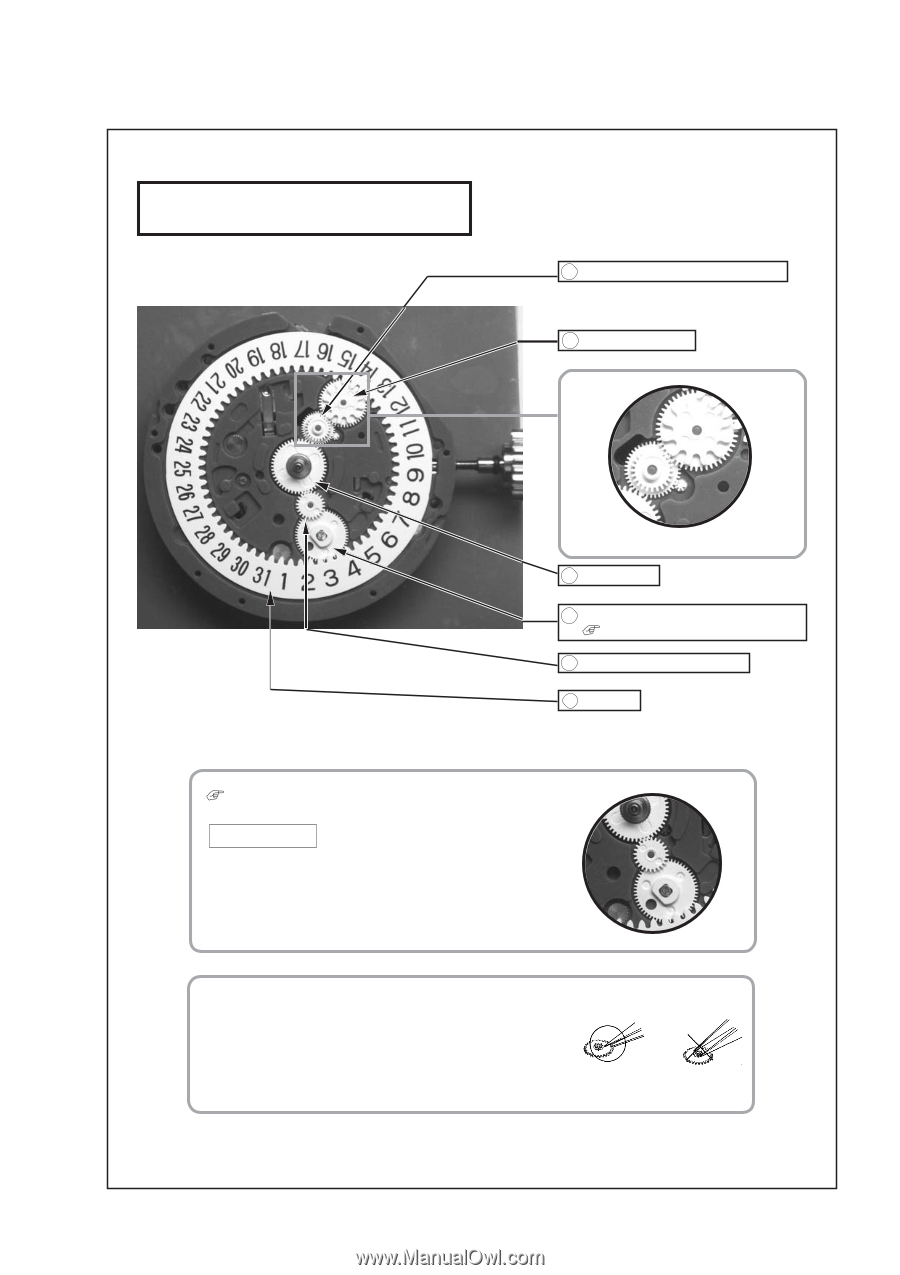
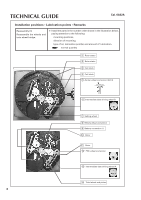
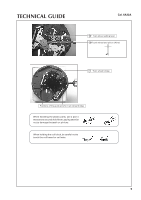
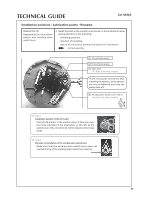
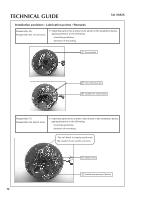
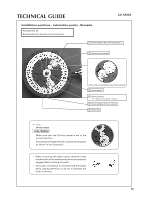
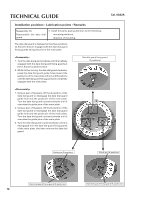
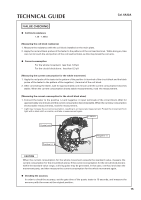
TECHNICAL GUIDE Installation positions • Lubrication points • Remarks Reassembly (8) Reassemble the wheels on the back side Cal. 6A32A 1 Intermediate date driving wheel C 2 Date driving wheel Pinion of the intermediate date driving wheel B 3 Hour wheel 4 24-hour wheel Refer to the Note 1 below. 5 Intermediate 24-hour wheel 6 Date dial Note 1 24-hour wheel CAUTION! Make sure that the 24-hour wheel is set in the correct direction. Ensure that the flattened side is positioned properly as shown in the illustration. • When mounting the plastic parts, carefully check that the teeth of the wheels and pinions are properly engaged before setting the parts. • Use a pair of tweezers to securely hold the plastic parts, paying attention so as not to damage the teeth or pinions. 13
-
 1
1 -
2
-
3
-
4
-
5
-
6
-
7
-
 8
8 -
 9
9 -
 10
10 -
 11
11 -
 12
12 -
 13
13 -
 14
14 -
 15
15 -
 16
16 -
 17
17 -
 18
18 -
19
-
20
-
21
-
22
-
23
-
24
 |
 |