Seiko 6A32 Technical Guide - Page 20
Cal. 6A32A, HOW TO INPUT THE CALENDAR DATA 3, Method of operation, Illustration, Notes and tips
 |
View all Seiko 6A32 manuals
Add to My Manuals
Save this manual to your list of manuals |
Page 20 highlights
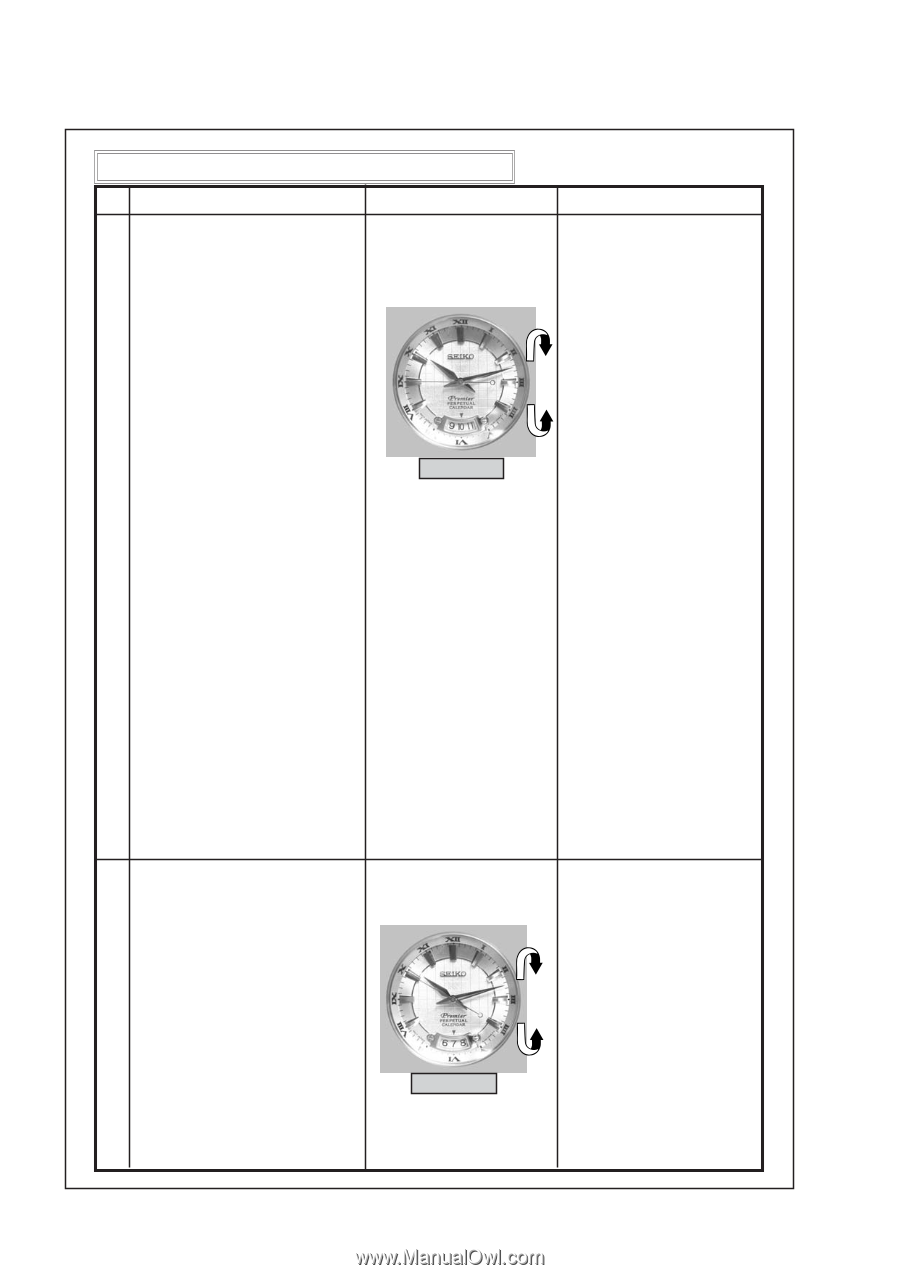
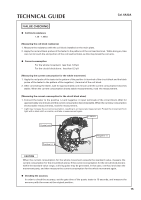
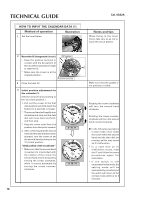
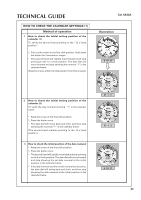
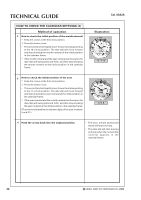
TECHNICAL GUIDE Cal. 6A32A HOW TO INPUT THE CALENDAR DATA (3) Method of operation Illustration Notes and tips 6 Set the date. * Keep the crown at the first click position. 1. Press the button once. * The second hand will turn counterclockwise and stop pointing to the 9 o'clock position. The date dial will move back and forth, and then stop when the numeral "1" comes to the center of the calendar frame. 2. After confirming that the date dial has been stopped, turn the crown clockwise rapidly until the date dial starts a self-propelling movement. 3. At the moment when the date numeral you wish to set appears in the calendar frame, slowly turn the crown counterclockwise to cancel the self-propelling movement of the date indictor and stop it. 9 10 11 When the date is the 10th, set the numeral to "10" in the center of the calendar frame. Rotating the crown clockwise will move the date dial forward. Rotating the crown counterclockwise will move the date dial backward. • Slowly turning the crown will move the date dial slowly. • Rapidly turning the crown continuously will trigger the self-propelling movement of the date dial. * While the date dial is selfpropelling, slowly turning the crown in the reverse direction of the date dial's movement will cancel the self-propelling movement of the date dial. * If the watch is left unoperated in this mode, the setting mode will be automatically cancelled and the watch will return to the normal mode within 2 to 3 minutes. 7 Set the month. * Keep the crown at the first click position. 1. Press the button once. * The second hand will stop pointing to the 10 o'clock position. The date dial will move forward and stop when the numeral "1" comes to the center of the calendar frame. 2. After confirming that the date dial has been stopped, turn the crown clockwise rapidly until the date dial starts a self-propelling movement. 6 7 8 When it is July, set the numeral to "7" in the center of the calendar frame. Rotating the crown clockwise will move the date dial forward. Rotating the crown counterclockwise will move the date dial backward. • Slowly turning the crown will move the date dial slowly. 20
-
 1
1 -
2
-
3
-
4
-
5
-
6
-
7
-
8
-
9
-
10
-
11
-
12
-
13
-
14
-
 15
15 -
 16
16 -
 17
17 -
 18
18 -
 19
19 -
 20
20 -
 21
21 -
 22
22 -
 23
23 -
 24
24
 |
 |