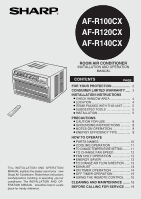
Sharp AF-R100CX AF-R100CX , AF-R120CX , AF-R140CX Operation Manual - Page 5
Items Packed With This Unit, Suggested Tools, Installation
 |
View all Sharp AF-R100CX manuals
Add to My Manuals
Save this manual to your list of manuals |
Page 5 highlights
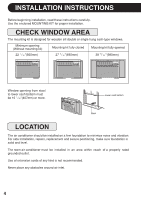
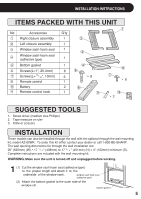
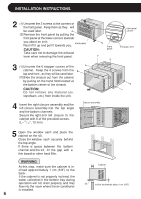
INSTALLATION INSTRUCTIONS ITEMS PACKED WITH THIS UNIT 1 No. Accessories Q'ty 1 Right closure assembly 1 2 2 Left closure assembly 1 3 Window sash foam seal 1 3 Window sash foam seal 4 (adhesive type) 1 5 Bottom gasket 1 6 Screws(L=1", 25.4mm) 8 7 Screws(L=13 / 32", 10mm) 6 8 Remote control 1 4 6 8 5 7 6 9 Battery 10 Remote control hook 2 8 1 9 10 2 SUGGESTED TOOLS 1. Screw driver (medium size Phillips) 2. Tape measure or ruler 3. Knife or scissors INSTALLATION These models can also be installed through the wall with the optional through the wall mounting kit, model AZ-80WK. To order this kit either contact your dealer or call 1-800-BE-SHARP. The wall opening dimensions for through the wall installation are: 25" (635mm) (W) 17 1 / 4 " (438mm) to 17 3 / 4 " (451mm) (H) 4" (102mm) minimum (D). Complete instructions are included with the wall mounting kit. WARNING: Make sure the unit is turned off and unplugged before working. 1 (1) Cut the window sash foam seal (adhesive type) to the proper length and attach it to the underside of the window sash. window sash foam seal (adhesive type) (2) Attach the bottom gasket to the outer side of the window sill. bottom gasket 5
-
 1
1 -
 2
2 -
 3
3 -
 4
4 -
 5
5 -
 6
6 -
 7
7 -
 8
8 -
 9
9 -
 10
10 -
 11
11 -
12
-
13
-
14
-
15
-
16
-
17
-
18
-
19
-
20
 |
 |
