Sharp ER-A440 Instruction Manual - Page 120
Recording paper specifications, Installing the paper roll, Installing and removing the paper roll
 |
View all Sharp ER-A440 manuals
Add to My Manuals
Save this manual to your list of manuals |
Page 120 highlights
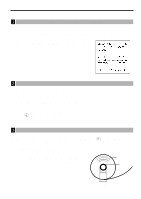
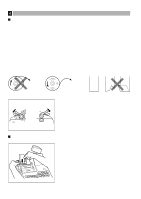
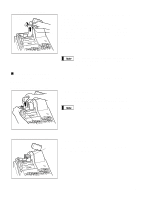
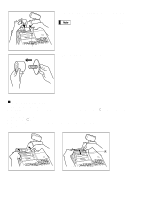
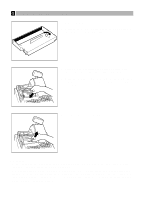
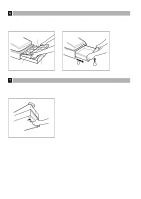
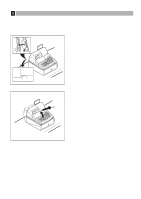
4 Installing and removing the paper roll Recording paper specifications Be sure to use paper rolls specified by SHARP. The use of any other paper rolls than specified could cause paper jamming, resulting in register malfunction. Paper specification Paper width: 44.5 ± 0.5 mm Max. outside diameter: 80 mm Weight: 52.3 - 64.0 g/m2 Quality: bond paper Paper tube: 18 mm • Be sure to set paper roll(s) prior to using your machine, otherwise it may cause a malfunction. Install the paper roll in the printer. Be careful then to set the roll and cut the paper end correctly. (How to set the paper roll) (How to cut the paper end) To the printer Incorrect Paper replease lever To the printer Correct Correct Incorrect To release the paper, press the paper release lever down. It is also used for removing a paper jam. The method for removing a paper jam is described in "Removing a paper jam" later in this section. Receipt side Journal side Installing the paper roll Installing the receipt paper roll 1. Turn the mode switch to the "REG" position with the AC cord connected. 2. Remove the printer cover. 3. Set the paper roll correctly and drop it into the printer. 4. Press the receipt paper release lever down and insert the paper end into the paper chute of the printer. 5. Pull the paper end that has come out of the printer, holding down the lever. 6. Advance the paper by a required length by pressing the receipt paper feed key. 7. Replace the printer cover. 118
-
 1
1 -
2
-
3
-
4
-
5
-
6
-
7
-
8
-
9
-
10
-
11
-
12
-
13
-
14
-
15
-
16
-
17
-
18
-
19
-
20
-
21
-
22
-
23
-
24
-
25
-
26
-
27
-
28
-
29
-
30
-
31
-
32
-
33
-
34
-
35
-
36
-
37
-
38
-
39
-
40
-
41
-
42
-
43
-
44
-
45
-
46
-
47
-
48
-
49
-
50
-
51
-
52
-
53
-
54
-
55
-
56
-
57
-
58
-
59
-
60
-
61
-
62
-
63
-
64
-
65
-
66
-
67
-
68
-
69
-
70
-
71
-
72
-
73
-
74
-
75
-
76
-
77
-
78
-
79
-
80
-
81
-
82
-
83
-
84
-
85
-
86
-
87
-
88
-
89
-
90
-
91
-
92
-
93
-
94
-
95
-
96
-
97
-
98
-
99
-
100
-
101
-
102
-
103
-
104
-
105
-
106
-
107
-
108
-
109
-
110
-
111
-
112
-
113
-
114
-
 115
115 -
 116
116 -
 117
117 -
 118
118 -
 119
119 -
 120
120 -
 121
121 -
 122
122 -
 123
123 -
 124
124 -
 125
125 -
126
-
127
-
128
-
129
-
130
 |
 |