Sharp LC-22DV24U LC-22DV24U Operation Manual - Page 11
liofirp
 |
UPC - 074000371125
View all Sharp LC-22DV24U manuals
Add to My Manuals
Save this manual to your list of manuals |
Page 11 highlights
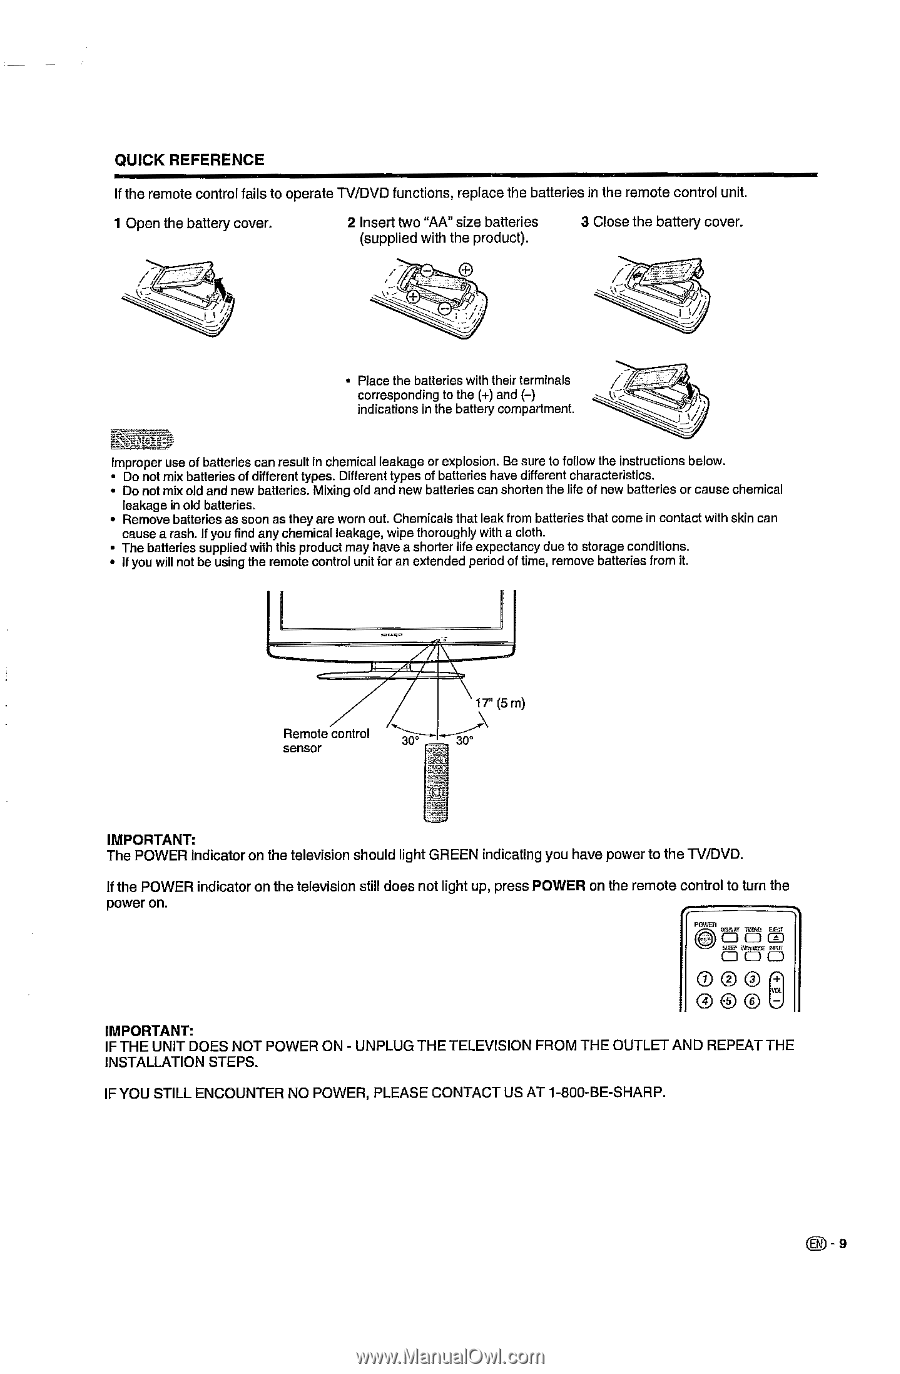
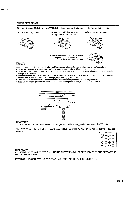
QUICK REFERENCE If the remote control fails to operate TV/DVD functions, replace the batteries in the remote control unit. 1 Open the battery cover. 2 Insert two "AN' size batteries (supplied with the product). 3 Close the battery cover. 0 • • Place the batteries with their terminals corresponding to the (+) and (-) indications in the battery compartment liofirp Improper use of batteries can result in chemical leakage or explosion. Be sure to follow the instructions below. • Do not mix batteries of different types. Different types of batteries have different characteristics. • Do not mix old and new batteries. Mixing old and new batteries can shorten the life of new batteries or cause chemical leakage in old batteries. • Remove batteries as soon as they are worn out. Chemicals that leak from batteries that come in contact with skin can cause a rash. If you find any chemical leakage, wipe thoroughly with a cloth. • The batteries supplied with this product may have a shorter life expectancy due to storage conditions. • If you will not be using the remote control unit for an extended period of time, remove batteries from it. Remote control sensor 30° 17" (5 m) 30' IMPORTANT: The POWER indicator on the television should light GREEN indicating you have power to the TV/DVD. If the POWER indicator on the television still does not light up, press POWER on the remote control to turn the power on. IMPORTANT: IF THE UNIT DOES NOT POWER ON - UNPLUG THE TELEVISION FROM THE OUTLET AND REPEAT THE INSTALLATION STEPS. IF YOU STILL ENCOUNTER NO POWER, PLEASE CONTACT US AT 1-800-BE-SHARP. EN -9
-
 1
1 -
2
-
3
-
4
-
5
-
 6
6 -
 7
7 -
 8
8 -
 9
9 -
 10
10 -
 11
11 -
 12
12 -
 13
13 -
 14
14 -
 15
15 -
 16
16 -
17
-
18
-
19
-
20
-
21
-
22
-
23
-
24
-
25
-
26
-
27
-
28
-
29
-
30
-
31
-
32
-
33
-
34
-
35
-
36
-
37
-
38
-
39
-
40
-
41
-
42
-
43
-
44
-
45
-
46
-
47
-
48
-
49
-
50
-
51
-
52
-
53
-
54
-
55
-
56
-
57
-
58
-
59
-
60
-
61
-
62
-
63
-
64
-
65
-
66
-
67
-
68
-
69
-
70
-
71
-
72
-
73
-
74
-
75
-
76
-
77
-
78
-
79
-
80
-
81
-
82
-
83
-
84
-
85
-
86
-
87
-
88
-
89
-
90
-
91
-
92
-
93
-
94
-
95
-
96
-
97
-
98
-
99
-
100
-
101
-
102
-
103
-
104
-
105
-
106
-
107
-
108
-
109
-
110
-
111
-
112
-
113
-
114
-
115
-
116
 |
 |