Sharp LC-26SB14U Service Manual - Page 15
Electrical Adjustments - white screen
 |
View all Sharp LC-26SB14U manuals
Add to My Manuals
Save this manual to your list of manuals |
Page 15 highlights
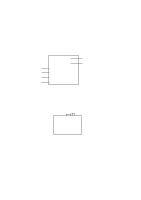
ELECTRICAL ADJUSTMENTS 1. ADJUSTMENT PROCEDURE Read and perform these adjustments when repairing the circuits or replacing electrical parts or PCB assemblies. CAUTION • Use an isolation transformer when performing any service on this chassis. • When removing a PCB or related component, after unfastening or changing a wire, be sure to put the wire back in its original position. • When you exchange IC and Transistor with a heat sink, apply silicon grease (YG6260M) on the contact section of the heat sink. Before applying new silicon grease, remove all the old silicon grease. (Old grease may cause damages to the IC and Transistor). Prepare the following measurement tools for electrical adjustments. 1. Pattern Generator On-Screen Display Adjustment 1. Set the VOLUME to minimum. 2. Press the VOL. DOWN button on the set and the channel button (9) on the remote control for more than 2 seconds to display adjustment mode on the screen as shown in Fig. 1-1. TV s.stretch 480i Function 03 R DRIVE (N) 8 Step No. Fig. 1-1 3. Use the UP/DOWN button or Channel button (0-9) on the remote control to select the options shown in Fig. 12. 4. Press the MENU button on the remote control to end the adjustments. 5. To display the adjustment screen for TV, AV, COMPONENT, HDMI and PC mode, press the INPUT button on the remote control. 6. Receive the DIGITAL broadcasting. 7. To display the adjustment screen for DTV mode, select the digital channel. 8. Press the VOL.DOWN button on the set and the channel (9) on the remote control for more than 2 seconds. NO. FUNCTION 03 R DRIVE(N) 04 R CUTOFF(N) 05 G DRIVE(N) 06 G CUTOFF(N) 07 B DRIVE(N) 08 B CUTOFF(N) 09 R DRIVE(C) 10 R CUTOFF(C) 11 G DRIVE(C) 12 G CUTOFF(C) 13 B DRIVE(C) 14 B CUTOFF(C) 15 R DRIVE(W) 16 R CUTOFF(W) 17 G DRIVE(W) 18 G CUTOFF(W) 19 B DRIVE(W) 20 B CUT OFF(W) 29 BAK LIGHT CENT 30 BAK LIGHT MAX NO. FUNCTION 31 BAK LIGHT MIN 32 BRIGHTNESS CENT 33 BRIGHTNESS MAX 34 BRIGHTNESS MIN 35 TINT 36 SHARP H1 MAX 37 SHARP H1 MIN 38 SHARP H2 MAX 39 SHARP H2 MIN 40 SHARP V1 MAX 41 SHARP V1 MIN 42 CONTRAST CENTER 43 CONTRAST MAX 44 CONTRAST MIN 45 COLOR CENTER 46 COLOR MAX 47 COLOR MIN 50 CONTRAST 40 Fig. 1-2 2. BASIC ADJUSTMENTS 2-1: WHITE BALANCE 1. Place the set in Aging Test for more than 15 minutes. 2. Receive the gray scale pattern from the Pattern Generator. 3. Press the INPUT button on the remote control to set to the AV mode. 4. Using the remote control, set the brightness and contrast to normal position. 5. Activate the adjustment mode display of Fig. 1-2 and press the channel button (03) on the remote control to select "R DRIVE(N)". 6. Press the CH. UP/DOWN button on the remote control to select the "R DRIVE (N)", "R CUT OFF (N)", "B DRIVE (N)", "B CUT OFF (N)", "R DRIVE (C)", "R CUT OFF (C)", "B DRIVE (C)", "B CUT OFF (C)", "R DRIVE (W)","R CUT OFF (W), "B DRIVE (W)" or "B CUTOFF(W)". 7. Adjust the LEFT/RIGHT button on the remote control to whiten the R DRIVE (N), R CUT OFF (N), B DRIVE (N), B CUT OFF (N), R DRIVE (C), R CUT OFF (C), B DRIVE (C), B CUT OFF (C), R DRIVE (W) ,R CUT OFF (W), B DRIVE (W) and B CUTOFF(W) at each step tone sections equally. 8. Perform the above adjustments 6 and 7 until the white color is achieved. D-1
-
 1
1 -
2
-
3
-
4
-
5
-
6
-
7
-
8
-
9
-
 10
10 -
 11
11 -
 12
12 -
 13
13 -
 14
14 -
 15
15 -
 16
16 -
 17
17 -
 18
18 -
 19
19 -
 20
20 -
21
-
22
-
23
-
24
-
25
-
26
-
27
-
28
-
29
-
30
-
31
-
32
-
33
-
34
-
35
-
36
-
37
-
38
-
39
-
40
-
41
-
42
-
43
-
44
-
45
-
46
-
47
-
48
-
49
-
50
-
51
-
52
-
53
-
54
-
55
-
56
-
57
-
58
-
59
-
60
-
61
-
62
 |
 |