Sharp LC-70LE735U LC70LE735U Operation Manual - Page 9

Contents, Specifications, Information on the Software License for, This Product - 3d

Page 9 highlights

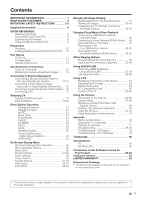
Contents IMPORTANT INFORMATION 1 DEAR SHARP CUSTOMER 3 IMPORTANT SAFETY INSTRUCTIONS 3-6 Supplied Accessories 8 QUICK REFERENCE Attaching the Stand 8 QUICK INSTALLATION TIPS 9 Experiencing HD Images 9 Using the Remote Control Unit 9 Preparation Antennas 10 Installing Batteries in the Remote Control Unit . . . 10 Part Names TV (Front 11 TV (Rear/Side 11 Remote Control Unit 12 Introduction to Connections Types of Connection 13 Displaying an External Equipment Image 13 Connecting to External Equipment Connecting a Blu-ray Disc/DVD Player or HD Cable/Satellite Set-top Box 14-15 Connecting a VCR, Game Console, Camcorder or Cable/Satellite Set-top Box. . . . 15 Connecting a Surround System/Audio System. . 16 Connecting a PC 17 Watching TV Turning On/Off the Power 18 Initial Installation 18-20 Direct Button Operation Changing Channels 21 Changing Volume 21 MUTE 21 Sleep Timer 21 FLASHBACK 21 FREEZE 21 AV MODE 22 INPUT 22 APPS 22 POWER SAVING 22 Closed Captions and Digital Closed Captions 23 VIEW MODE 24 On-Screen Display Menu On-Screen Display Menu Operation 25 Menu Operation Buttons 25 Menu Items 26 Picture Settings 27-28 Audio Settings 29 Power Control 30 System Options 31-33 Initial Setup 34-37 Information 38-40 Enjoying 3D Image Viewing Display Methods for 3D and 2D Images 41 Viewing 3D Images 42-43 Configuring the TV Settings to Enhance 3D Image Viewing 43-45 Enjoying Photo/Music/Video Playback Connecting a USB Memory Device/ USB Hard Drive 46 Connecting a Home Network (DLNA) Server . . . 46 Select the Files to Play Back 47 Playing Back Files on a USB Memory Device 48-52 Playing Back Files on a Home Network (DLNA) Server 53-54 Other Viewing Options Presetting Remote Control Function 55 Operating the Connected Equipment 55-56 Using AQUOS LINK Controlling HDMI Equipment Using AQUOS LINK 57-59 Link Operation Menu 59-60 Using a PC Displaying a PC Image on the Screen 61 Adjusting the PC Image 62 Setting Audio Input 62 PC Compatibility Chart 62 Control of the TV 63-64 Using the Internet Connecting to the Internet 65-66 Internet Setup 67-68 Displaying Updated Information and Support Service 68 Entering Text (Software Keyboard 69 Using the Browser 70-73 Using Applications via the Internet 74 Appendix Removing the Stand 76 Setting the TV on the Wall 77 Optional Accessories 77 Troubleshooting 78-79 Troubleshooting - 3D Images 79 Troubleshooting - Error Message 79 Trademarks 80 Specifications TV 81 Wireless LAN 82 Information on the Software License for This Product 83-84 Calling for Service 85 LIMITED WARRANTY 85 Dimensional Drawings • The dimensional drawings for the LCD TV set are shown on the inside back cover. • The illustrations and on-screen displays in this operation manual are for explanation purposes and may vary slightly from the actual operations. 7

  • 1
  • 2
  • 3
  • 4
  • 5
  • 6
  • 7
  • 8
  • 9
  • 10
  • 11
  • 12
  • 13
  • 14
  • 15
  • 16
  • 17
  • 18
  • 19
  • 20
  • 21
  • 22
  • 23
  • 24
  • 25
  • 26
  • 27
  • 28
  • 29
  • 30
  • 31
  • 32
  • 33
  • 34
  • 35
  • 36
  • 37
  • 38
  • 39
  • 40
  • 41
  • 42
  • 43
  • 44
  • 45
  • 46
  • 47
  • 48
  • 49
  • 50
  • 51
  • 52
  • 53
  • 54
  • 55
  • 56
  • 57
  • 58
  • 59
  • 60
  • 61
  • 62
  • 63
  • 64
  • 65
  • 66
  • 67
  • 68
  • 69
  • 70
  • 71
  • 72
  • 73
  • 74
  • 75
  • 76
  • 77
  • 78
  • 79
  • 80
  • 81
  • 82
  • 83
  • 84
  • 85
  • 86
  • 87
  • 88
  • 89
  • 90
  • 91
  • 92

7
Contents
IMPORTANT INFORMATION
.....................
1
DEAR SHARP CUSTOMER
.......................
3
IMPORTANT SAFETY INSTRUCTIONS
........
3-6
Supplied Accessories
............................
8
QUICK REFERENCE
Attaching the Stand
............................
8
QUICK INSTALLATION TIPS
...................
9
Experiencing HD Images
.......................
9
Using the Remote Control Unit
.................
9
Preparation
Antennas
......................................
10
Installing Batteries in the Remote Control Unit
... 10
Part Names
TV (Front)
.....................................
11
TV (Rear/Side)
.................................
11
Remote Control Unit
...........................
12
Introduction to Connections
Types of Connection
..........................
13
Displaying an External Equipment Image
.......
13
Connecting to External Equipment
Connecting a Blu-ray Disc/DVD Player or
HD Cable/Satellite Set-top Box
...........
14-15
Connecting a VCR, Game Console,
Camcorder or Cable/Satellite Set-top Box
....
15
Connecting a Surround System/Audio System . .
16
Connecting a PC
..............................
17
Watching TV
Turning On/Off the Power
.....................
18
Initial Installation
............................
18-20
Direct Button Operation
Changing Channels
.......................
21
Changing Volume
..........................
21
MUTE
......................................
21
Sleep Timer
................................
21
FLASHBACK
...............................
21
FREEZE
....................................
21
AV MODE
..................................
22
INPUT
......................................
22
APPS
......................................
22
POWER SAVING
...........................
22
Closed Captions and
Digital Closed Captions
...................
23
VIEW MODE
...............................
24
On-Screen Display Menu
On-Screen Display Menu Operation
...........
25
Menu Operation Buttons
......................
25
Menu Items
...................................
26
Picture Settings
............................
27-28
Audio Settings
................................
29
Power Control
.................................
30
System Options
............................
31-33
Initial Setup
.................................
34-37
Information
.................................
38-40
Enjoying 3D Image Viewing
Display Methods for 3D and 2D Images
........
41
Viewing 3D Images
.........................
42-43
Configuring the TV Settings to Enhance
3D Image Viewing
.........................
43-45
Enjoying Photo/Music/Video Playback
Connecting a USB Memory Device/
USB Hard Drive
..............................
46
Connecting a Home Network (DLNA) Server . . .
46
Select the Files to Play Back
...................
47
Playing Back Files
on a USB Memory Device
.................
48-52
Playing Back Files
on a Home Network (DLNA) Server
.......
53-54
Other Viewing Options
Presetting Remote Control Function
...........
55
Operating the Connected Equipment
.......
55-56
Using AQUOS LINK
Controlling HDMI Equipment
Using AQUOS LINK
.......................
57-59
Link Operation Menu
.......................
59-60
Using a PC
Displaying a PC Image on the Screen
..........
61
Adjusting the PC Image
.......................
62
Setting Audio Input
............................
62
PC Compatibility Chart
........................
62
Control of the TV
...........................
63-64
Using the Internet
Connecting to the Internet
..................
65-66
Internet Setup
..............................
67-68
Displaying Updated Information and
Support Service
.............................
68
Entering Text (Software Keyboard)
.............
69
Using the Browser
..........................
70-73
Using Applications via the Internet
.............
74
Appendix
Removing the Stand
...........................
76
Setting the TV on the Wall
.....................
77
Optional Accessories
..........................
77
Troubleshooting
............................
78-79
Troubleshooting - 3D Images
..................
79
Troubleshooting - Error Message
..............
79
Trademarks
......................................
80
Specifications
TV
............................................
81
Wireless LAN
..................................
82
Information on the Software License for
This Product
.................................
83-84
Calling for Service
...............................
85
LIMITED WARRANTY
............................
85
Dimensional Drawings
The dimensional drawings for the LCD TV set are shown
on the inside back cover.
• The illustrations and on-screen displays in this operation manual are for explanation purposes and may vary slightly from
the actual operations.