Sharp LL-S242A-W Operation Manual - Page 11
Digitizer pen cable, Connecting Devices, Connection with a PC
 |
View all Sharp LL-S242A-W manuals
Add to My Manuals
Save this manual to your list of manuals |
Page 11 highlights
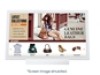
Digitizer pen cable You can secure the digitizer pen cable using the supplied clamper and fixing screw. 1. Pass the digitizer pen cable through the ring of the clamper. 2. Attach the clamper using the fixing screw. Fixing screw Clamper Digitizer pen cable Binding Cables Connecting Devices Caution • Be sure to turn off the power and disconnect the plug from the power outlet before connecting/disconnecting cables. Also, read the manual of the equipment to be connected. • Do not forcibly bend or apply force to cables. Doing so may result in wire breakage or other damage. • When connecting cables, spread a soft cloth on a stable level surface such as a desk, and gently place the monitor on it with the screen facing down. • Do not use any cable that has a damaged or deformed terminal. Using such cables may cause malfunctions. • Connect USB devices that have the following thicknesses around the connector area. D B A 12mm B 38mm A C 8mm D 17mm C TIPS • Images may not be displayed properly depending on the computer (video card) to be connected. • To use the digitizer pen, the necessary software must be installed on the computer from the supplied CD-ROM. (See page 19.) • When connecting a USB device to the USB terminal, use only USB devices with current consumption of 500mA or lower. Connection with a PC Connect the monitor and a PC using the connection cable. nInputting video and audio HDMI input terminal Commercially available HDMI cable (conforming to the HDMI standard) To HDMI output terminal on PC HDMI input terminal Check the orientation of the connector and insert it horizontally as far as it will go. • It is possible to connect the monitor's HDMI input terminal to a smartphone or similar MHL-compliant device using a commercially available MHL cable. This product supports MHL 1. DisplayPort input terminal Commercially available DisplayPort cable To DisplayPort output terminal on PC DisplayPort input terminal Check the orientation of the connector and insert it horizontally as far as it will go. 11 E
-
 1
1 -
2
-
3
-
4
-
5
-
 6
6 -
 7
7 -
 8
8 -
 9
9 -
 10
10 -
 11
11 -
 12
12 -
 13
13 -
 14
14 -
 15
15 -
 16
16 -
17
-
18
-
19
-
20
-
21
-
22
-
23
-
24
-
25
-
26
-
27
-
28
-
29
-
30
-
31
-
32
-
33
-
34
 |
 |
