Sharp LL-S242A-W Operation Manual - Page 16
Disassembling the rack stand, Fold the stand closed and separate the front and back
 |
View all Sharp LL-S242A-W manuals
Add to My Manuals
Save this manual to your list of manuals |
Page 16 highlights
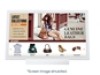
Installation Portrait orientation Disassembling the rack stand Remove the monitor from the rack stand before disassembling the stand. Caution • After removing the monitor from the rack stand, store the stand so that the screws will not be lost. 1. Remove the screws and remove the monitor. Remove fixing screws Run the cables along the hollow on the front side and out between the legs of the back side. 7. Secure the monitor to the stand using the two fixing screws. Landscape orientation Fixing screws (supplied) 2. Disengage the tabs of the support on the front side, and raise the support. Portrait orientation Fixing screws (supplied) 3. Fold the stand closed and separate the front and back sides. E 16
-
 1
1 -
2
-
3
-
4
-
5
-
6
-
7
-
8
-
9
-
10
-
 11
11 -
 12
12 -
 13
13 -
 14
14 -
 15
15 -
 16
16 -
 17
17 -
 18
18 -
 19
19 -
 20
20 -
 21
21 -
22
-
23
-
24
-
25
-
26
-
27
-
28
-
29
-
30
-
31
-
32
-
33
-
34
 |
 |

16
E
Portrait orientation
Run the cables along the hollow on the front side and out
between the legs of the back side.
7. Secure the monitor to the stand using the two fixing
screws.
Landscape orientation
Fixing screws (supplied)
Portrait orientation
Fixing screws (supplied)
Disassembling the rack stand
Remove the monitor from the rack stand before disassembling
the stand.
Caution
•
After removing the monitor from the rack stand, store the
stand so that the screws will not be lost.
1. Remove the screws and remove the monitor.
Remove fixing screws
2. Disengage the tabs of the support on the front side,
and raise the support.
3. Fold the stand closed and separate the front and back
sides.
Installation