Sharp MX-3111U MX-3111U Software Setup - Page 17
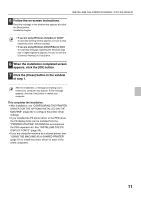
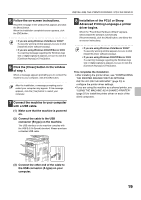
When the printer name window, appears, click the [Next] button.
 |
View all Sharp MX-3111U manuals
Add to My Manuals
Save this manual to your list of manuals |
Page 17 highlights
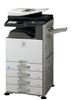
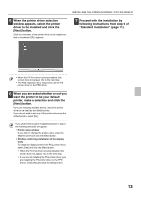
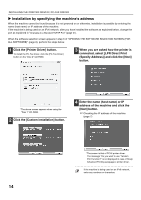
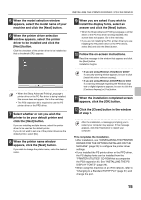
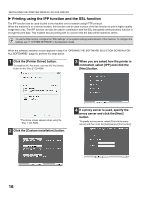
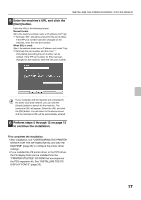
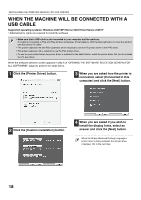
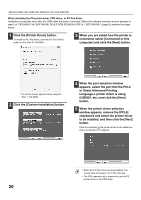
INSTALLING THE PRINTER DRIVER / PC-FAX DRIVER 5 When the model selection window appears, select the model name of your machine and click the [Next] button. 6 When the printer driver selection window appears, select the printer driver to be installed and click the [Next] button. Click the checkbox of the printer driver to be installed so that a checkmark ( ) appears. 9 When you are asked if you wish to install the display fonts, select an answer and click the [Next] button. • When the Sharp Advanced Printing Language-c printer driver or the PC-Fax driver is being installed, this screen does not appear. Go to the next step. • If you are not installing the PCL printer driver (you are installing the PS printer driver or the PPD driver), select [No] and click the [Next] button. 10 Follow the on-screen instructions. Read the message in the window that appears and click the [Next] button. Installation begins. • When the Sharp Advanced Printing Language-c printer driver or the PC-Fax driver is being installed, this screen does not appear. Go to the next step. • The PS3 expansion kit is required to use the PS printer driver or the PPD driver. 7 Select whether or not you wish the printer to be your default printer and click the [Next] button. If you are installing multiple drivers, select the printer driver to be used as the default printer. If you do not wish to set one of the printer drivers as the default printer, select [No]. 8 When the printer name window appears, click the [Next] button. If you wish to change the printer name, enter the desired name. • If you are using Windows Vista/Server 2008/7 If a security warning window appears, be sure to click [Install this driver software anyway]. • If you are using Windows 2000/XP/Server 2003 If a warning message regarding the Windows logo test or digital signature appears, be sure to click the [Continue Anyway] or [Yes] button. 11 When the installation completed screen appears, click the [OK] button. 12 Click the [Close] button in the window of step 1. After the installation, a message prompting you to restart your computer may appear. If this message appears, click the [Yes] button to restart your computer. This completes the installation. • After installation, see "CONFIGURING THE PRINTER DRIVER FOR THE OPTIONS INSTALLED ON THE MACHINE" (page 23) to configure the printer driver settings. • If you installed the PS printer driver or the PPD driver, the PS display fonts can be installed from the "PRINTER UTILITIES" CD-ROM that accompanies the PS3 expansion kit. See "INSTALLING THE PS DISPLAY FONTS" (page 29). • When using this machine on an IPv6 network, refer to "Changing to a Standard TCP/IP Port" (page 31) and change the port. 15
-
 1
1 -
2
-
3
-
4
-
5
-
6
-
7
-
8
-
9
-
10
-
11
-
 12
12 -
 13
13 -
 14
14 -
 15
15 -
 16
16 -
 17
17 -
 18
18 -
 19
19 -
 20
20 -
 21
21 -
 22
22 -
23
-
24
-
25
-
26
-
27
-
28
-
29
-
30
-
31
-
32
-
33
-
34
-
35
-
36
-
37
-
38
-
39
-
40
-
41
-
42
-
43
-
44
-
45
-
46
 |
 |