Sharp MX-B402SC Starter Guide - Page 31
Setup In A Windows, Environment - scanner driver
 |
View all Sharp MX-B402SC manuals
Add to My Manuals
Save this manual to your list of manuals |
Page 31 highlights
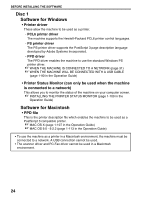
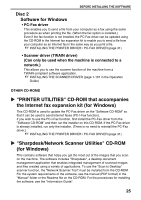
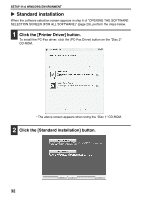
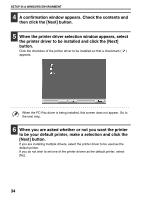
SETUP IN A WINDOWS ENVIRONMENT This section explains how to install the software on a Windows computer. For more details regarding installation procedures and instructions for installation in Macintosh environments, see Chapter 1 of the Operation Guide. OPENING THE SOFTWARE SELECTION SCREEN (FOR ALL SOFTWARE) 1 Insert the "Software CD-ROM" into your computer's CD-ROM drive. • If you are installing the printer driver or printer status monitor, insert the "Software CD-ROM" that shows "Disc 1" on the front of the CD-ROM. • If you are installing the PC-Fax driver or scanner driver, insert the "Software CD-ROM" that shows "Disc 2" on the front of the CD-ROM. 2 Click the [Start] button ( ), click [Computer], and then double-click the [CD-ROM] icon ( ). • In Windows XP/Server 2003, click the [start] button, click [My Computer], and then double-click the [CD-ROM] icon. • In Windows 2000, double-click [My Computer] and then double-click the [CD-ROM] icon. 3 Double-click the [Setup] icon ( ). In Windows 7, if a message screen appears asking you for confirmation, click [Yes]. In Windows Vista/Server 2008, if a message screen appears asking you for confirmation, click [Allow]. 4 The "SOFTWARE LICENSE" window will appear. Make sure that you understand the contents of the license agreement and then click the [Yes] button. You can show the "SOFTWARE LICENSE" in a different language by selecting the desired language from the language menu. To install the software in the selected language, continue the installation with that language selected. 29
-
 1
1 -
2
-
3
-
4
-
5
-
6
-
7
-
8
-
9
-
10
-
11
-
12
-
13
-
14
-
15
-
16
-
17
-
18
-
19
-
20
-
21
-
22
-
23
-
24
-
25
-
 26
26 -
 27
27 -
 28
28 -
 29
29 -
 30
30 -
 31
31 -
 32
32 -
 33
33 -
 34
34 -
 35
35 -
 36
36 -
37
-
38
-
39
-
40
-
41
-
42
-
43
-
44
-
45
-
46
-
47
-
48
-
49
-
50
-
51
-
52
-
53
-
54
-
55
-
56
 |
 |
