Sharp PG-M15X PG-M15S , PG-M15X Operation Manual
Sharp PG-M15X - Notevision XGA DLP Projector Manual
 |
UPC - 074000358225
View all Sharp PG-M15X manuals
Add to My Manuals
Save this manual to your list of manuals |
Sharp PG-M15X manual content summary:
- Sharp PG-M15X | PG-M15S , PG-M15X Operation Manual - Page 1
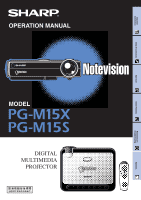
OPERATION MANUAL MODEL DIGITAL MULTIMEDIA PROJECTOR Important Information Setup & Connections Operation Useful Features Maintenance & Troubleshooting Appendix - Sharp PG-M15X | PG-M15S , PG-M15X Operation Manual - Page 2
be inserted elsewhere into a 3A socket outlet, as a serious electric shock may occur. To fit an appropriate plug to the mains lead, follow the instructions below: IMPORTANT: The wires in the mains lead are coloured in accordance with the following code: Blue: Neutral Brown: Live As the colours of - Sharp PG-M15X | PG-M15S , PG-M15X Operation Manual - Page 3
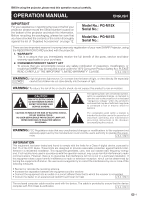
user to the presence of important operating and maintenance (servicing) instructions in the literature accompanying the product. WARNING: FCC and, if not installed and used in accordance with the operation manual, may cause harmful interference to radio communications. However, there is - Sharp PG-M15X | PG-M15S , PG-M15X Operation Manual - Page 4
1ONLY. UV RADIATION : CAN CAUSE EYE DAMAGE. TURN OFF LAMP BEFORE SERVICING. MEDIUM PRESSURE LAMP : RISK OF EXPLOSION. POTENTIAL HAZARD OF GLASS PARTICLES IF LAMP HAS RUPTURED. HANDLE WITH CARE. SEE OPERATION MANUAL. PRECAUTIONS A OBSERVER LORS DU REMPLACEMENT DE LA LAMPE. DEBRANCHER - Sharp PG-M15X | PG-M15S , PG-M15X Operation Manual - Page 5
to operate from battery power, or other sources, refer to the operating instructions. 12. Grounding or Polarization This product is provided with one of the following types of 17. Servicing Do not attempt to service this product yourself as opening or removing covers may expose you to dangerous - Sharp PG-M15X | PG-M15S , PG-M15X Operation Manual - Page 6
something should fall into the product, immediately disconnect the power cable from the product and have the object removed by a Sharp Authorized Projector Dealer or Service Center. • Do not place any liquids on top of the product. • Do not look into the lens while the product is on. Serious damage - Sharp PG-M15X | PG-M15S , PG-M15X Operation Manual - Page 7
Outstanding Features 1. SMALL, LIGHTWEIGHT & USER-FRIENDLY DESIGN Small and lightweight design (3.5 lbs/1.6 kg, 2.0 liter) enhances projector portability. 2. 1.2 MANUAL ZOOM/FOCUS Adjusts image size without relocating the projector. 3. EASY-TO-USE GRAPHICAL USER INTERFACE (GUI) Multi-color - Sharp PG-M15X | PG-M15S , PG-M15X Operation Manual - Page 8
Contents 6 Usage Guidelines 7 How to Access the PDF Operation Manuals (for Windows and Macintosh 8 Part Names 9 Setup & Image 33 Maintenance & Troubleshooting Lamp/Maintenance Indicators 46 Replacing the Projection Lamp 47 Using the Kensington Lock 48 Troubleshooting 48 Appendix Using the - Sharp PG-M15X | PG-M15S , PG-M15X Operation Manual - Page 9
41˚F (ם5˚C) Cautions Concerning the Setup of the Projector For minimal servicing and to maintain high image quality, SHARP recommends that this projector Temperature Monitor Function If the projector starts to overheat due to setup problems, "TEMP." will appear in the lower-left corner of the - Sharp PG-M15X | PG-M15S , PG-M15X Operation Manual - Page 10
click on the "manuals" folder. 4 Double click on the "acrobat" folder. 5 Double click on the "acrobat" folder. 5 Double click on the "mac" folder. 6 Double click on the "windows" folder. 7 Double click on the desired installation program and follow the instructions on the screen. 6 Double - Sharp PG-M15X | PG-M15S , PG-M15X Operation Manual - Page 11
Important Information Part Names Numbers next to the part names refer to the main pages in this manual where the topic is explained. Projector Front and Top View MENU button 26 ON/OFF button 18 POWER indicator 18 LAMP REPLACEMENT indicator 46 19 - Sharp PG-M15X | PG-M15S , PG-M15X Operation Manual - Page 12
Important Information Part Names Remote Control Front View Mouse (∂/ƒ)/ 25 Adjustment (∂/ƒ) buttons 26 Remote control signal transmitter indicator (Flashes when remote control sends a signal) Mouse (ß) button 25 MOUSE button 25 FREEZE button 34 Remote control signal transmitting window - Sharp PG-M15X | PG-M15S , PG-M15X Operation Manual - Page 13
Setup & Connections Setup & Connections 11 - Sharp PG-M15X | PG-M15S , PG-M15X Operation Manual - Page 14
S-video cable 9HJ4283113001 AV audio cable 9HJ4283121001 Lenscap with strap 9HJ7083117001 CD-ROM 9HJ3683104001 Projector operation manual 9HJ3683107001 Projector quick reference guide 9HJ3683110001 Optional Cables DVI digital cable (9Ј10Љ, 3.0 m) AN-C3DVU HD-15/RCA cable (9Ј10Љ, 3.0 m) AN-C3CP - Sharp PG-M15X | PG-M15S , PG-M15X Operation Manual - Page 15
a computer to the projector using the DVI digital cable-Digital connection instructions 1 Connect one end of the DVI digital cable (sold separately) be turned on last. Projector • Please read the computer's operation manual carefully. • Refer to page 53 "Computer Compatibility Chart" for - Sharp PG-M15X | PG-M15S , PG-M15X Operation Manual - Page 16
the DVI-Analog to VGA cable-Analog connection instructions 1 Connect one end of the supplied computer Projector • Please read the computer's operation manual carefully. • Refer to page 53 " Contact your nearest Sharp Authorized Projector Dealer or Service Center. 3 PC audio cable 4 1 - Sharp PG-M15X | PG-M15S , PG-M15X Operation Manual - Page 17
Setup & Connections Connecting the Projector Connecting the Projector to Video Equipment You can connect your projector to a VCR, laser disc player and other audiovisual equipment. CAUTION • Always turn off the projector while connecting to audiovisual equipment, in order to protect both the - Sharp PG-M15X | PG-M15S , PG-M15X Operation Manual - Page 18
Setup & Connections Connecting the Projector Connecting a video source (DTV* decoder or DVD player) using the DVI-DIGITAL/ANALOG INPUT 1 port 1 Connect one end of the supplied DVI-Analog to VGA adaptor to the DVI-DIGITAL/ANALOG INPUT 1 port on the projector. 2 Connect the other end of the DVI- - Sharp PG-M15X | PG-M15S , PG-M15X Operation Manual - Page 19
computer port is not correctly set up. Please refer to the operation manual of the computer for details on setting up/installing the correct mouse with some Macintosh computers. Contact your nearest Sharp Authorized Projector Dealer or Service Center. 3 RS-232C cable (null modem, cross type, sold - Sharp PG-M15X | PG-M15S , PG-M15X Operation Manual - Page 20
Operation Operation Basic Operations Maintenance indicators Projector 2 Remote control Maintenance indicators 1 Make the necessary connections before proceeding. Connect the power cord to a wall outlet. The POWER indicator illuminates red and the projector enters standby mode. 2 Press ON/OFF on - Sharp PG-M15X | PG-M15S , PG-M15X Operation Manual - Page 21
Basic Operations Zooming/Focusing 3 Rotate the ZOOM knob. The image can be adjusted to the desired size within the zoom range. 4 Rotate the FOCUS ring until the image on the screen becomes clear. Operation Projector 8 5 7 6 Remote control EXAMPLE 5 INPUT 1 (DVI) Mode f INPUT 1 (RGB) Mode 6 - Sharp PG-M15X | PG-M15S , PG-M15X Operation Manual - Page 22
Setting up the Screen Operation Position the projector perpendicular to the screen with all feet flat and level to achieve an optimal image. Move the projector forward or backward if the edges of the image are distorted. • The projector lens should be centered in the middle of the screen. If the - Sharp PG-M15X | PG-M15S , PG-M15X Operation Manual - Page 23
Setting up the Screen Screen 90˚ H Lens center Operation L: Projection distance PG-M15S Throw distance ratio NORMAL Mode (4:3) x : Picture size (Diag.) (inches) L1: Maximum projection distance (feet) L2: Minimum projection distance (feet) H: Distance from the lens center to the bottom of the - Sharp PG-M15X | PG-M15S , PG-M15X Operation Manual - Page 24
optional Sharp ceiling-mount bracket for this installation. • Before mounting the projector, contact your nearest Sharp Authorized Projector Dealer or Service Center to obtain the recommended ceiling-mount bracket (sold separately). (ANPGCM85 ceiling-mount bracket and its AN-EP101A extension tube - Sharp PG-M15X | PG-M15S , PG-M15X Operation Manual - Page 25
Operation Setting up the Screen Digital Keystone Correction • When the image is distorted due to the projection angle, the digital keystone correction function allows you to correct it. • The digital keystone correction can be made by pressing KEYSTONE Projector 2 1 2 Using the KEYSTONE - Sharp PG-M15X | PG-M15S , PG-M15X Operation Manual - Page 26
the corresponding terminal on the computer. USB mouse control cable 1 To RS-232C/MOUSE port To USB port 2 Computer • Windows 95 does not support USB mouse driver software. • The minimum system requirements for the USB type mouse system are shown below. Windows Hardware: PC/AT compatible machine - Sharp PG-M15X | PG-M15S , PG-M15X Operation Manual - Page 27
to the normal mode. • The wireless mouse may not operate correctly if your computer is not correctly set up. Refer to the computer's operation manual for details of setting up/installing the mouse driver. • For one-button mouse systems, use either LEFT-CLICK or RIGHT-CLICK. • To conserve battery - Sharp PG-M15X | PG-M15S , PG-M15X Operation Manual - Page 28
Operation Using the GUI (Graphical User Interface) Menu Screens This projector has four sets of menu screens (INPUT 1 (DVI), INPUT 1 (RGB), INPUT 1 (COMPONENT) and INPUT 2 (S-VIDEO) or 3 (VIDEO)) that allow you to adjust the image and various projector settings. These menu screens can be operated - Sharp PG-M15X | PG-M15S , PG-M15X Operation Manual - Page 29
Using the GUI (Graphical User Interface) Menu Screens 4, 5 Contrast 0 Picture Bright 0 Fine Sync Red 0 Options Blue 0 Language CLR Temp High Reset PRJ Mode 4 Press ∂/ƒ to select an adjustment item in the sub menu. 5 Press ENTER to activate the selected adjustment item. END 6 - Sharp PG-M15X | PG-M15S , PG-M15X Operation Manual - Page 30
Operation Using the GUI (Graphical User Interface) Menu Screens Items on the INPUT 1 (DVI) Mode Menu Bar Items on the INPUT 1 (RGB) Mode Menu Bar Main menu Picture Fine Sync Sub menu Contrast Bright Red Blue CLR Temp Reset Clock Phase H-Pos V-Pos Signal Info Options Language Lamp Timer - Sharp PG-M15X | PG-M15S , PG-M15X Operation Manual - Page 31
Operation Using the GUI (Graphical User Interface) Menu Screens Items on the INPUT 1 (COMPONENT) Mode Menu Bar Main menu Picture Options Sub menu Contrast Bright Color Tint Sharp Red Blue CLR Temp Reset Lamp Timer Keystone AV Mute Disp. OSD Display Auto Power Off Auto Source Background - Sharp PG-M15X | PG-M15S , PG-M15X Operation Manual - Page 32
Operation Selecting the On-screen Display Language Projector 1, 5 2, 4 2, 3 Remote control (GUI) On-screen Display Picture Fine Sync Options Language PRJ Mode English Deutsch Español Nederlands Français Italiano Svenska Português English is the preset language for the On-screen Display. The - Sharp PG-M15X | PG-M15S , PG-M15X Operation Manual - Page 33
Operation Picture Adjustments Projector 1,5 2,3 2,3,4 Remote control (GUI) On-screen Display INPUT 1 (RGB) Mode Contrast 0 Picture Bright 0 Fine Sync Red 0 Options Blue 0 Language CLR Temp High Reset PRJ Mode END SELECT BACK ENTER INPUT 1 (COMPONENT) Mode Contrast 0 - Sharp PG-M15X | PG-M15S , PG-M15X Operation Manual - Page 34
Picture Adjustments Projector 1,5 2,3,4 2,3,4 Remote control (GUI) On-screen Display Picture Fine Sync Options Language PRJ Mode Contrast Bright Red Blue CLR Temp Reset 0 0 0 0 High Low END SELECT BACK ENTER Selecting the Color Temperature This function can be used to adjust the color - Sharp PG-M15X | PG-M15S , PG-M15X Operation Manual - Page 35
(INPUT 1 (RGB) mode only) Projector Auto Sync Adjustment • Used to automatically adjust a computer image. • Auto Sync adjustment can be made manually by pressing AUTO SYNC. 1 1 Press AUTO SYNC. Operation Remote control On-screen Display During Auto Sync adjustment, "Adjusting The Image" is - Sharp PG-M15X | PG-M15S , PG-M15X Operation Manual - Page 36
Useful Features Useful Features Freeze Function Remote control 1, 2 On-screen Display This function allows you to instantly freeze a moving image. This is useful when you want to display a still image from a computer or video, giving you more time to explain the image to the audience. You can - Sharp PG-M15X | PG-M15S , PG-M15X Operation Manual - Page 37
Digital Image Magnification Remote control 2 1 3 On-screen Display This function allows you to magnify a specific portion of an image. This is useful when you want to display a detailed portion of the image. 1 Press ENLARGE on the remote control. Each time ENLARGE is pressed, the image will be - Sharp PG-M15X | PG-M15S , PG-M15X Operation Manual - Page 38
Selecting the Picture Display Mode Remote control 1 This function allows you to modify or customize the picture display mode to enhance the input image. Depending on the input signal, you can choose the picture display mode preferred. 1 Press RESIZE on the remote control. Each time RESIZE is - Sharp PG-M15X | PG-M15S , PG-M15X Operation Manual - Page 39
Selecting the Picture Display Mode DVD/VIDEO EXAMPLE PG-M15X 4:3 aspect ratio 480I, NTSC, PAL, SECAM PG-M15S 4:3 aspect ratio 480I, NTSC, PAL, SECAM 4:3 Letterbox Squeeze 4:3 Letterbox Squeeze NORMAL 1024 ן768 1024 ן768 1024 ן768 STRETCH 1024 ן576 1024 ן576 1024 ן576 BORDER - Sharp PG-M15X | PG-M15S , PG-M15X Operation Manual - Page 40
Gamma Correction Remote control 1 STANDARD On-screen Display s GAMMA 1 s GAMMA 2 • Gamma is an image quality enhancement function that offers a richer image by brightening the darker portions of the image without altering the brightness of the brighter portions. • Three gamma settings are - Sharp PG-M15X | PG-M15S , PG-M15X Operation Manual - Page 41
Checking the Input Signal (INPUT 1 (DVI) mode or (RGB) mode only) Projector 1, 4 2, 3 2, 3 This function allows you to check the current input signal information. 1 Press MENU. 2 Press ∂/ƒ to select "Fine Sync", and then press ENTER. 3 Press ∂/ƒ to select "Signal Info", and then press ENTER. 4 To - Sharp PG-M15X | PG-M15S , PG-M15X Operation Manual - Page 42
Turning On/Off the AV Mute Message Projector 1,5 2,3,4 2,3,4 Remote control (GUI) On-screen Display Picture Fine Sync Options Language PRJ Mode Lamp Timer Keystone AV Mute Disp. OSD Display Auto Power Off Auto Source Background 100 0 ON OFF ON ON Blue This function allows you to turn off the - Sharp PG-M15X | PG-M15S , PG-M15X Operation Manual - Page 43
On-screen Display Override Function Projector 1,5 2,3,4 2,3,4 Remote control (GUI) On-screen Display Picture Fine Sync Options Language PRJ Mode Lamp Timer Keystone AV Mute Disp. OSD Display Auto Power Off Auto Source Background 100 0 ON ON OFF ON Blue This function allows you to turn off the - Sharp PG-M15X | PG-M15S , PG-M15X Operation Manual - Page 44
Automatic Power Shutoff Function Projector 1,5 2,3,4 2,3,4 Remote control (GUI) On-screen Display Picture Fine Sync Options Language PRJ Mode Lamp Timer Keystone AV Mute Disp. OSD Display Auto Power Off Auto Source Background 100 0 ON ON ON OFF Blue When no input signal is detected for - Sharp PG-M15X | PG-M15S , PG-M15X Operation Manual - Page 45
a signal. • For multiple signal input, can skip the input source that has no input signal and selects the one that has a signal. OFF • Manually select the input source connected to the projector. 1 Press MENU. 2 Press ∂/ƒ to select "Options", and then press ENTER. 3 Press ∂/ƒ to select "Auto - Sharp PG-M15X | PG-M15S , PG-M15X Operation Manual - Page 46
Reverse/Invert Image Function Projector 1, 4 2, 3 2, 3 Remote control (GUI) On-screen Display Picture Fine Sync Options Language PRJ Mode Front Ceiling Front Rear Ceiling Rear END SELECT BACK ENTER This projector is equipped with a reverse/invert image function which allows you to - Sharp PG-M15X | PG-M15S , PG-M15X Operation Manual - Page 47
Maintenance & Troubleshooting 45 Maintenance & Troubleshooting - Sharp PG-M15X | PG-M15S , PG-M15X Operation Manual - Page 48
problems • If a problem occurs, either the Problem Sharp Authorized Projector Dealer or Service Center for repair. • Projector Dealer or Service Center for repair. 1,500 hours. Condition Problem The LAMP REPLACEMENT indicator • Lamp Authorized Projector Dealer or Service Center. • Replace the - Sharp PG-M15X | PG-M15S , PG-M15X Operation Manual - Page 49
type BQC-PGM15X//1 from your nearest Sharp Authorized Projector Dealer or Service Center. Then carefully change the lamp by following the instructions below. If you wish, you may have the lamp replaced direction of the arrow. Then tighten the user service screws. Maintenance & Troubleshooting 47 - Sharp PG-M15X | PG-M15S , PG-M15X Operation Manual - Page 50
for use with a Kensington MicroSaver Security System. Refer to the information that came with the system for instructions on how to use it to secure the projector. Troubleshooting Problem Check No picture and no sound. • Projector power cord is not plugged into the wall outlet. • Selected - Sharp PG-M15X | PG-M15S , PG-M15X Operation Manual - Page 51
Appendix Using the Soft Carrying Pouch Use the soft carrying pouch to prevent damage to your projector and its lens when transporting. CAUTION • Do not lift or carry the projector by the lens or the lens cap as this may damage the lens. • Besides the projector, do not put anything else into the soft - Sharp PG-M15X | PG-M15S , PG-M15X Operation Manual - Page 52
Connection Pin Assignments DVI INPUT 1 Port: 29-pin DVI input C5 Pin No. C4 C3 24 17 9 1 2 3 4 5 6 7 8 16 8 1 9 10 C2 C1 11 12 13 14 • *1 Return for ם5 V, Hsync. and Vsync. 15 • *2 These pins are not used on this equipment. 16 17 18 19 20 21 22 23 24 C1 C2 C3 C4 - Sharp PG-M15X | PG-M15S , PG-M15X Operation Manual - Page 53
Connection Pin Assignments OUTPUT (INPUT 1) Signal Port: 15-pin Mini D-sub female connector RGB output Analog 1 Video output (red) 11 15 2 Video output 6 10 (green/sync on green) 1 5 3 Video output (blue) 4 Not connected 5 Not connected 6 Earth (red) 7 Earth (green/sync on green) 8 - Sharp PG-M15X | PG-M15S , PG-M15X Operation Manual - Page 54
C1 C2 C3 C4 P1 P2 P3 P4 Return code (0DH) Command 4-digit Response code format Normal response Parameter 4-digit O K Return code (0DH) Problem response (Failure due to incorrect command/parameter or the other communication errors) E R R Return code (0DH) When more than one code is being - Sharp PG-M15X | PG-M15S , PG-M15X Operation Manual - Page 55
computer and output the display data in "CRT only" mode. Details on how to change display modes can be found in your notebook computer's operation manual. • This projector can receive 640 ן350 VESA format VGA signals, however, "640 ן400" will appear on the screen. Appendix 53 - Sharp PG-M15X | PG-M15S , PG-M15X Operation Manual - Page 56
11Љ, 1.8 m), AV audio cable (5Ј 11Љ, 1.8 m), Soft carrying pouch, Lenscap with strap, CD-ROM, Projector operation manual, Projector quick reference guide Replacement parts Remote control (9HJ7583104001), AAA size battery (9HJ4683101001), Power cord for U.S., Canada etc. (9HJ4283114001), Power cord - Sharp PG-M15X | PG-M15S , PG-M15X Operation Manual - Page 57
Dimensions Rear View Top View 6 59/64 (176) 1/3 (3) Side View 8 55/64 (225) 3 1/64 (76.5) 6 1/32 (153) 33/64 (13) 4 3/4 (120.5) 1 (25.5) 31/32 (24.5) 2 19/32 (66) Front View Bottom View Units: inches (mm) 55 Appendix - Sharp PG-M15X | PG-M15S , PG-M15X Operation Manual - Page 58
combining horizontal and vertical sync pulses. Dot by dot Mode that projects images in their native resolution. DVI Digital Visual Interface that supports both digital and analog displays. FREEZE Function to freeze a moving image. GUI Graphical User Interface. User interface with graphics that allow - Sharp PG-M15X | PG-M15S , PG-M15X Operation Manual - Page 59
Index A AC socket 13 Adjuster 22 ANALOG OUTPUT port 9 Aspect ratio 36 AUDIO INPUT terminal 9 Auto Power Off 42 Auto Source 43 Auto sync adjustment 33 AUTO SYNC button 33 AV audio cable 15 AV MUTE button 19 AV Mute Disp 40 B BACK button 27 Background 43 C Ceiling-mount 22 Ceilingם - Sharp PG-M15X | PG-M15S , PG-M15X Operation Manual - Page 60
For SHARP Assistance If you encounter any problems during setup or operation of this projector, first refer to the "Troubleshooting" section on page 48. If this operation manual does not answer your question, please contact the Service Department of your nearest SHARP Authorized Distributor. USA - Sharp PG-M15X | PG-M15S , PG-M15X Operation Manual - Page 61
SHARP CORPORATION
-
 1
1 -
 2
2 -
 3
3 -
 4
4 -
 5
5 -
 6
6 -
 7
7 -
8
-
9
-
10
-
11
-
12
-
13
-
14
-
15
-
16
-
17
-
18
-
19
-
20
-
21
-
22
-
23
-
24
-
25
-
26
-
27
-
28
-
29
-
30
-
31
-
32
-
33
-
34
-
35
-
36
-
37
-
38
-
39
-
40
-
41
-
42
-
43
-
44
-
45
-
46
-
47
-
48
-
49
-
50
-
51
-
52
-
53
-
54
-
55
-
56
-
57
-
58
-
59
-
60
-
61
 |
 |
Important
Information
Setup & Connections
Operation
Useful Features
Maintenance &
Troubleshooting
Appendix
OPERATION MANUAL
MODEL
DIGITAL
MULTIMEDIA
PROJECTOR