Sharp VL-AH150 Operation Manual - Page 35
Recording the Date and Time
 |
View all Sharp VL-AH150 manuals
Add to My Manuals
Save this manual to your list of manuals |
Page 35 highlights
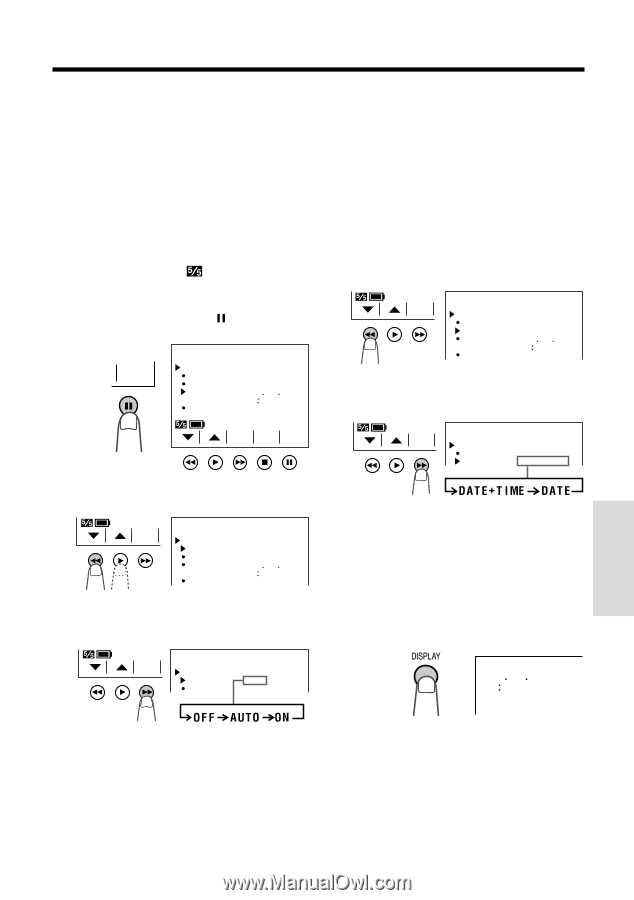
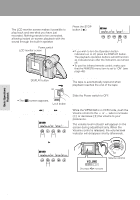
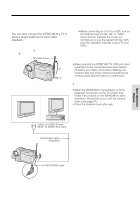
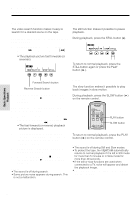
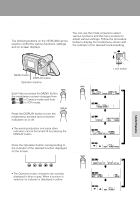
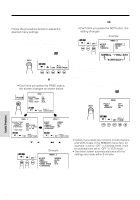
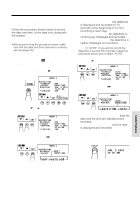
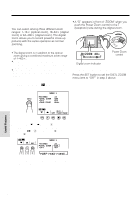
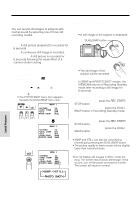
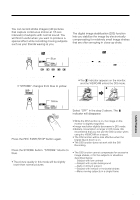
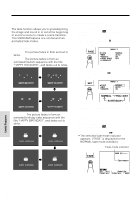
Recording the Date and Time When "AUTO" is selected, the date/time is displayed and recorded for 10 Follow the procedure shown below to record the date and time, or the date only, along with the subject. seconds at the beginning of the first recording of each day. When "ON" is selected, the date/time is continuously displayed and recorded. Note: • Before performing the procedure below, make When "OFF" is selected, the date/time is neither displayed nor recorded. sure that the date and time have been correctly set (see page 16). Note: In "AUTO", if you wish to record the date/time a second time that day, repeat the 1 In Recording Standby mode, press the procedure above and re-select "AUTO". MENU button until (MENU 1) appears. 5 Press the ĭ button to select "SELECT". MENU 3 2 Press the PAGE button ( ) until MENU 3 appears. MENU 3 SET DATE / T IME D I SPLAY SELECT AUTO DATE + T I ME SETT I NG JUN 2 2 0 0 1 1 0 3 0 AM 12H / 24H 12H PAGE DAT E / T IME D I SPLAY SELECT SETT I NG 12H / 24H OFF DAT E + T I ME JUN 2 2 0 0 1 1 0 3 0 AM 12H 6 Press the SET button (B) to select "DATE+TIME" or "DATE". 5 P I CSET TURE PAGE MENU 3 SET DAT E / T IME D I SPLAY SELECT AUTO DAT E + T I ME 3 Press the ĭ or İ button to select "DISPLAY". MENU 3 SET DAT E / T IME D I SPLAY SELECT OFF DAT E + T I ME SETT I NG JUN 2 2 0 0 1 1 0 3 0 AM 12H / 24H 12H 4 Press the SET button (B) to select "AUTO", "ON", or "OFF". When "DATE+TIME" is selected, both the date and the time are displayed and recorded. When "DATE" is selected, only the date is displayed and recorded. 7 Press the DISPLAY button to turn off the menu screen, and then press the REC START/STOP button to begin recording. MENU 3 SET DA T E / T I ME D I SPLAY SELECT OFF DA T E + T I ME JUN 2 2 0 0 1 10 30 AM Useful Features 26
-
 1
1 -
2
-
3
-
4
-
5
-
6
-
7
-
8
-
9
-
10
-
11
-
12
-
13
-
14
-
15
-
16
-
17
-
18
-
19
-
20
-
21
-
22
-
23
-
24
-
25
-
26
-
27
-
28
-
29
-
 30
30 -
 31
31 -
 32
32 -
 33
33 -
 34
34 -
 35
35 -
 36
36 -
 37
37 -
 38
38 -
 39
39 -
 40
40 -
41
-
42
-
43
-
44
-
45
-
46
-
47
-
48
-
49
-
50
-
51
-
52
-
53
-
54
-
55
-
56
-
57
-
58
-
59
-
60
-
61
-
62
-
63
-
64
-
65
-
66
-
67
-
68
-
69
-
70
-
71
-
72
-
73
-
74
-
75
-
76
-
77
-
78
-
79
-
80
 |
 |