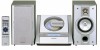
Sharp XL 1700 Service Manual - Page 5
Setting the clock, Remote control, Troubleshooting Chart - set clock
 |
UPC - 074000412644
View all Sharp XL 1700 manuals
Add to My Manuals
Save this manual to your list of manuals |
Page 5 highlights
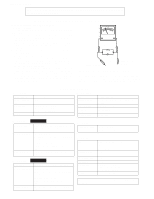
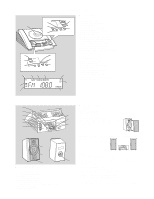
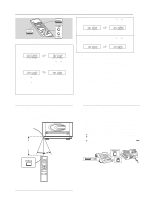
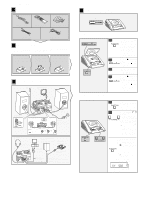
Setting the clock OPERATION MANUAL XL-1700/1700C 3 Within 1 minute, press the PRESET ( or ) button to adjust the hour and then press the MEMORY button. This may be operated only with the remote control. In this example, the clock is set for the 12-hour (AM12:00) display. 1 Press the CLOCK button and within 3 seconds, press the MEMORY button. 2 Within 1 minute, press the PRESET ( or ) button to select 12-hour or 24-hour display and then press the MEMORY button. "AM 12:00" The 12-hour display will appear. (AM 12:00 - PM 11:59) "0:00" The 24-hour display will appear. (0:00 - 23:59) Note that this can only be set when the unit is first installed or it has been reset. When the 12-hour display is selected, "AM" will change automatically to "PM". 4 Within 1 minute, press the PRESET ( or ) button to adjust the minutes and then press the MEMORY button. The clock starts from "0" second. (Seconds are not displayed.) To confirm the time display when the power is on: Press the CLOCK button. The time display will appear for about 5 seconds. Note: The time will flash at the push of the CLOCK button when the AC power supply is restored after a power failure or unplugging the unit. Readjust the clock as follows. To readjust the clock: Perform "Setting the clock" from the beginning. If the time display is flashing, step 2 (for selecting the 12-hour or 24-hour display) will be skipped. To change the 12-hour or 24-hour display: 1 Clear all the programmed contents. 2 Perform "Setting the clock" from the beginning. Remote control s Test of the remote control Face the remote control directly to the remote sensor on the unit. The remote control can be used within the range shown below: Press the POWER button. Does the power turn on? Now, you can enjoy your music. Remote sensor 8" - 20' (0.2 m - 6 m) Troubleshooting Chart s If trouble occurs When this product is subjected to strong external interference (mechanical shock, excessive static electricity, abnormal supply voltage due to lightning, etc.) or if it is operated incorrectly, it may malfunction. If such a problem occurs, do the following: 1 Set the unit to the stand-by mode and turn the power on again. 2 If the unit is not restored in step 1, unplug and plug in the unit, and then turn the power on. 3 If neither step 1 nor 2 restores the unit, do the following: Press the POWER button to enter the power stand-by mode. Unplug the AC power cord from the AC INPUT jack on the unit. While pressing down the MEMORY/SET button and the button, plug the AC power cord into the AC INPUT jack on the unit. AC INPUT Caution: This operation will erase all data stored in memory including clock, timer settings, tuner preset, and CD program. - 5 -
-
 1
1 -
 2
2 -
 3
3 -
 4
4 -
 5
5 -
 6
6 -
 7
7 -
 8
8 -
 9
9 -
 10
10 -
 11
11 -
12
-
13
-
14
-
15
-
16
-
17
-
18
-
19
-
20
-
21
-
22
-
23
-
24
-
25
-
26
-
27
-
28
-
29
-
30
-
31
-
32
-
33
-
34
-
35
-
36
-
37
-
38
-
39
-
40
-
41
-
42
-
43
-
44
-
45
-
46
-
47
-
48
-
49
-
50
-
51
-
52
-
53
-
54
-
55
-
56
 |
 |
