Singer 9100 Professional Instruction Manual - Page 30
OPERATION BUTTONS, Needle up/ down position button, Auto-lock button
 |
View all Singer 9100 Professional manuals
Add to My Manuals
Save this manual to your list of manuals |
Page 30 highlights
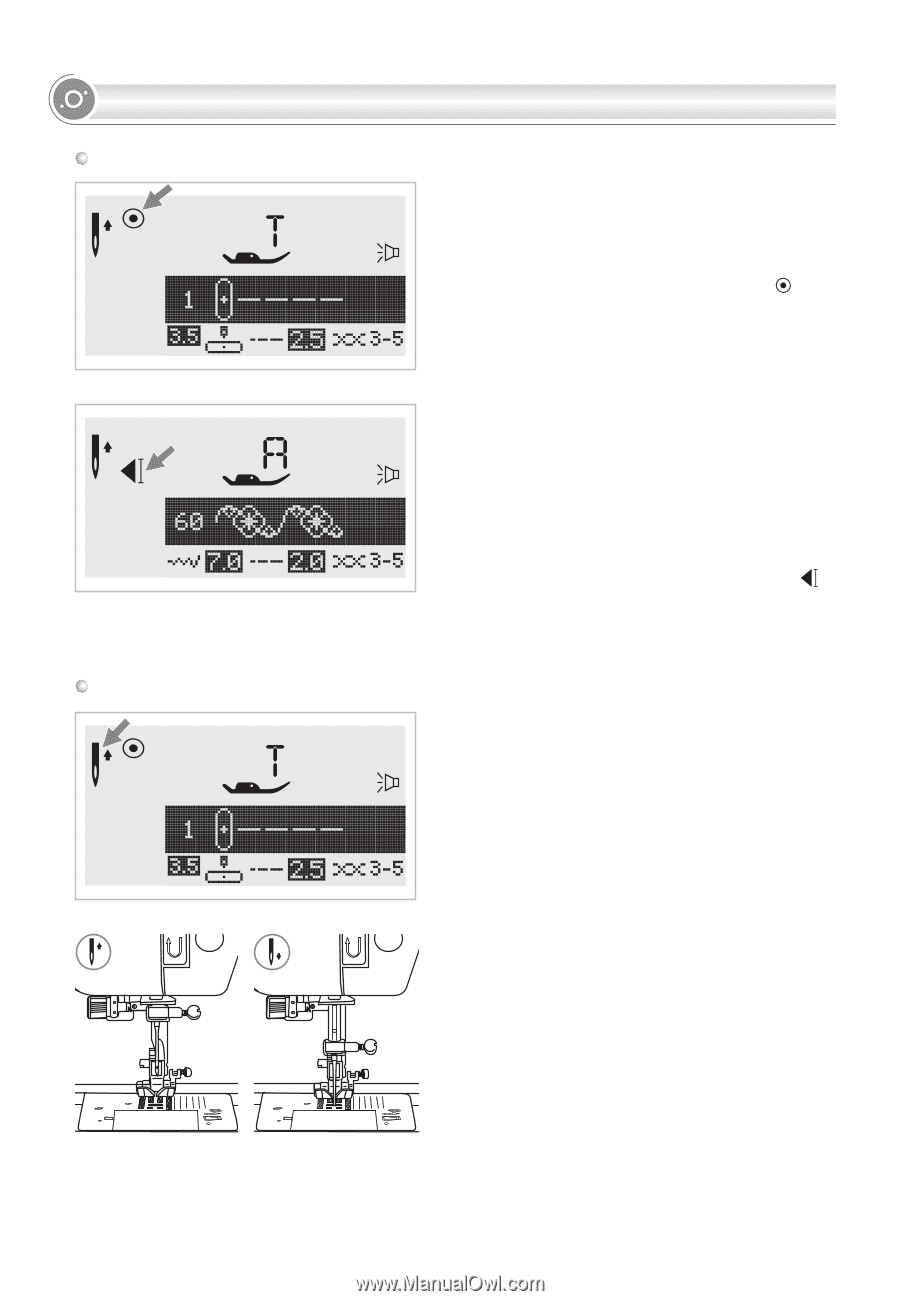
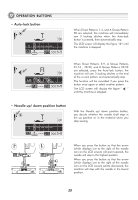
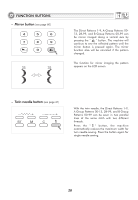
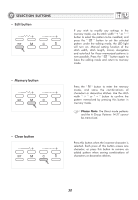
OPERATION BUTTONS Auto-lock button When Direct Patterns 1-4, and A Group Pattern 00 are selected, the machine will immediately sew 3 locking stitches when the Auto-lock button is pressed, then automatically stop. The LCD screen will display the figure " " until the machine is stopped. When Direct Patterns 5-9, A Group Patterns 01-13 , 28-99, and B Group Patterns 00-99 are selected, press the Auto-lock button, the machine will sew 3 locking stitches at the end of the current pattern and automatically stop. The function will be cancelled if you press the button once again or select another pattern. The LCD screen will display the figure " " until the machine is stopped. Needle up/ down position button With the Needle up/ down position button, you decide whether the needle shall stop in the up position or in the material when you stop sewing. When you press the button so that the arrow (which displays just to the right of the needle icon on the LCD screen) will point upward, the needle will stop in the highest position. When you press the button so that the arrow (which displays just to the right of the needle icon on the LCD screen) points downward, the machine will stop with the needle in the lowest position. 25
-
 1
1 -
2
-
3
-
4
-
5
-
6
-
7
-
8
-
9
-
10
-
11
-
12
-
13
-
14
-
15
-
16
-
17
-
18
-
19
-
20
-
21
-
22
-
23
-
24
-
 25
25 -
 26
26 -
 27
27 -
 28
28 -
 29
29 -
 30
30 -
 31
31 -
 32
32 -
 33
33 -
 34
34 -
 35
35 -
36
-
37
-
38
-
39
-
40
-
41
-
42
-
43
-
44
-
45
-
46
-
47
-
48
-
49
-
50
-
51
-
52
-
53
-
54
-
55
-
56
-
57
-
58
-
59
-
60
-
61
-
62
-
63
-
64
-
65
-
66
-
67
-
68
-
69
-
70
-
71
-
72
-
73
-
74
-
75
-
76
-
77
-
78
-
79
-
80
-
81
-
82
-
83
-
84
 |
 |