Singer Futura Quartet Instruction Manual - Page 12
Control Panel Functions
 |
View all Singer Futura Quartet manuals
Add to My Manuals
Save this manual to your list of manuals |
Page 12 highlights
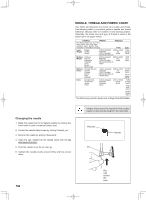
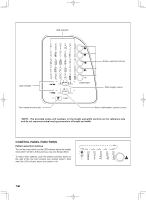
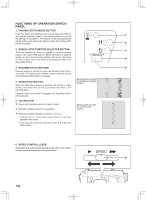
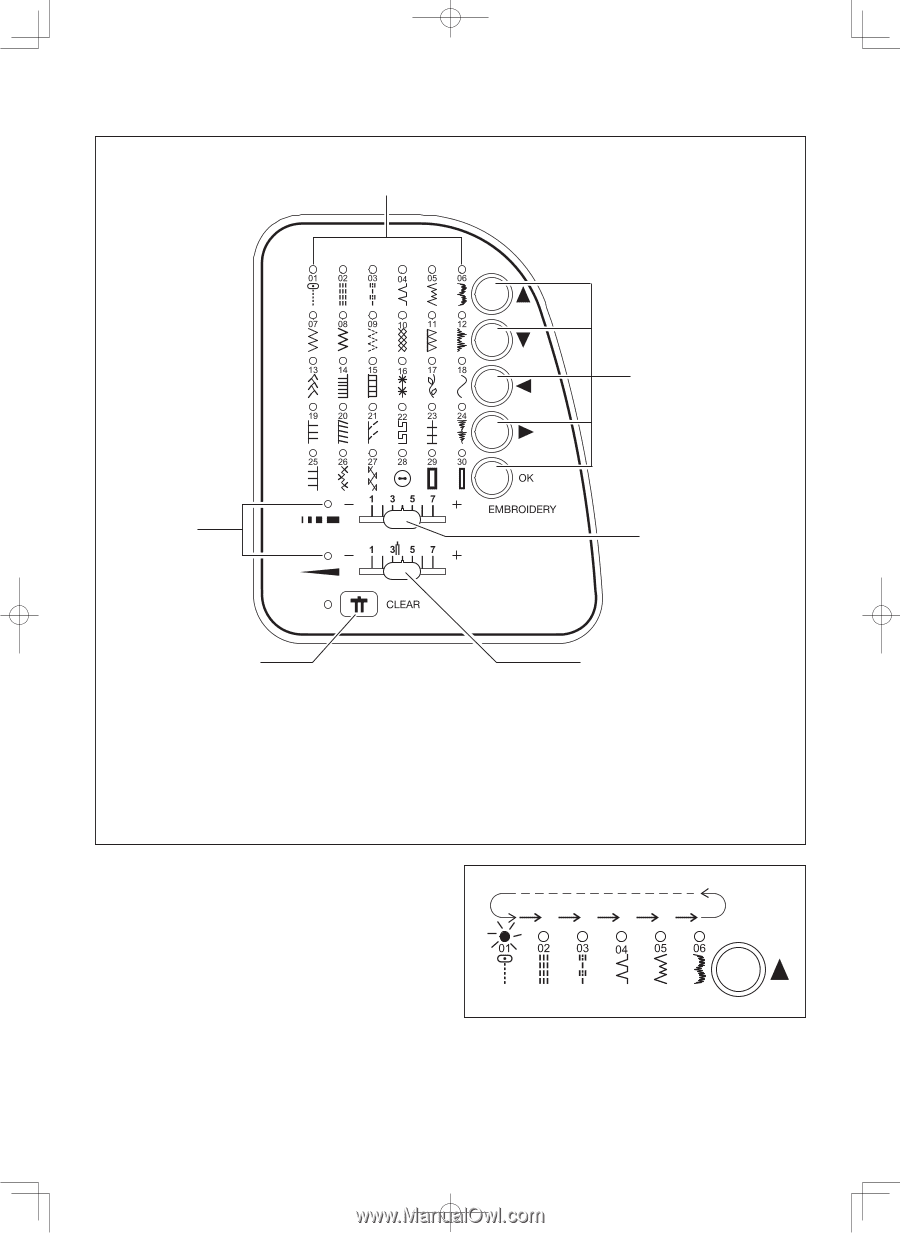
LED indicator Pattern selection buttons LED indicator Stitch length control Twin needle mode button Stitch width/needle position control *NOTE: The provided scales and numbers on the length and width controls are for reference only and do not represent actual sewing parameters of length and width. CONTROL PANEL FUNCTIONS Pattern selection buttons Turn on the power switch and the LED indicator above the straight stitch pattern will be lit. At this point you may sew Straight Stitch. To select other patterns, push the pattern selection button to the right of the row that contains your desired pattern. Stop when the LED indicator above your pattern is lit. 12
-
 1
1 -
2
-
3
-
4
-
5
-
6
-
 7
7 -
 8
8 -
 9
9 -
 10
10 -
 11
11 -
 12
12 -
 13
13 -
 14
14 -
 15
15 -
 16
16 -
 17
17 -
18
-
19
-
20
-
21
-
22
-
23
-
24
-
25
-
26
-
27
-
28
-
29
-
30
-
31
-
32
-
33
-
34
-
35
-
36
-
37
-
38
-
39
-
40
-
41
-
42
-
43
-
44
-
45
-
46
-
47
-
48
-
49
-
50
-
51
-
52
-
53
-
54
-
55
-
56
-
57
-
58
-
59
-
60
 |
 |
12
CONTROL PANEL FUNCTIONS
Pattern selection buttons
Turn on the power switch and the LED indicator above the straight
stitch pattern will be lit. At this point you may sew Straight Stitch.
To select other patterns, push the pattern selection button to
the right of the row that contains your desired pattern. Stop
when the LED indicator above your pattern is lit.
Twin needle mode button
*NOTE:
The provided scales and numbers on the length and width controls are for reference only
and do not represent actual sewing parameters of length and width.
LED indicator
LED indicator
Stitch length control
Pattern selection buttons
Stitch width/needle
position control