Sony CDP-C515 Operating Instructions - Page 15
designate, different, selections
 |
View all Sony CDP-C515 manuals
Add to My Manuals
Save this manual to your list of manuals |
Page 15 highlights
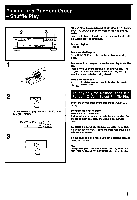
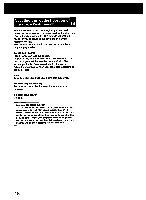
You can designate a time and the unit will make 2 different programs of selections each fitting within that period. Use this function, by designating the length of your tape, for editing both sides of a tape. To add selection(s) - LINK - After all selections on the disc have been programmed, if there is selection(s) within the remaining time, "LINK" and the selection number(s) will blink. 2 3 4 5 - irc T, ias,:I - W./ ".x." G' 13. ')o^ L"'il I / 3 2- To add selection, press the numeric button for the selection number or press the EDIT/TIME FADE again. When pressing the EDIT/TIME FADE, a program will be made automatically to fit the playing time as close as possible to the remaining time. If the remaining time can contain other selection(s), "LINK" and the selection number keep blinking. When "LINK" blinks, if the disc is changed by another disc, the new selection number(s) on the new disc that fit in the remaining time will blink. "EDIT" disappears when the playing time becomes equal to the designated time. Whether "LINK" is blinking or not, you can change the disc by another disc and choose selection(s) to fit the remaining time. To disappear "EDIT" in the window, press • button. To play the program Press IN.% The selections for side A will be played and then the unit will pause. "B" lights up in the tape side indicator. Set the tape to the beginning of side B, then press IP. or The selections for side B will be played. Note Playback can be performed when "EDIT' is displayed. To stop playing Press M. You can play the same program repeatedly as long as you do not cancel time edit or erase the program. To cancel time edit Press CONTINUE and return to the continuous playing mode. The program will be erased. To erase the entire program Press • once during stop; twice during play. The program is also erased, when you turn off the unit. .1I To include desired selections in the program 1 Make your own program of the desired selections. See page 12 for instructions. 2 Follow the procedure as shown on the preceding page. Just designate the length of your tape; you need not subtract the length of your program. The unit will place your selections at the beginning of its program and add other selections to fit the remaining time. To check the program See page 13. To designate a different time for each side Execute steps 1 to 4 and pressII. Then repeat steps 2 and 4. Do not execute step 5. If your disc has more than 20 selections Selections over 20 cannot be programmed with the time edit function; program desired selections before using the time edit function. See page 12 for details. 15
-
 1
1 -
2
-
3
-
4
-
5
-
6
-
7
-
8
-
9
-
 10
10 -
 11
11 -
 12
12 -
 13
13 -
 14
14 -
 15
15 -
 16
16 -
 17
17 -
 18
18 -
 19
19 -
 20
20
 |
 |
