Sony CDP-CE500 Operating Instructions - Page 9
Connecting the Player - amplifier for
 |
UPC - 027242805453
View all Sony CDP-CE500 manuals
Add to My Manuals
Save this manual to your list of manuals |
Page 9 highlights
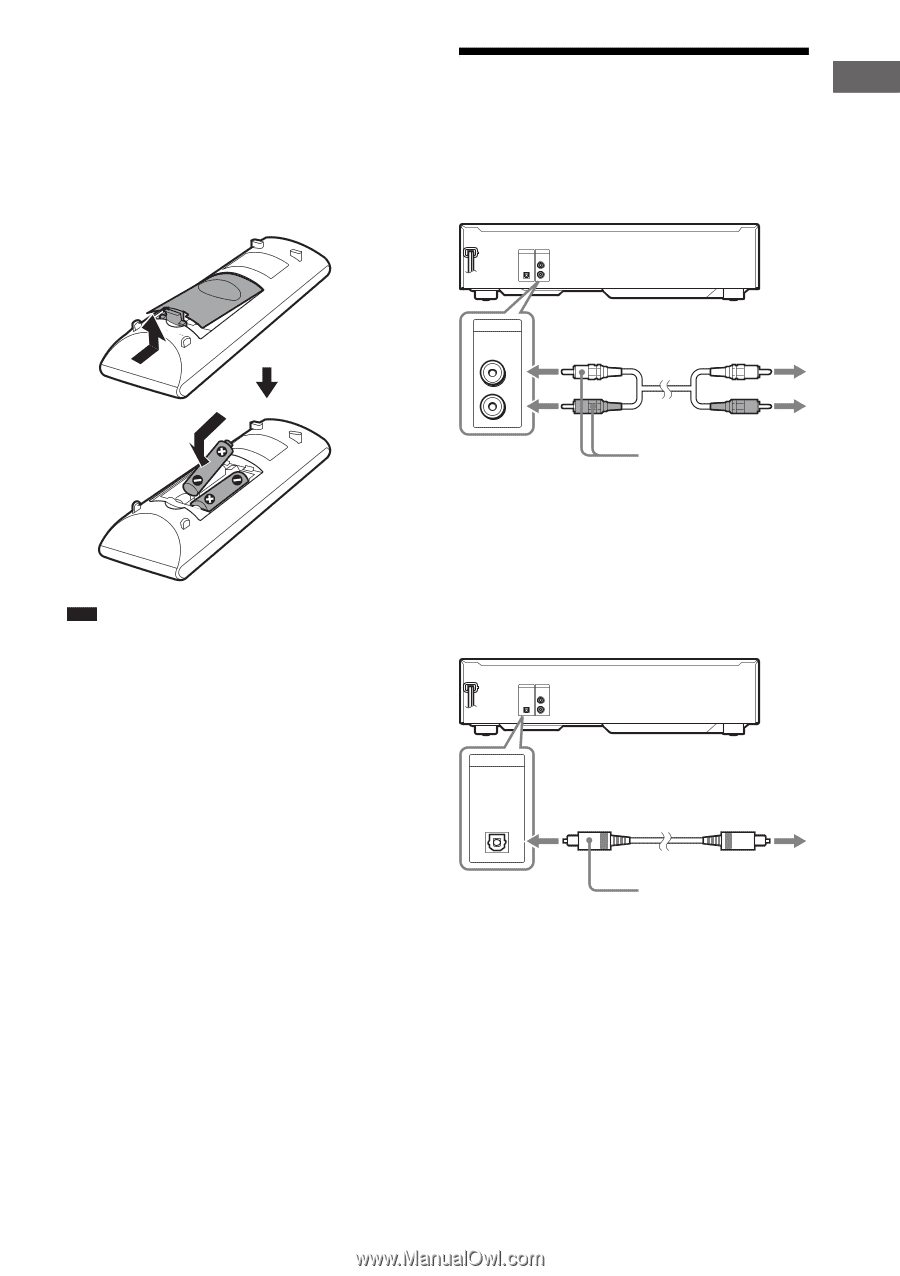
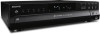
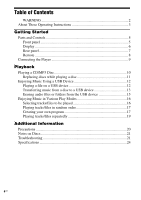
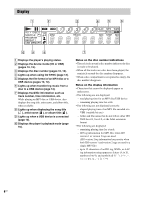
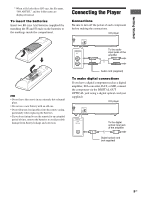
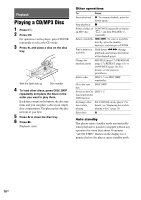
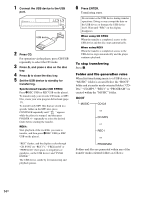
Getting Started * When a file lacks these ID3 tags, the file name, "NO ARTIST," and the folder name are displayed instead. To insert the batteries Insert two R6 (size AA) batteries (supplied) by matching the 3 and # ends on the batteries to the markings inside the compartment. Note • Do not leave the remote in an extremely hot or humid place. • Do not use a new battery with an old one. • Do not drop any foreign object into the remote casing, particularly when replacing the batteries. • If you do not intend to use the remote for an extended period of time, remove the batteries to avoid possible damage from battery leakage and corrosion. Connecting the Player Connections Be sure to turn off the power of each component before making the connections. CD player DIGITAL OUT OPTICAL ANALOG OUT L R ANALOG OUT L R To the audio input jacks of the amplifier Audio cord (supplied) To make digital connections If you have a digital component such as a digital amplifier, D/A converter, DAT, or MD, connect the component via the DIGITAL OUT OPTICAL jack using a digital optical cord (not supplied). CD player DIGITAL OUT OPTICAL ANALOG OUT L R DIGITAL OUT OPTICAL To the digital optical input jack of the amplifier Digital optical cord (not supplied) 9US
-
 1
1 -
2
-
3
-
 4
4 -
 5
5 -
 6
6 -
 7
7 -
 8
8 -
 9
9 -
 10
10 -
 11
11 -
 12
12 -
 13
13 -
 14
14 -
15
-
16
-
17
-
18
-
19
-
20
-
21
-
22
-
23
-
24
 |
 |