Sony CMT-LS1 Operating Instructions - Page 6
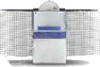
Using the wall hanging, bracket, Connect the AC power cord to a wall - battery
 |
View all Sony CMT-LS1 manuals
Add to My Manuals
Save this manual to your list of manuals |
Page 6 highlights
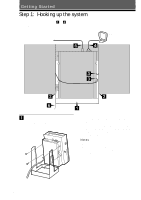
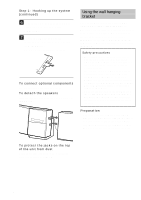
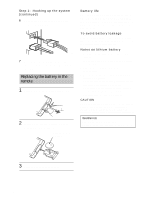
Step 1: Hooking up the system (continued) 6 Connect the AC power cord to a wall outlet after you complete all the connections. 7 To use the remote, pull out the insulating sheet to allow power to flow from the battery. The remote already contains a battery. To connect optional components See "Optional Components" on page 24. To detach the speakers Slide the speakers in the direction of the arrows as shown below. Using the wall hanging bracket You can hang the unit on the wall using the supplied wall hanging adapter and bracket. The screws for attaching the wall hanging bracket to the wall are not supplied. When installing the bracket by yourself, be sure to use screws appropriate for the type of wall. Sony cannot be held responsible for any damages or injury due to installation. Safety precautions • The supplied adapter and bracket are for use with the Sony Compact Component System CMT-LS1 only. Using these items for purposes other than to hang the unit on the wall may result in accidents. • The component system CMT-LS1 (7.5 kg), the wall hanging adapter (0.5 kg) and the wall hanging bracket (0.5 kg) have a combined weight of 8.5 kg. Therefore, for safety reasons, the bracket should be attached securely to a wall made from materials capable of supporting a load of 50 kg or more. • When you hang the unit on the wall, make sure the left and right speakers are both attached or both detached. Attaching one speaker without the other may cause the unit to drop and injure someone. Preparation • The screws for attaching the wall hanging bracket to the wall are not supplied. Be sure to purchase screws suited to the wall materials. • If the wall materials cannot support a load of 50 kg or more, be sure to reinforce the wall. To protect the jacks on the top of the unit from dust Use the dust caps (supplied). See "Connecting audio components" on page 24. 6
-
 1
1 -
 2
2 -
 3
3 -
 4
4 -
 5
5 -
 6
6 -
 7
7 -
 8
8 -
 9
9 -
 10
10 -
 11
11 -
 12
12 -
13
-
14
-
15
-
16
-
17
-
18
-
19
-
20
-
21
-
22
-
23
-
24
-
25
-
26
-
27
-
28
-
29
-
30
-
31
-
32
 |
 |
