Sony DCR-PC9 Operating Instructions - Page 77
Dubbing only desired scenes, Digital program editing
 |
View all Sony DCR-PC9 manuals
Add to My Manuals
Save this manual to your list of manuals |
Page 77 highlights
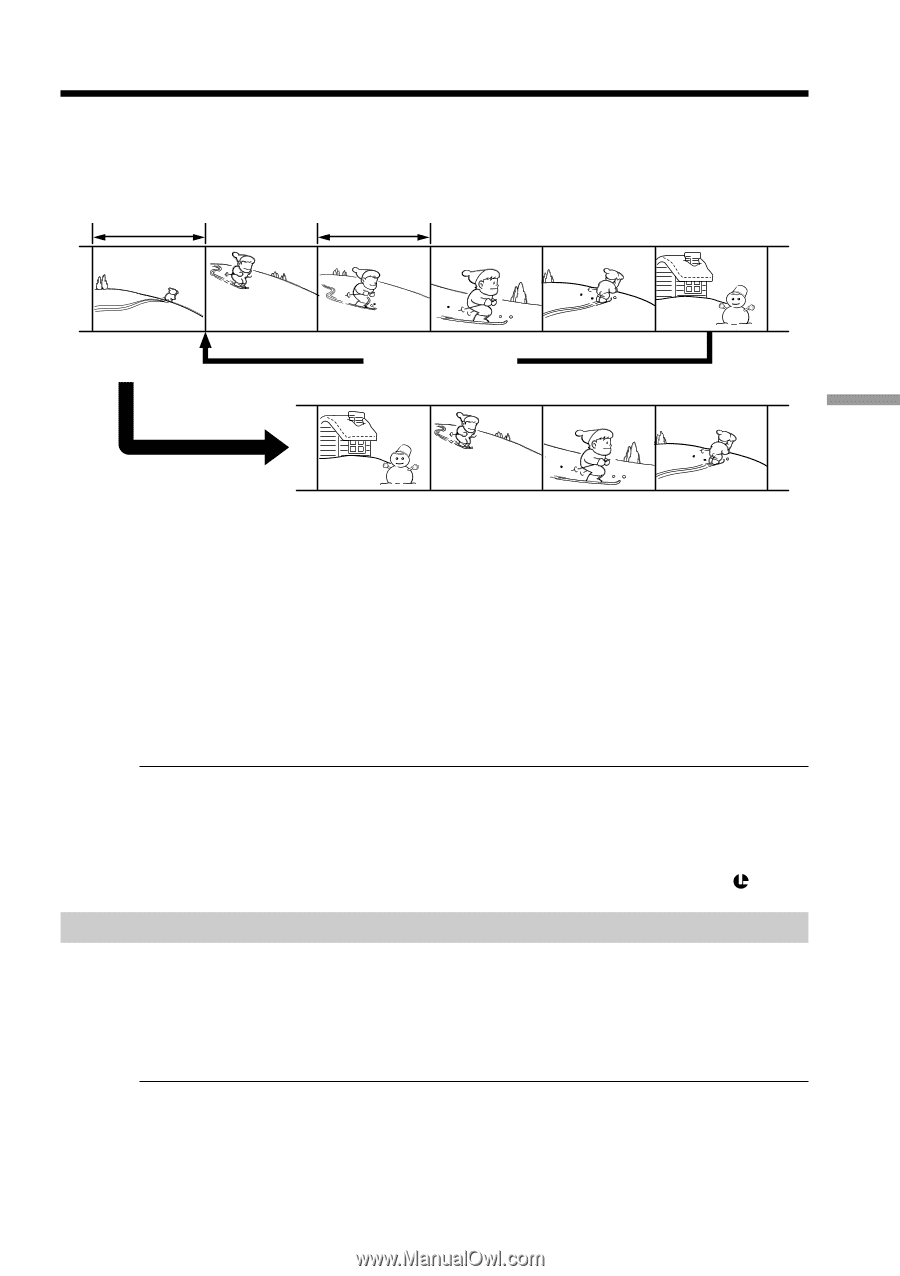
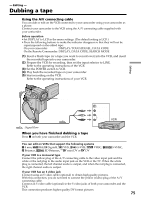
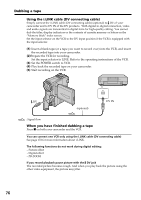
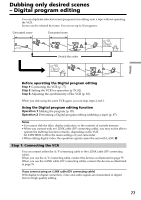
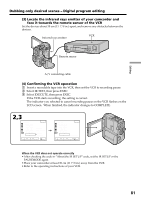
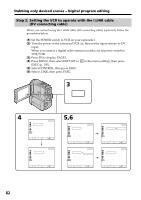
Dubbing only desired scenes - Digital program editing You can duplicate selected scenes (programs) for editing onto a tape without operating the VCR. Scenes can be selected by frame. You can set up to 20 programs. Unwanted scene Unwanted scene Switch the order Editing Before operating the Digital program editing Step 1 Connecting the VCR (p. 77). Step 2 Setting the VCR for operation (p 78, 82). Step 3 Adjusting the synchronicity of the VCR (p. 83). When you dub using the same VCR again, you can skip steps 2 and 3. Using the Digital program editing function Operation 1 Making the program (p. 85). Operation 2 Performing a Digital program editing (dubbing a tape) (p. 87). Notes •You cannot dub the titles, display indicators, or the contents of cassette memory. •When you connect with an i.LINK cable (DV connecting cable), you may not be able to operate the dubbing function correctly, depending on the VCR. Set CONTROL to IR in the menu settings of your camcorder . •When editing digital video, the operation signals cannot be sent with LANC . Step 1: Connecting the VCR You can connect either the A/V connecting cable or the i.LINK cable (DV connecting cable). When you use the A/V connecting cable, connect the devices as illustrated in page 75. When you use the i.LINK cable (DV connecting cable), connect the devices as illustrated in page 76. If you connect using an i.LINK cable (DV connecting cable) With digital-to-digital connection, video and audio signals are transmitted in digital form for high-quality editing. 77
-
 1
1 -
2
-
3
-
4
-
5
-
6
-
7
-
8
-
9
-
10
-
11
-
12
-
13
-
14
-
15
-
16
-
17
-
18
-
19
-
20
-
21
-
22
-
23
-
24
-
25
-
26
-
27
-
28
-
29
-
30
-
31
-
32
-
33
-
34
-
35
-
36
-
37
-
38
-
39
-
40
-
41
-
42
-
43
-
44
-
45
-
46
-
47
-
48
-
49
-
50
-
51
-
52
-
53
-
54
-
55
-
56
-
57
-
58
-
59
-
60
-
61
-
62
-
63
-
64
-
65
-
66
-
67
-
68
-
69
-
70
-
71
-
 72
72 -
 73
73 -
 74
74 -
 75
75 -
 76
76 -
 77
77 -
 78
78 -
 79
79 -
 80
80 -
 81
81 -
 82
82 -
83
-
84
-
85
-
86
-
87
-
88
-
89
-
90
-
91
-
92
-
93
-
94
-
95
-
96
-
97
-
98
-
99
-
100
-
101
-
102
-
103
-
104
-
105
-
106
-
107
-
108
-
109
-
110
-
111
-
112
-
113
-
114
-
115
-
116
-
117
-
118
-
119
-
120
-
121
-
122
-
123
-
124
-
125
-
126
-
127
-
128
-
129
-
130
-
131
-
132
-
133
-
134
-
135
-
136
-
137
-
138
-
139
-
140
-
141
-
142
-
143
-
144
-
145
-
146
-
147
-
148
-
149
-
150
-
151
-
152
-
153
-
154
-
155
-
156
-
157
-
158
-
159
-
160
-
161
-
162
-
163
-
164
-
165
-
166
-
167
-
168
-
169
-
170
-
171
-
172
-
173
-
174
-
175
-
176
-
177
-
178
-
179
-
180
-
181
-
182
-
183
-
184
-
185
-
186
-
187
-
188
-
189
-
190
-
191
-
192
 |
 |