Sony DCR-TRV33 Operating Instructions (primary manual) - Page 167
Viewing images recorded on “Memory Stick” on a computer (For Windows users) (DCR-TRV22/TRV33 only
 |
View all Sony DCR-TRV33 manuals
Add to My Manuals
Save this manual to your list of manuals |
Page 167 highlights
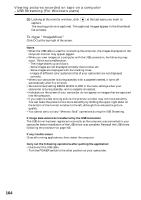
Viewing images recorded on "Memory Stick" on a computer (For Windows users) (DCR-TRV22/TRV33 only) The image data recorded on the "Memory Stick" is automatically transferred (copied) to a computer with Image Transfer. You can view images with ImageMixer. Before operation You need to install the USB driver, Image Transfer and ImageMixer to view the "Memory Stick" images on a computer (p. 153). (1) Turn on your computer and allow Windows to load. (2) Insert the "Memory Stick" into your camcorder, then connect the AC Adaptor to your camcorder. (3) Set the POWER switch to . (4) Connect the (USB) jack on your camcorder to the USB port on the computer using the supplied USB cable. (5) Image Transfer automatically starts up and the transfer of image data begins. Viewing images with your computer (6) ImageMixer automatically starts up, enabling you to view the copied image. Import button (7) Select an album and the image, then press the import button. The image is added in your album, and you can edit the image. 167
-
 1
1 -
2
-
3
-
4
-
5
-
6
-
7
-
8
-
9
-
10
-
11
-
12
-
13
-
14
-
15
-
16
-
17
-
18
-
19
-
20
-
21
-
22
-
23
-
24
-
25
-
26
-
27
-
28
-
29
-
30
-
31
-
32
-
33
-
34
-
35
-
36
-
37
-
38
-
39
-
40
-
41
-
42
-
43
-
44
-
45
-
46
-
47
-
48
-
49
-
50
-
51
-
52
-
53
-
54
-
55
-
56
-
57
-
58
-
59
-
60
-
61
-
62
-
63
-
64
-
65
-
66
-
67
-
68
-
69
-
70
-
71
-
72
-
73
-
74
-
75
-
76
-
77
-
78
-
79
-
80
-
81
-
82
-
83
-
84
-
85
-
86
-
87
-
88
-
89
-
90
-
91
-
92
-
93
-
94
-
95
-
96
-
97
-
98
-
99
-
100
-
101
-
102
-
103
-
104
-
105
-
106
-
107
-
108
-
109
-
110
-
111
-
112
-
113
-
114
-
115
-
116
-
117
-
118
-
119
-
120
-
121
-
122
-
123
-
124
-
125
-
126
-
127
-
128
-
129
-
130
-
131
-
132
-
133
-
134
-
135
-
136
-
137
-
138
-
139
-
140
-
141
-
142
-
143
-
144
-
145
-
146
-
147
-
148
-
149
-
150
-
151
-
152
-
153
-
154
-
155
-
156
-
157
-
158
-
159
-
160
-
161
-
 162
162 -
 163
163 -
 164
164 -
 165
165 -
 166
166 -
 167
167 -
 168
168 -
 169
169 -
 170
170 -
 171
171 -
 172
172 -
173
-
174
-
175
-
176
-
177
-
178
-
179
-
180
-
181
-
182
-
183
-
184
-
185
-
186
-
187
-
188
-
189
-
190
-
191
-
192
-
193
-
194
-
195
-
196
-
197
-
198
-
199
-
200
-
201
-
202
-
203
-
204
-
205
-
206
-
207
-
208
-
209
-
210
-
211
-
212
-
213
-
214
-
215
-
216
-
217
-
218
-
219
-
220
 |
 |
