Sony DCRPC1000 Operating Guide - Page 5

Table of Contents, Getting Started, Recording/Playback - battery

Page 5 highlights

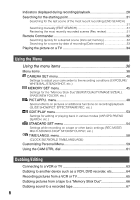
Table of Contents Getting Started Step 1: Checking supplied items 8 Step 2: Charging the battery pack 9 Step 3: Turning the power on and holding your camcorder firmly ...........13 Step 4: Adjusting the LCD panel and viewfinder 14 Step 5: Using the touch panel 15 Changing the language setting 15 Checking the screen indicators (Display guide 15 Step 6: Setting the date and time 16 Step 7: Inserting a tape or a "Memory Stick Duo 17 Step 8: Selecting the aspect ratio (16:9 or 4:3) of the recording picture ...19 Recording/Playback Recording/Playback with ease (Easy Handycam 20 Recording 22 Playback 23 Functions used for recording/playback, etc 24 Recording To use zoom Controlling the settings with the CAM CTRL dial/ MANUAL button (Assignable dial) To record sound with more presence (4CH MIC recording) To use the flash To adjust the exposure for backlit subjects To record in mirror mode To use a tripod Playback To use PB zoom Recording/playback To check the remaining battery (Battery Info) To turn off the operation confirmation beep To initialize the settings Other part names and functions Continued  5

  • 1
  • 2
  • 3
  • 4
  • 5
  • 6
  • 7
  • 8
  • 9
  • 10
  • 11
  • 12
  • 13
  • 14
  • 15
  • 16
  • 17
  • 18
  • 19
  • 20
  • 21
  • 22
  • 23
  • 24
  • 25
  • 26
  • 27
  • 28
  • 29
  • 30
  • 31
  • 32
  • 33
  • 34
  • 35
  • 36
  • 37
  • 38
  • 39
  • 40
  • 41
  • 42
  • 43
  • 44
  • 45
  • 46
  • 47
  • 48
  • 49
  • 50
  • 51
  • 52
  • 53
  • 54
  • 55
  • 56
  • 57
  • 58
  • 59
  • 60
  • 61
  • 62
  • 63
  • 64
  • 65
  • 66
  • 67
  • 68
  • 69
  • 70
  • 71
  • 72
  • 73
  • 74
  • 75
  • 76
  • 77
  • 78
  • 79
  • 80
  • 81
  • 82
  • 83
  • 84
  • 85
  • 86
  • 87
  • 88
  • 89
  • 90
  • 91
  • 92
  • 93
  • 94
  • 95
  • 96
  • 97
  • 98
  • 99
  • 100
  • 101
  • 102
  • 103
  • 104
  • 105
  • 106
  • 107
  • 108
  • 109
  • 110
  • 111
  • 112
  • 113
  • 114
  • 115
  • 116
  • 117
  • 118
  • 119
  • 120
  • 121
  • 122
  • 123

5
Continued
Table of Contents
Getting Started
Step 1: Checking supplied items
...............................................................
8
Step 2: Charging the battery pack
.............................................................
9
Step 3: Turning the power on and holding your camcorder firmly
...........
13
Step 4: Adjusting the LCD panel and viewfinder
.....................................
14
Step 5: Using the touch panel
.................................................................
15
Changing the language setting
.....................................................................
15
Checking the screen indicators (Display guide)
...........................................
15
Step 6: Setting the date and time
............................................................
16
Step 7: Inserting a tape or a “Memory Stick Duo”
....................................
17
Step 8: Selecting the aspect ratio (16:9 or 4:3) of the recording picture
.......................................................................................................
19
Recording/Playback
Recording/Playback with ease (Easy Handycam)
...................................
20
Recording
................................................................................................
22
Playback
..................................................................................................
23
Functions used for recording/playback, etc.
............................................
24
Recording
To use zoom
Controlling the settings with the CAM CTRL dial/
MANUAL button (Assignable dial)
To record sound with more presence (4CH MIC recording)
To use the flash
To adjust the exposure for backlit subjects
To record in mirror mode
To use a tripod
Playback
To use PB zoom
Recording/playback
To check the remaining battery (Battery Info)
To turn off the operation confirmation beep
To initialize the settings
Other part names and functions