Sony DCRPC330 Computer Applications Guide - Page 13
Step 4: Connecting your camcorder to a computer - computer applications guide
 |
UPC - 027242636095
View all Sony DCRPC330 manuals
Add to My Manuals
Save this manual to your list of manuals |
Page 13 highlights
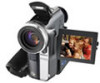
Connecting to a Windows computer Step 4: Connecting your camcorder to a computer On connection There are two ways to connect your camcorder to a computer. Connecting with a USB cable (supplied) (p. 14) • This method is good for copying files from a "Memory Stick" to a computer for editing, and copying files to a "Memory Stick." • You can view the image that your camcorder is seeing on a computer, or play back pictures and sound recorded on a tape and view them on a computer. (PC Camera, Video Streaming) • You need to install the USB driver on your computer beforehand (p. 8). Connecting with an i.LINK cable (optional) (p. 16) • This method is good for copying and editing pictures and sound recorded on a tape. • Image data is transferred with more precision than with a USB cable. • You cannot copy files from a "Memory Stick" to a computer or copy files from a computer to a "Memory Stick" in your camcorder. b Note • When you are using a USB cable or an i.LINK cable to connect your camcorder to a computer, make sure you insert the connector in the correct direction. If you insert the connector forcibly, it may be damaged, and causes a malfunction of your camcorder. To copy and edit pictures recorded on a tape If your computer has a USB jack ,Connect your camcorder to your computer using the supplied USB cable. See "Connecting with the USB cable (supplied)" (p. 14). If your computer has an i.LINK (IEEE1394) connector ,Connect your camcorder to your computer using an optional i.LINK cable. See "Connecting with an i.LINK cable (optional) (DV format models only)" (p. 16). Image data are transferred with more precision, and the installation of the USB driver is not required with this type of connection. If your camcorder is a MICROMV format model, refer also to the separate MovieShaker Application Guide supplied with your camcorder. To copy and edit pictures recorded on a "Memory Stick" If your computer has a USB jack ,Connect your camcorder to your computer using the supplied USB cable. See "Connecting with the USB cable (supplied)" (p. 14). If your computer has a Memory Stick slot ,Copy still images or movies to a "Memory Stick," then insert it into the Memory Stick slot on your computer. To check where the images are stored on a "Memory Stick," see page 27. ,continued Connecting to a Windows computer 13
-
 1
1 -
2
-
3
-
4
-
5
-
6
-
7
-
 8
8 -
 9
9 -
 10
10 -
 11
11 -
 12
12 -
 13
13 -
 14
14 -
 15
15 -
 16
16 -
 17
17 -
 18
18 -
19
-
20
-
21
-
22
-
23
-
24
-
25
-
26
-
27
-
28
-
29
-
30
-
31
-
32
-
33
-
34
-
35
-
36
-
37
-
38
-
39
-
40
-
41
-
42
-
43
-
44
-
45
-
46
-
47
-
48
 |
 |
