Sony DVP-NS710H Operating Instructions - Page 14
Step 3: Connecting the Power Cord, Step 4: Preparing the Remote, Audio L/R input jacks - remote control
 |
UPC - 027242757622
View all Sony DVP-NS710H manuals
Add to My Manuals
Save this manual to your list of manuals |
Page 14 highlights
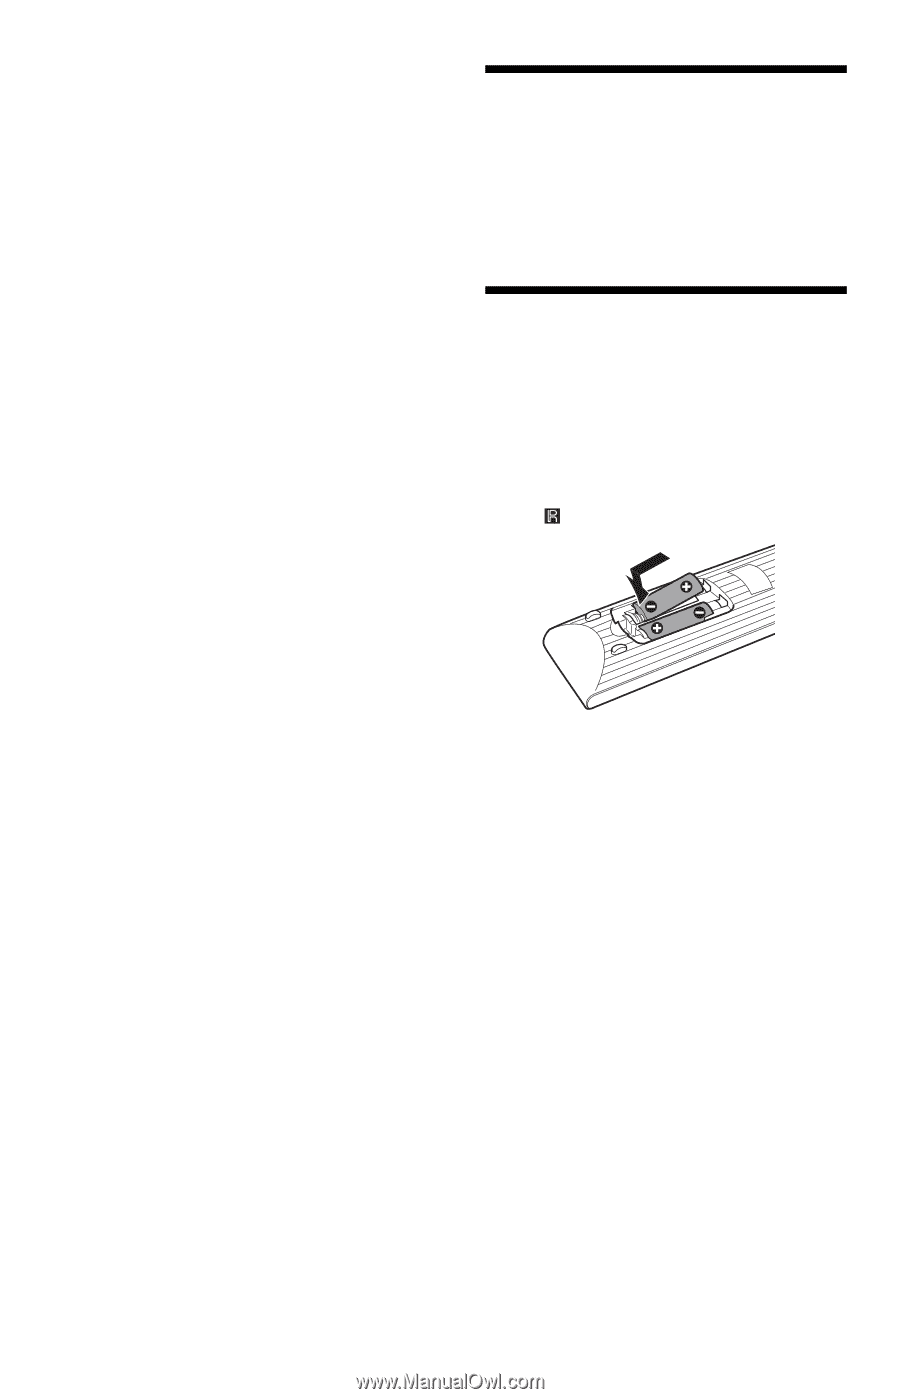
A Audio L/R input jacks This connection will use your TV's or audio component's two speakers for sound. B Digital audio input jack If your audio component has a Dolby*1 Digital or DTS*2 decoder and a digital input jack, use this connection. You can enjoy Dolby Digital (5.1ch) and DTS (5.1ch) surround effect. If you connect to a Sony audio component that is compatible with the CONTROL FOR HDMI function, refer to the operating instructions supplied with the audio component. *1 Manufactured under license from Dolby Laboratories. Dolby, Pro Logic, and the double-D symbol are trademarks of Dolby Laboratories. *2 Manufactured under license under U.S. Patent #: 5,451,942 & other U.S. and worldwide patents issued & pending. DTS and DTS Digital Out are registered trademarks and the DTS logos and Symbol are trademarks of DTS, Inc. © 19962008 DTS, Inc. All Rights Reserved. b • After you have completed the connection, make the appropriate settings in Quick Setup (page 15). Otherwise, no sound or a loud noise will come from your speakers. • The TVS effects of this player cannot be used with this connection. • When you connect the player to an audio component using an HDMI cord, you will need to do one of the following: - Connect the audio component to the TV with the HDMI cord. - Connect the player to the TV with a video cord other than HDMI cord (component video cord or audio/video cord). • When connecting to the HDMI OUT jack, carefully align the HDMI connector with the jack. Do not bend and apply force to the HDMI cord. Step 3: Connecting the Power Cord Plug the player and TV power cords into an AC outlet. Step 4: Preparing the Remote Insert two Size AA (R6) batteries by matching the 3 and # ends on the batteries to the markings inside the compartment. When using the remote, point it at the remote sensor on the player. b • Do not leave the remote in an extremely hot or humid place. • Do not drop any foreign object into the remote casing, particularly when replacing the batteries. • Do not expose the remote sensor to direct light from the sun or a lighting apparatus. Doing so may cause a malfunction. • If you do not use the remote for an extended period of time, remove the batteries to avoid possible damage from battery leakage and corrosion. 14US
-
 1
1 -
2
-
3
-
4
-
5
-
6
-
7
-
8
-
 9
9 -
 10
10 -
 11
11 -
 12
12 -
 13
13 -
 14
14 -
 15
15 -
 16
16 -
 17
17 -
 18
18 -
 19
19 -
20
-
21
-
22
-
23
-
24
-
25
-
26
-
27
-
28
-
29
-
30
-
31
-
32
-
33
-
34
-
35
-
36
-
37
-
38
-
39
-
40
-
41
-
42
-
43
-
44
-
45
-
46
-
47
-
48
-
49
-
50
-
51
-
52
-
53
-
54
-
55
-
56
-
57
-
58
-
59
-
60
 |
 |