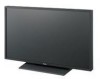
Sony FWDS42H1 Operating Instructions - Page 83
Setup screen, Owner Information, Network, Mail Report, Mail Account, Send e-mail POP before SMTP
 |
UPC - 027242754423
View all Sony FWDS42H1 manuals
Add to My Manuals
Save this manual to your list of manuals |
Page 83 highlights
Phase +/- buttons Adjust the color balance. Reset button Resets the settings from "Contrast" to "Phase" to their factory default values. Notes • If the input signal is Video or S Video and the color system of the video signal is not NTSC, "Phase" is not available. • "Chroma" and "Phase" are not available for PC input. • "Normal" at the ASPECT setting corresponds to "4:3" for video input or "Real" for PC input. Setup screen This screen lets you set up the Network Password. The factory default settings are as follows: Name: root Password: pudadm After you have made any changes or entered information, click "Apply" at the bottom of each screen to enable the settings. Special characters cannot be used in the text fields. Owner Information Owner Enter owner information here. Display Location Enter information about the display installation location here. Note Do not use spaces when entering the information. Doing so may cause the file name to display incorrectly. Memo You can enter auxiliary information here. Time Time Enter the time, day of the week, year, month, and day. Network Internet Protocol (TCP/IP) Select "Specify an IP address" to enter each value in the IP address's numeric string. Select "Obtain an IP address (DHCP)" to acquire an IP address automatically from the DHCP server. Note that in this case the IP address may change every time the display in which the display is installed is turned on. Note The IP address can be set from the menu of the display. For details, see "IP Address Setup" (page 32). Password The administrator and user name and password information can be entered here. The administrator name is fixed to "root". Each can be a maximum of 8 characters long. Once a user name and password are set, the "Network Password" screen appears whenever the display control screen of the display is called up. To ensure security on the network, setting a user name and password is recommended. Mail Report Error Report When a display function error has occurred, an error report is immediately sent by e-mail (error notification). Status Report The status of the display can be reported via email according to the selected time interval. Address Enter the target e-mail address here. Up to four addresses can be specified, for simultaneous sending of an error report. The maximum length for each address is 64 characters. GB Mail Account Mail Address: Enter the allocated mail address here. The maximum length for the address is 64 characters. Outgoing Mail Server (SMTP): Enter the mail server address here. The maximum length for the address is 64 characters. Requires the use of POP Authentication before Send e-mail (POP before SMTP): If POP authentication is required when connecting to the SMTP server, select this check box. Incoming Mail Server (POP3): When POP authentication is used for the "POP before SMTP" setting, enter the POP3 server address here. Account Name: Enter the mail account name here. Password: Enter the mail password here. Send Test Mail: To test whether mail can be sent successfully to the specified address(es), select this check box and click "Apply". A test mail will be sent. 37 GB
-
 1
1 -
2
-
3
-
4
-
5
-
6
-
7
-
8
-
9
-
10
-
11
-
12
-
13
-
14
-
15
-
16
-
17
-
18
-
19
-
20
-
21
-
22
-
23
-
24
-
25
-
26
-
27
-
28
-
29
-
30
-
31
-
32
-
33
-
34
-
35
-
36
-
37
-
38
-
39
-
40
-
41
-
42
-
43
-
44
-
45
-
46
-
47
-
48
-
49
-
50
-
51
-
52
-
53
-
54
-
55
-
56
-
57
-
58
-
59
-
60
-
61
-
62
-
63
-
64
-
65
-
66
-
67
-
68
-
69
-
70
-
71
-
72
-
73
-
74
-
75
-
76
-
77
-
 78
78 -
 79
79 -
 80
80 -
 81
81 -
 82
82 -
 83
83 -
 84
84 -
 85
85 -
 86
86 -
 87
87 -
 88
88 -
89
-
90
-
91
-
92
-
93
-
94
-
95
-
96
-
97
-
98
-
99
-
100
-
101
-
102
-
103
-
104
-
105
-
106
-
107
-
108
-
109
-
110
-
111
-
112
-
113
-
114
-
115
-
116
-
117
-
118
-
119
-
120
-
121
-
122
-
123
-
124
-
125
-
126
-
127
-
128
-
129
-
130
-
131
-
132
-
133
-
134
-
135
-
136
-
137
-
138
-
139
-
140
-
141
-
142
-
143
-
144
-
145
-
146
-
147
-
148
-
149
-
150
-
151
-
152
-
153
-
154
-
155
-
156
-
157
-
158
-
159
-
160
-
161
-
162
-
163
-
164
-
165
-
166
-
167
-
168
-
169
-
170
-
171
-
172
-
173
-
174
-
175
-
176
-
177
-
178
-
179
-
180
-
181
-
182
-
183
-
184
-
185
-
186
-
187
-
188
-
189
-
190
-
191
-
192
-
193
-
194
-
195
-
196
-
197
-
198
-
199
-
200
-
201
-
202
-
203
-
204
-
205
-
206
-
207
-
208
-
209
-
210
-
211
-
212
-
213
-
214
-
215
-
216
-
217
-
218
-
219
-
220
-
221
-
222
-
223
-
224
-
225
-
226
-
227
-
228
-
229
-
230
-
231
-
232
-
233
-
234
-
235
-
236
-
237
-
238
-
239
-
240
-
241
-
242
-
243
-
244
-
245
-
246
-
247
-
248
-
249
-
250
-
251
-
252
-
253
-
254
-
255
-
256
-
257
-
258
-
259
-
260
-
261
-
262
-
263
-
264
-
265
-
266
-
267
-
268
-
269
-
270
-
271
-
272
-
273
-
274
-
275
-
276
-
277
-
278
-
279
-
280
-
281
-
282
-
283
-
284
-
285
-
286
-
287
-
288
-
289
-
290
-
291
-
292
-
293
-
294
-
295
-
296
-
297
-
298
-
299
-
300
-
301
-
302
-
303
 |
 |