Sony HCD-EX5 Operating Instructions - Page 19
Display, Turning off the display, — Power Saving Mode, Changing the brightness for the display
 |
View all Sony HCD-EX5 manuals
Add to My Manuals
Save this manual to your list of manuals |
Page 19 highlights
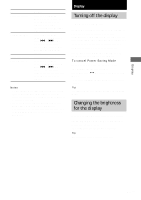
Display To Check the settings Activate the timer Change the setting Cancel the timer Do this Press CLOCK/TIMER SELECT on the remote, then press ENTER/YES on the remote. "PLAY ON?" appears, then press ENTER/ YES on the remote. Press CLOCK/TIMER SELECT on the remote and press . or > on the remote repeatedly until "PLAY ON?" appears, then press ENTER/YES on the remote. Start over from step 1. Press CLOCK/TIMER SELECT on the remote and press . or > on the remote repeatedly until "TIMER OFF?" appears, then press ENTER/YES on the remote. Notes • Do not operate the system from the time the system turns on until the play starts (about 15 seconds before the preset time). Otherwise the timer will not be activated correctly. • If you use the Play Timer at the same time as the Sleep Timer, the Sleep Timer has priority. • You cannot use the optional components connected to PC/TAPE/MD IN jack as the sound source for Play Timer. Display Turning off the display - Power Saving Mode Even if the system is off, the system consumes power to display the clock and to stay responsive to commands from the remote. The Power Saving Mode is introduced to reduce the amount of power consumed during standby. In this mode, the clock is not displayed. Press DISPLAY while the system is off until the clock display disappears. To cancel Power Saving Mode Press DISPLAY while the system is off. The display changes as follows: Clock display* y No display (Power Saving Mode) * The clock is displayed only when you have set the clock. Tip The timer continues to operate during Power Saving Mode. Changing the brightness for the display You can change the brightness for the display. Press DIMMER on the remote repeatedly while the system is on. The brightness level changes cyclically. Tip The brightness level is factory set to high. 19GB
-
 1
1 -
2
-
3
-
4
-
5
-
6
-
7
-
8
-
9
-
10
-
11
-
12
-
13
-
 14
14 -
 15
15 -
 16
16 -
 17
17 -
 18
18 -
 19
19 -
 20
20 -
 21
21 -
 22
22 -
 23
23 -
 24
24 -
25
-
26
-
27
-
28
 |
 |
