Sony HVR-DR60 Operating Instructions - Page 13
Recording images from the camcorder to this unit, Recording images (POWER switch at the VIDEO side)
 |
UPC - 027242706989
View all Sony HVR-DR60 manuals
Add to My Manuals
Save this manual to your list of manuals |
Page 13 highlights
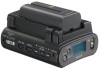
Recording images from the camcorder to this unit Images recorded by the camcorder can be recorded onto this unit. Recording images (POWER switch at the VIDEO side) The different methods of recording are as follows: x Recording video simultaneously on this unit and a camcorder x Recording video on this unit while changing the tape of the camcorder x Recording video from this unit x Operating cache recording x Recording video simultaneously on this unit and a camcorder - Connecting to a camcorder with an "external REC control" function (SYNCHRO mode) When connected to a camcorder that has an external REC control function, this unit can be controlled by the camcorder to record video data simultaneously to the camcorder recording on tape. Camcorder This unit STANDBY STANDBY REC REC REC STANDBY STOP STANDBY 1 Press the CAM LINK button of this unit and set it to ON. 2 Set the [CAM LINK SEL] setting of this unit to [SYNCHRO]. 3 Set the [EXT REC CTRL] setting of the camcorder to [SYNCHRONOUS]. 4 Connect the camcorder to this unit via an i.LINK cable. 5 Press the REC START/STOP button of the camcorder to start recording. • The above Step 3 is for the HVR-V1U/V1N/V1E/V1P only. For details on another camcorder you want to connect to this unit, refer to the operating instructions supplied with that camcorder. • For details on the types of camcorder that have an "external REC control" function and on motion detection, refer to the "Guide to supported models and their functions" supplied with this unit. - Connecting to a camcorder without an "external REC control" function (FOLLOW mode) When connected to a camcorder that has no external REC control function, this unit regularly checks the status of the camcorder and follows its recording operation. Camcorder STANDBY REC STANDBY This unit STANDBY REC STANDBY 1 Press the CAM LINK button of this unit and set it to ON. 2 Set the [CAM LINK SEL] setting of this unit to [FOLLOW]. 3 Connect the camcorder to this unit via an i.LINK cable. 4 Press the REC START/STOP button of the camcorder to start recording. Note • This unit may lag up to two seconds behind the tape recording/stopping point of the camcorder. • For details on camcorders that have been tested in FOLLOW mode, refer to "Guide to supported models and their functions" supplied with this unit. 13
-
 1
1 -
2
-
3
-
4
-
5
-
6
-
7
-
 8
8 -
 9
9 -
 10
10 -
 11
11 -
 12
12 -
 13
13 -
 14
14 -
 15
15 -
 16
16 -
 17
17 -
 18
18 -
19
-
20
-
21
-
22
-
23
-
24
-
25
-
26
-
27
-
28
-
29
-
30
 |
 |
