Sony HVRM35U Product Manual (HVR-M35U Operating Manuals) - Page 31
Preparing the Power Supply, Turning the Power on, Inserting/Ejecting Cassettes
 |
View all Sony HVRM35U manuals
Add to My Manuals
Save this manual to your list of manuals |
Page 31 highlights
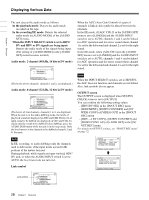
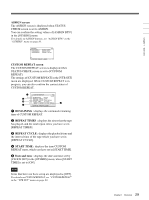
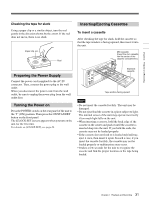
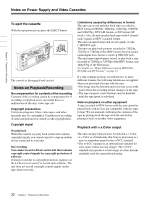
Chapter 2 Playback and Recording Checking the tape for slack Using a paper clip or a similar object, turn the reel gently in the direction shown by the arrow. If the reel does not move, there is no slack. Paper clip, etc. Reel Inserting/Ejecting Cassettes To insert a cassette After checking the tape for slack, hold the cassette so that the tape window is facing upward, then insert it into the unit. Mini cassette (Insert the mini cassette into the center of the cassette compartment.) Preparing the Power Supply Connect the power cord (supplied) to the AC IN connector. Then, connect the power plug to the wall outlet. When you disconnect the power code from the wall outlet, be sure to unplug the power plug from the wall outlet first. Turning the Power on Press the POWER switch on the rear panel of the unit to the "|" (ON) position. Then press the ON/STANDBY button on the front panel. The [CLOCK SET] screen appears when you turn on the unit for the first time. For details on [CLOCK SET], see page 84. Standard cassette Tape window facing upward Notes • Do not insert the cassette forcibly. The unit may be damaged. • Do not eject/load the cassette in a place subject to light. The internal sensor of the unit may operate incorrectly if too much light falls on the unit. • When inserting a cassette, hold the back edge of the cassette in the center and push it until the cassette is inserted deep into the unit. If you hold the ends, the cassette may not be loaded properly. • If the cassette does not load or is loaded only halfway, eject it once, then insert it again. In such a case, if you insert the cassette forcibly, the cassette may not be loaded properly or malfunctions may occur. • It takes a few seconds for the unit to recognize the cassette and find the proper location on the tape being loaded. 31 Chapter 2 Playback and Recording
-
 1
1 -
2
-
3
-
4
-
5
-
6
-
7
-
8
-
9
-
10
-
11
-
12
-
13
-
14
-
15
-
16
-
17
-
18
-
19
-
20
-
21
-
22
-
23
-
24
-
25
-
 26
26 -
 27
27 -
 28
28 -
 29
29 -
 30
30 -
 31
31 -
 32
32 -
 33
33 -
 34
34 -
 35
35 -
 36
36 -
37
-
38
-
39
-
40
-
41
-
42
-
43
-
44
-
45
-
46
-
47
-
48
-
49
-
50
-
51
-
52
-
53
-
54
-
55
-
56
-
57
-
58
-
59
-
60
-
61
-
62
-
63
-
64
-
65
-
66
-
67
-
68
-
69
-
70
-
71
-
72
-
73
-
74
-
75
-
76
-
77
-
78
-
79
-
80
-
81
-
82
-
83
-
84
-
85
-
86
-
87
-
88
-
89
-
90
-
91
-
92
-
93
-
94
-
95
-
96
-
97
-
98
-
99
-
100
-
101
-
102
-
103
-
104
-
105
-
106
-
107
-
108
-
109
-
110
-
111
-
112
 |
 |
